LIGHT | CAMERA | CAPTURE | The Art of Portrait Photography | Ross McKelvey

Watch the recordong of this LIVE Broadcast as I chat with Portrait Photographer Ross McKelvey about his process for capturing stunning portraits and motion covering Lighting Set Ups and Post Processing. Plus Camera Clubs, Printing, Presenting your Work and Photography Competitions …

links mentioned in the video …

Ross McKelvey website: rossmckelvey.co.uk

Ross McKelvey YouTube Channel: youtube.com/@rossmckelvey

Ross McKelvey on Instagram: instagram.com/rossmckelvey

Ross McKelvey on Facebook: facebook.com/ross.mckelvey

Westcott L60-B Bi Colour LED: LINK

Constant LED Light Portraits with Sony and iPhone

The more I use the LED Constant Light for Portraits, the more I fall in love with it.

I know I said it before in an earlier post but when you use it, the whole WYSIWYG (What You See Is What You Get) not only makes setting up so much easier and quicker but also every time I use it, the people I photograph say how much more relaxing it is not having a flash go off in their face.

Just over a week ago I was recording some content for the iPhone Photography Conference and thought it would be an interesting comparison just to see how close I could get a photograph I took with my main camera, my Sony A7RIV Mirrorless and my iPhone 15 Pro Max.

Of course I went into this knowing that the iPhone image wouldn’t equal or surpass the quality of my Sony, but just thought it would be interesting to see how far the quality has moved on and do this with a lit Portrait using the constant light … the Westcott L60-B Bi-Colour LED.

THE SET UP

For the lighting. I had originally planned to use just one light, the L60-B, however I couldn’t resist the warm light emitting from the heater that Ian had turned on in the studio. I loved the way it cast a warm glow onto the wood panelling so this was carefully raised off the ground and then became the main light and the L60-B was positioned on the opposite side of Ian further forward and higher up.

The L60-B was given a warmer temperature using the iPhone app which works incredibly well.

As soon as I opened the app it connected to the light and I was able to dial in the power settings, change the temperature and I could even make it perform lighting special effects like lightning, TV and a faulty bulb … but these are obviously for use when doing video.

CAMERA SET UP 

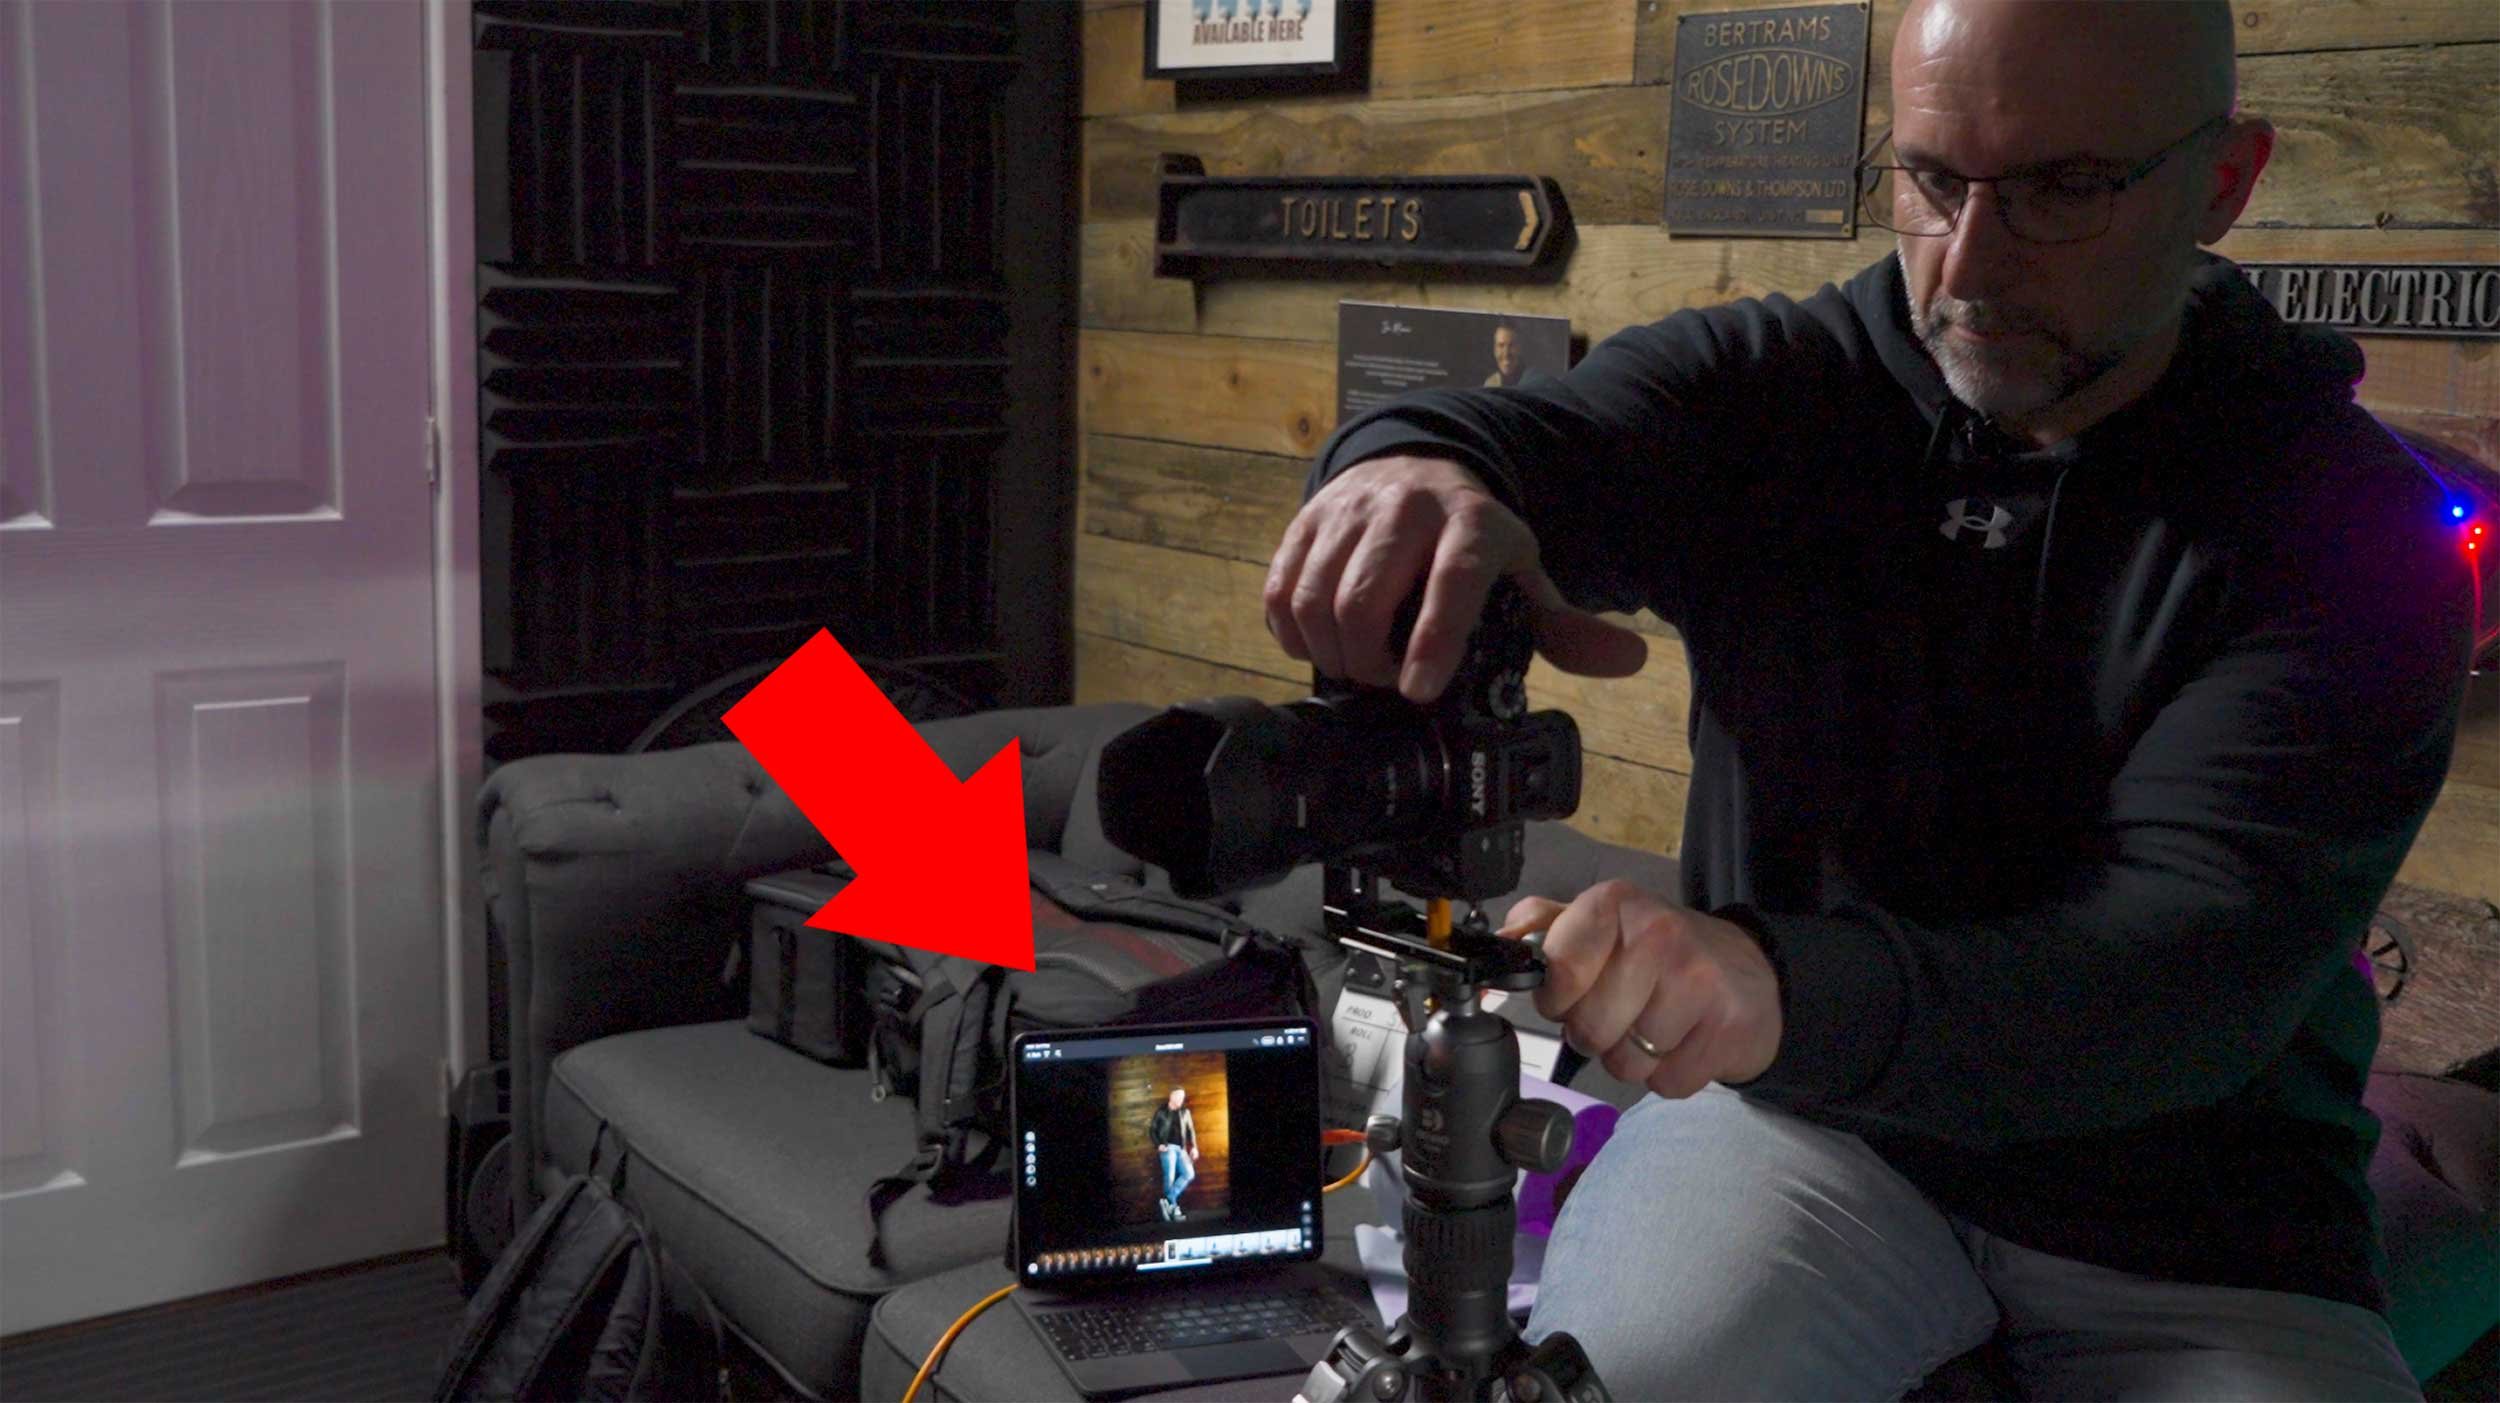
So with my Sony A7RIV on my tripod I used my 55mm Zeiss f/4.0 lens and tethered this into CaptureOne on my iPad, which works an absolute treat!

It’s incredibly easy to set up; you literally plug one end of a USB-C cable into the camera, the other end into the iPad, and with the app open i’st connected and ready to go.

I’m using this all the time now when tethering and what I also love about it is that you can stop and start the monthly subscription whenever you want. The subscription is only £4.49 / month so I tend to look at what I have planned and just restart it for that period, then cancel it again.

The only thing I don’t like which might (I hope) be just down to a setting I’ve missed turning on, but the photographs you take are only stored on the iPad. I only discovered this after the first shoot I did using it. I disconnected the camera and went to check the images on the camera and nothing was there. Only once my heart re-started and I looked on my iPad did I realise where they were 😳


CAMERA SETTINGS

The settings dialled into my camera were …

  • f/4.0

  • 1/60 sec

  • 2000 ISO … which for modern day cameras is nothing

using the iphone

Having taken the portrait with my Sony I then swapped over to my iPhone which was placed on the tripod using the ULANZI ST-27 Phone Mount.

I also attached the 2x Telephoto lens from ReeFlex to the 1x lens on my iPhone using one of their cases that has threads in each of the lens apertures.

The 1x lens is the equivalent of 24mm and is the only lens on the iPhone capable of shooting in ApplePro Raw at 48MP … the highest resolution and largest file my iPhone 15 Pro Max can produce.

With the 2x Telephoto lens attached this made the 1x lens the equivalent of 48mm and did this optically rather than digitally, and so doing everything possible to create the best possible file; not quite 55mm but the closest I could get oto it optically.

iPHONE PRO CAMER APP

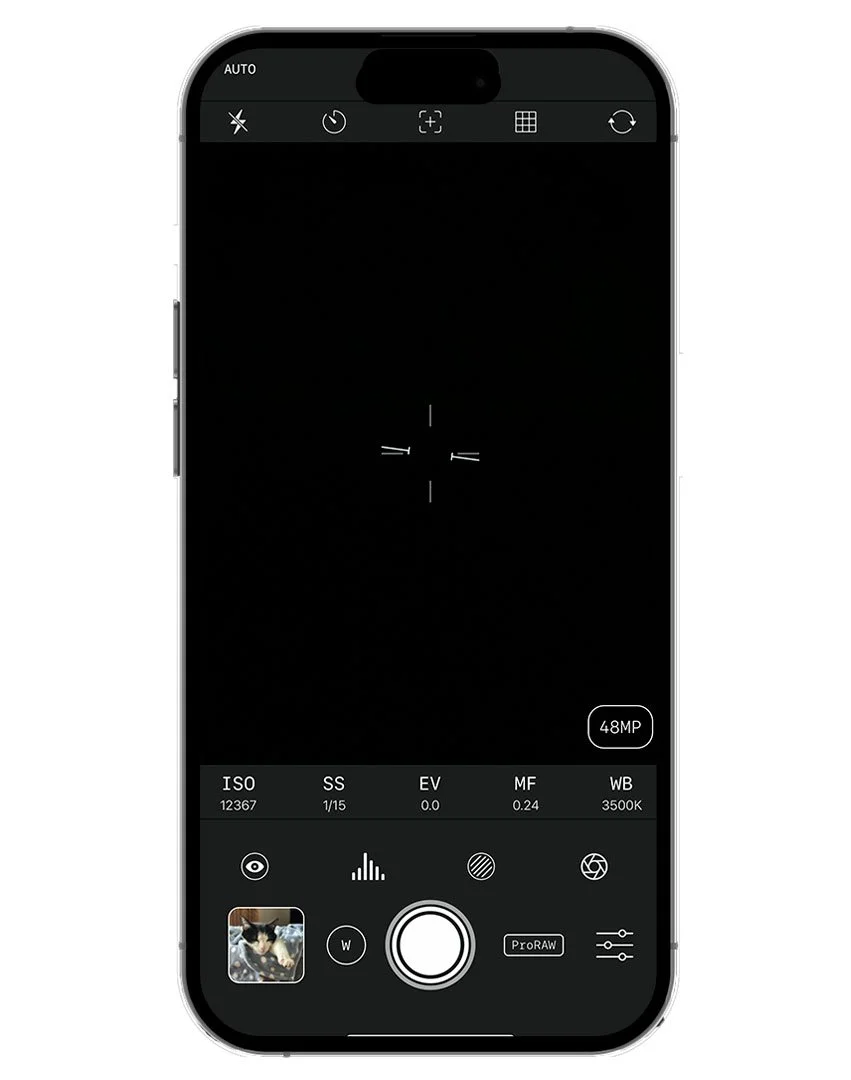
To take the photograph with my iPhone I used a Pro Camera App from ReeFlex and called ReeFlex.

This app like most other pro camera apps gives you control over extra settings like Shutter Speed and ISO but it also makes it very clear to see not only what file format you are in but also the resolution.

ReeFlex Pro Camera App usinfg 1x lens in Apple ProRaw at 48MP

However here’s the catch …

If when you’re using the 1x lens in Apple ProRaw at 48MP you make changes to the shutter speed and / or ISO then the file size immediately drops from 48MP to 12MP.

ReeFlex Pro Camera App using 1x lens with Shutter Speed Adjusted

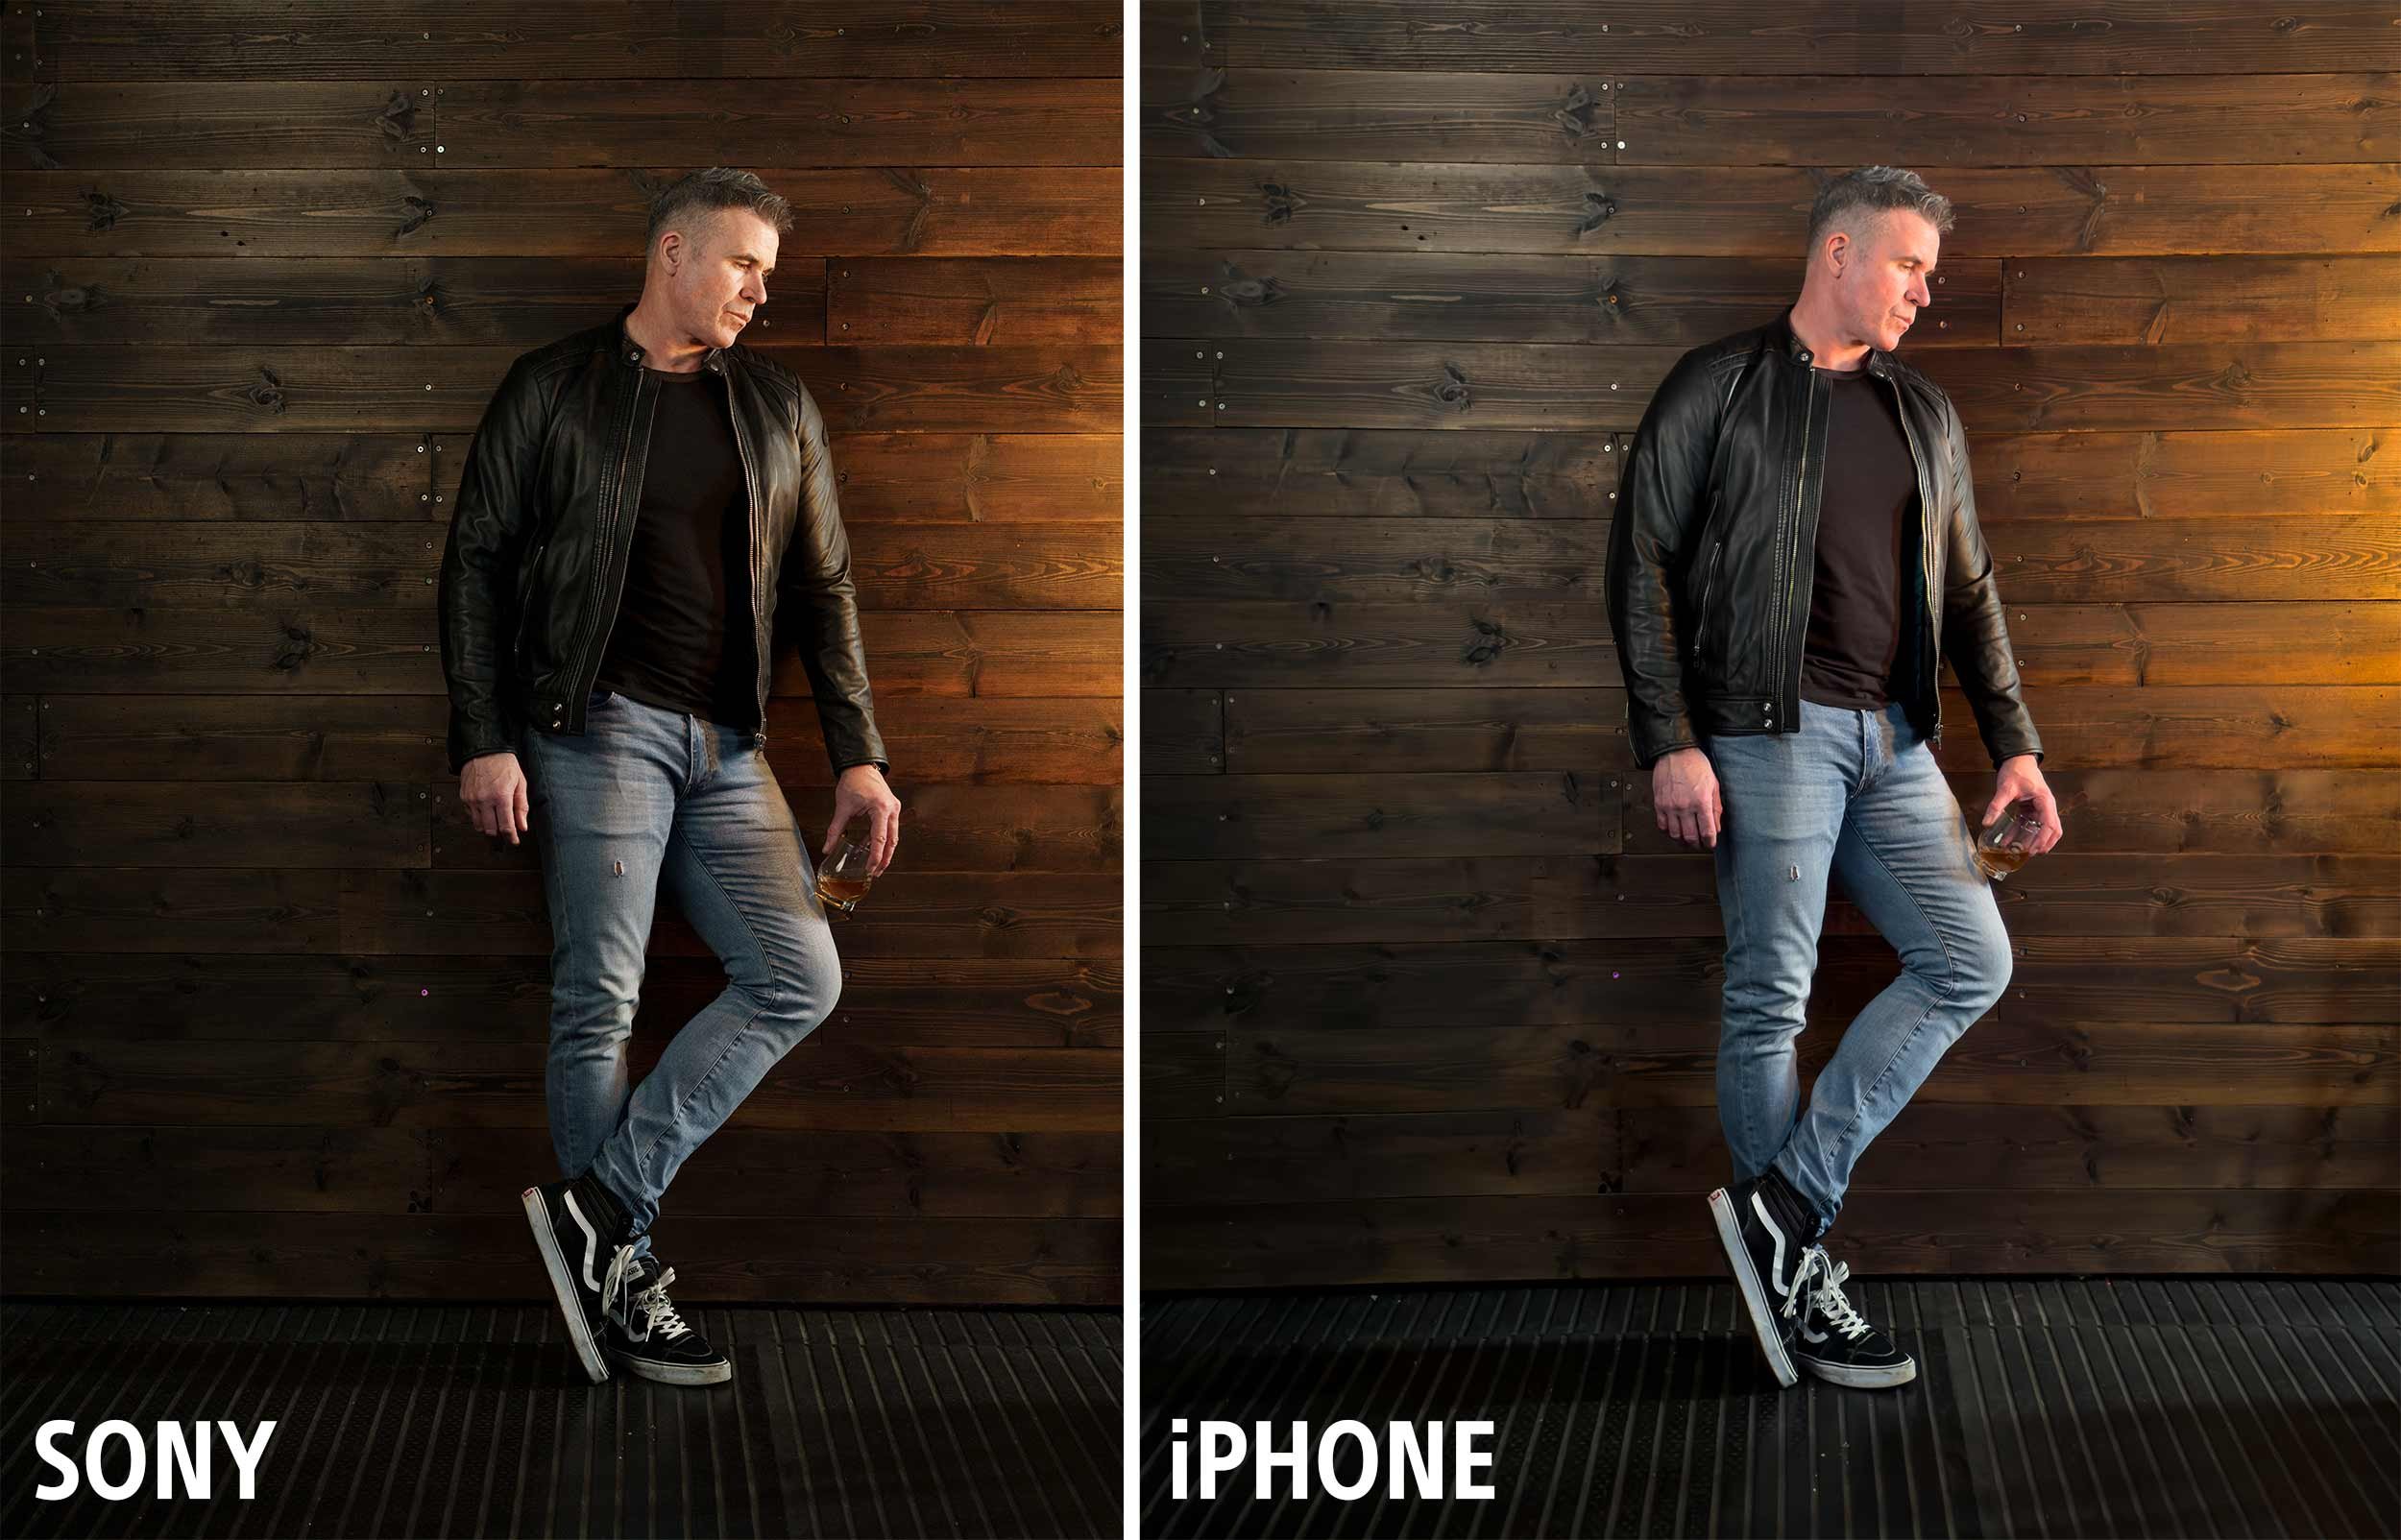
So because of this I opted to leave the iPhone in the AUTO settings which kept the 1x lens in Apple ProRaw at 48MP, and these are the out of camera and out of phone results, with the Sony image on the left and the iPhone image on the right …

Now at this 100% magnification the iPhone file, although different to the Sony file, certainly looks to be holding up.

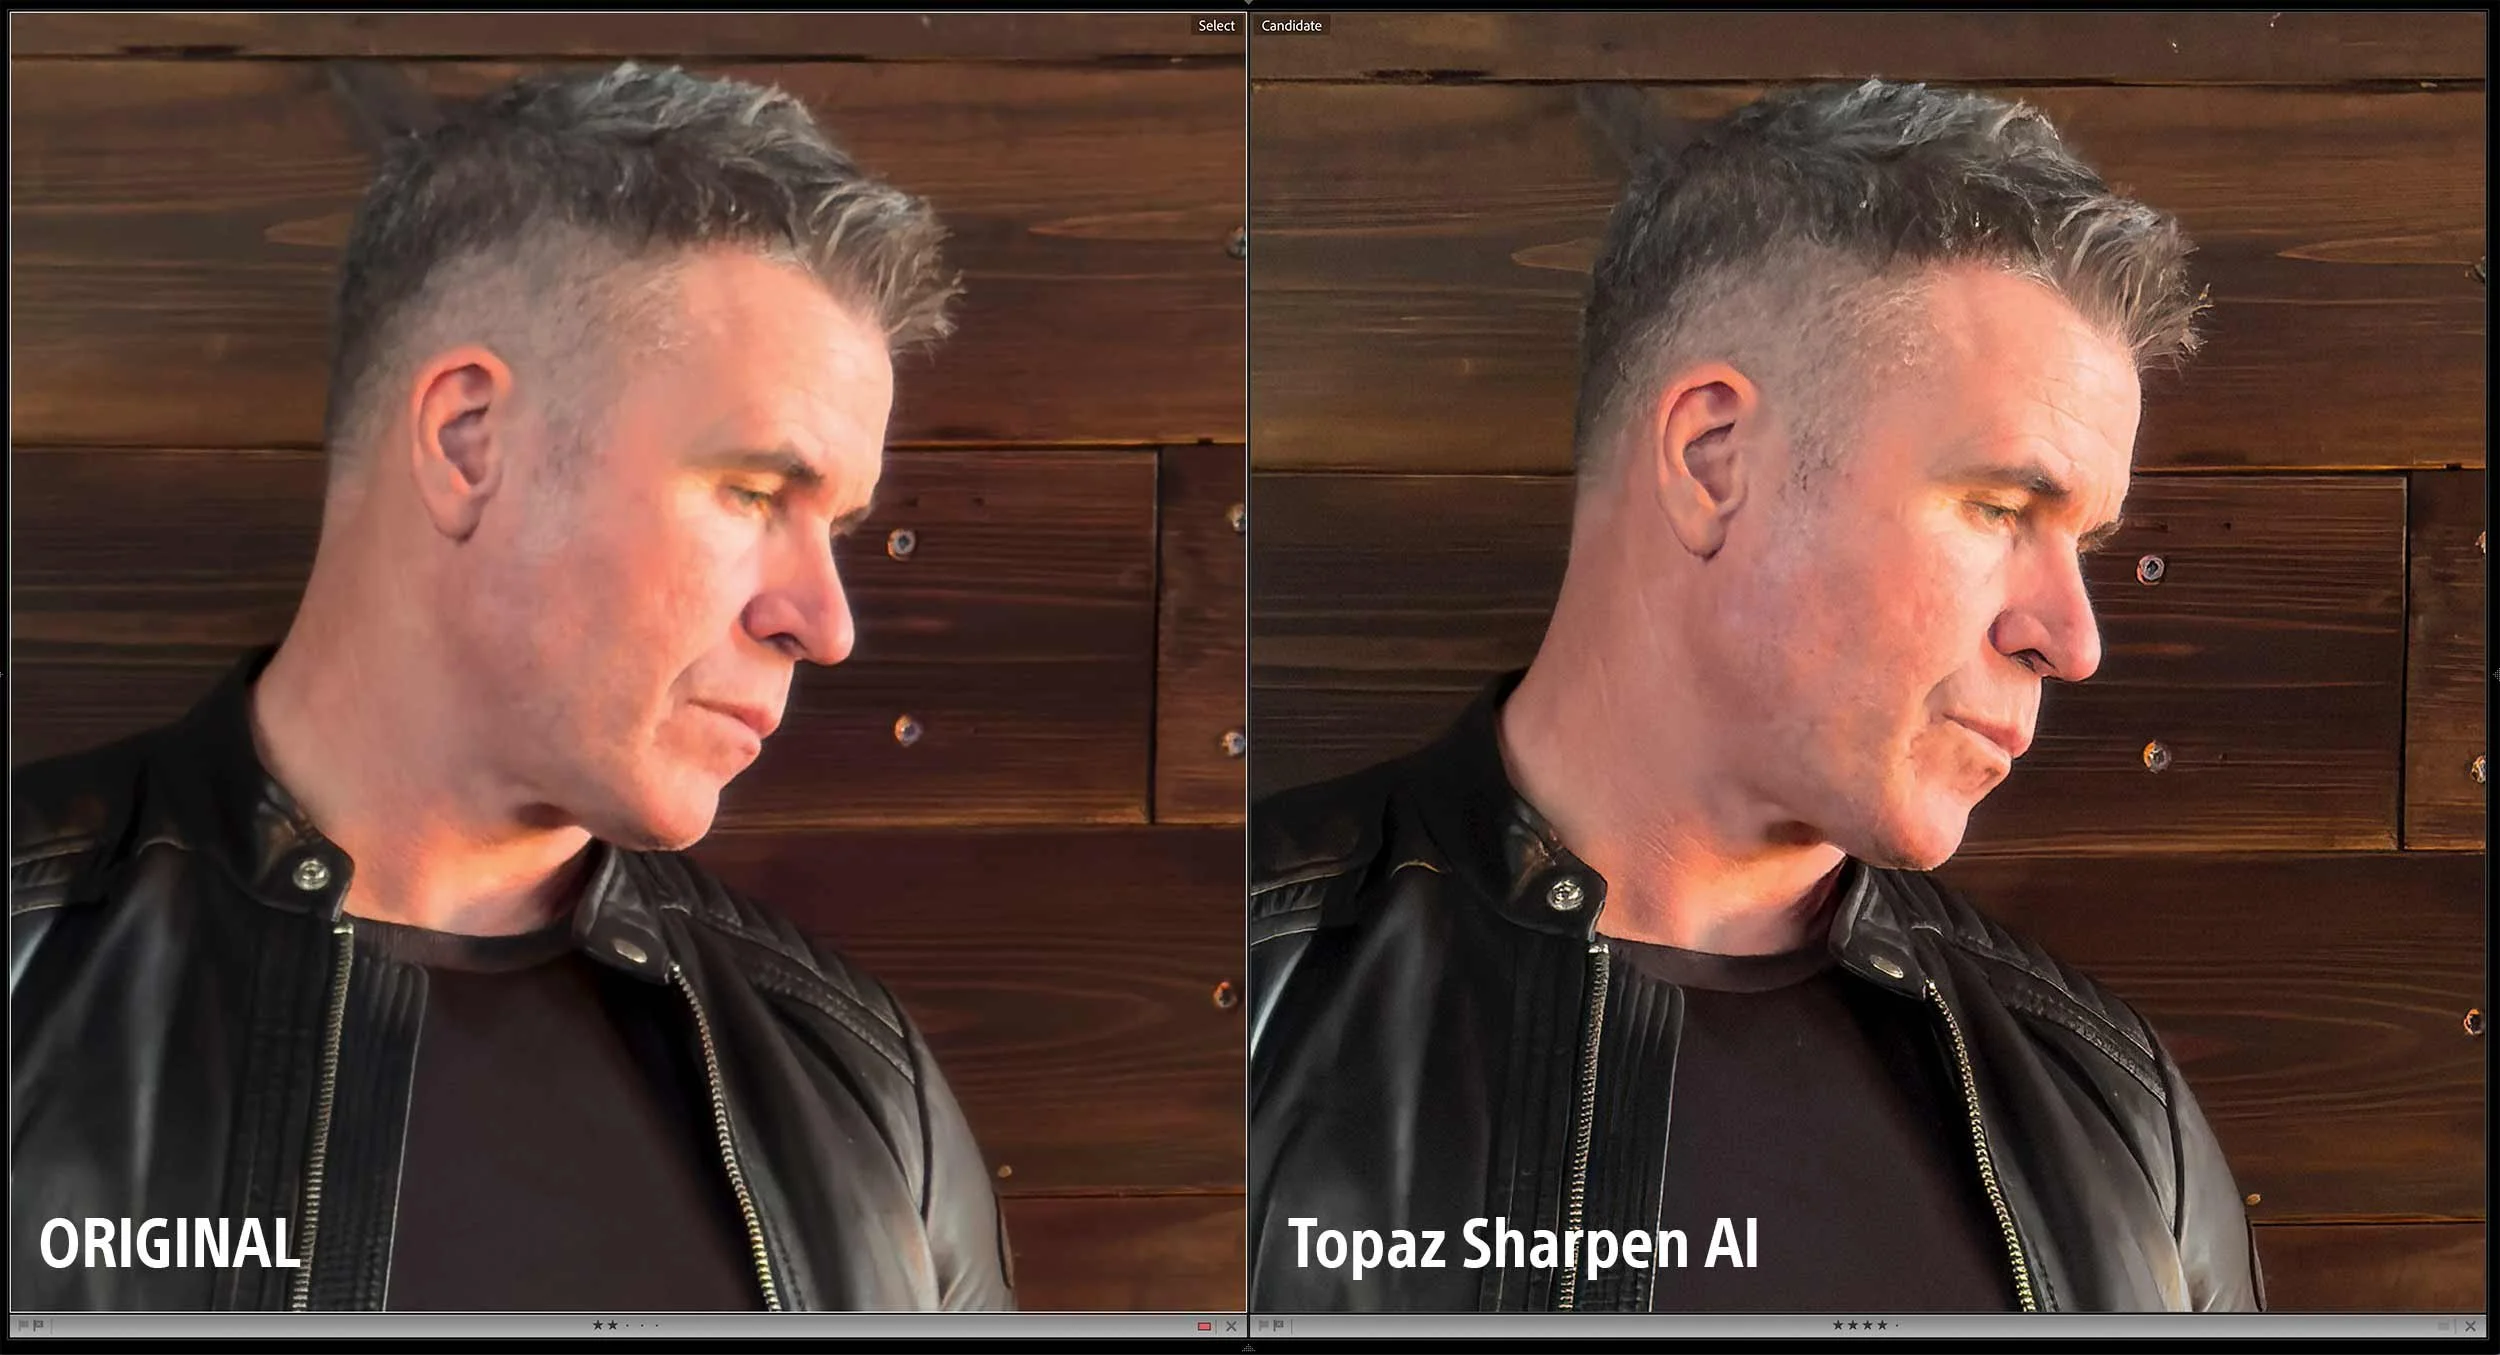
However, it’s when you zoom in on that iPhone file that things look VERY different …

Look how the file looks soft and slightly out of focus. Look how the file lacks texture and detail in Ian’s skin, his hair and the wood panelling.

Apple ProRaw

This softening appearance to the image is all because of shooting in the supposed highest resolution settings, AppleProRaw at 48MP and that’s because Apple ProRaw isn’t like a traditional Raw file as we know and understand them.

You see Apple ProRaw files do actually receive some processing such as Noise Reduction ( quite al lot ) and Smart HDR, so the file we end up with is also a blend of a number of images at different exposures taken and processed increibly quickly.

So not REALLY a Raw file as you would expect 🤷‍♂️

topaz sharpen ai

Running the file thorugh Topaz Sharpen AI does recover alot of that lost detail as you can see here …

However knowing what Apple ProRaw does to your files does arm you with a bit of knowledge so that you can make the decision to use it or not.

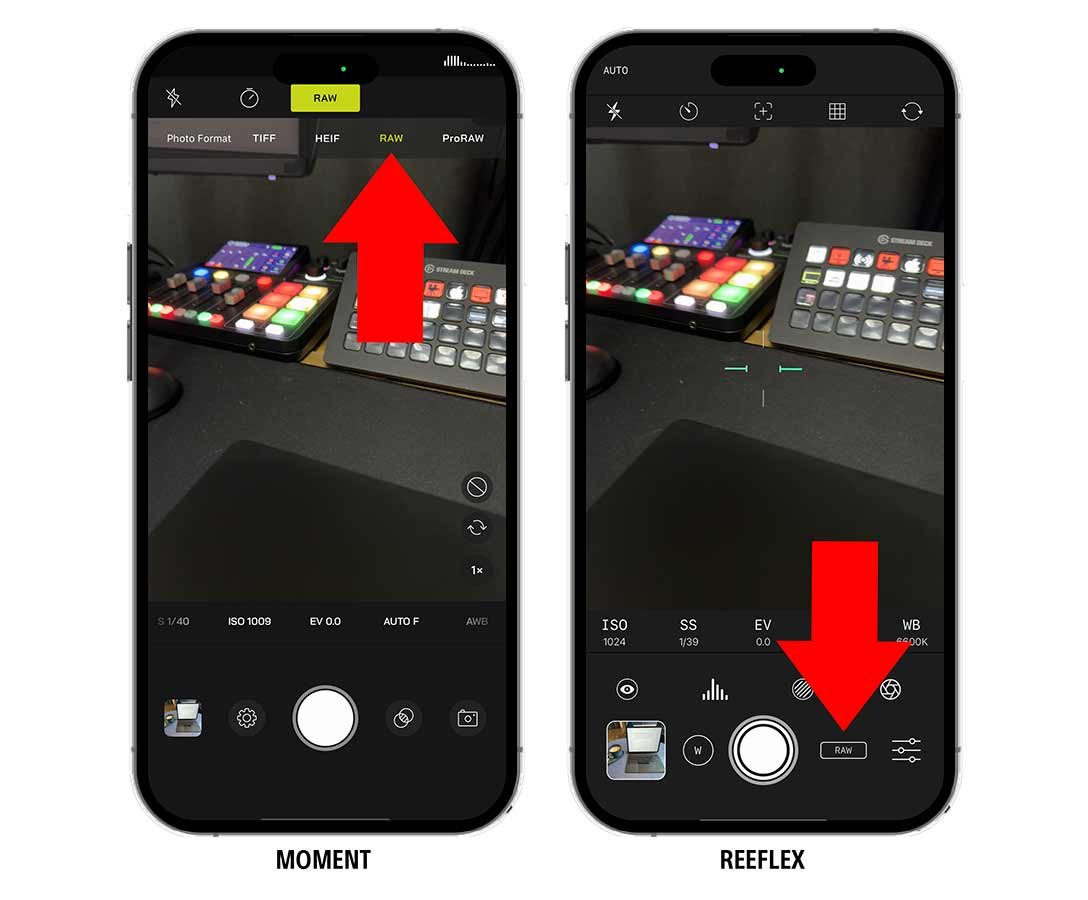
Depending on how serious you are about your iPhone photography you might want to consider shooting in 12MP Raw which Pro Camera apps like Moment and ReeFlex allow you to do …

Naturally we always want the highest resolution file possible but the noise reduction that Apple ProRaw does, might make you reconsider.

12MP Bayer raw files

Currently ALL Raw Long Exposure apps produce 12MP Bayer Raw files and that’s what all of my seascape images are and I’m more than happy with them.

Sure more resolution would be good but until that time, these 12MP Bayer Raw files are very acceptable …

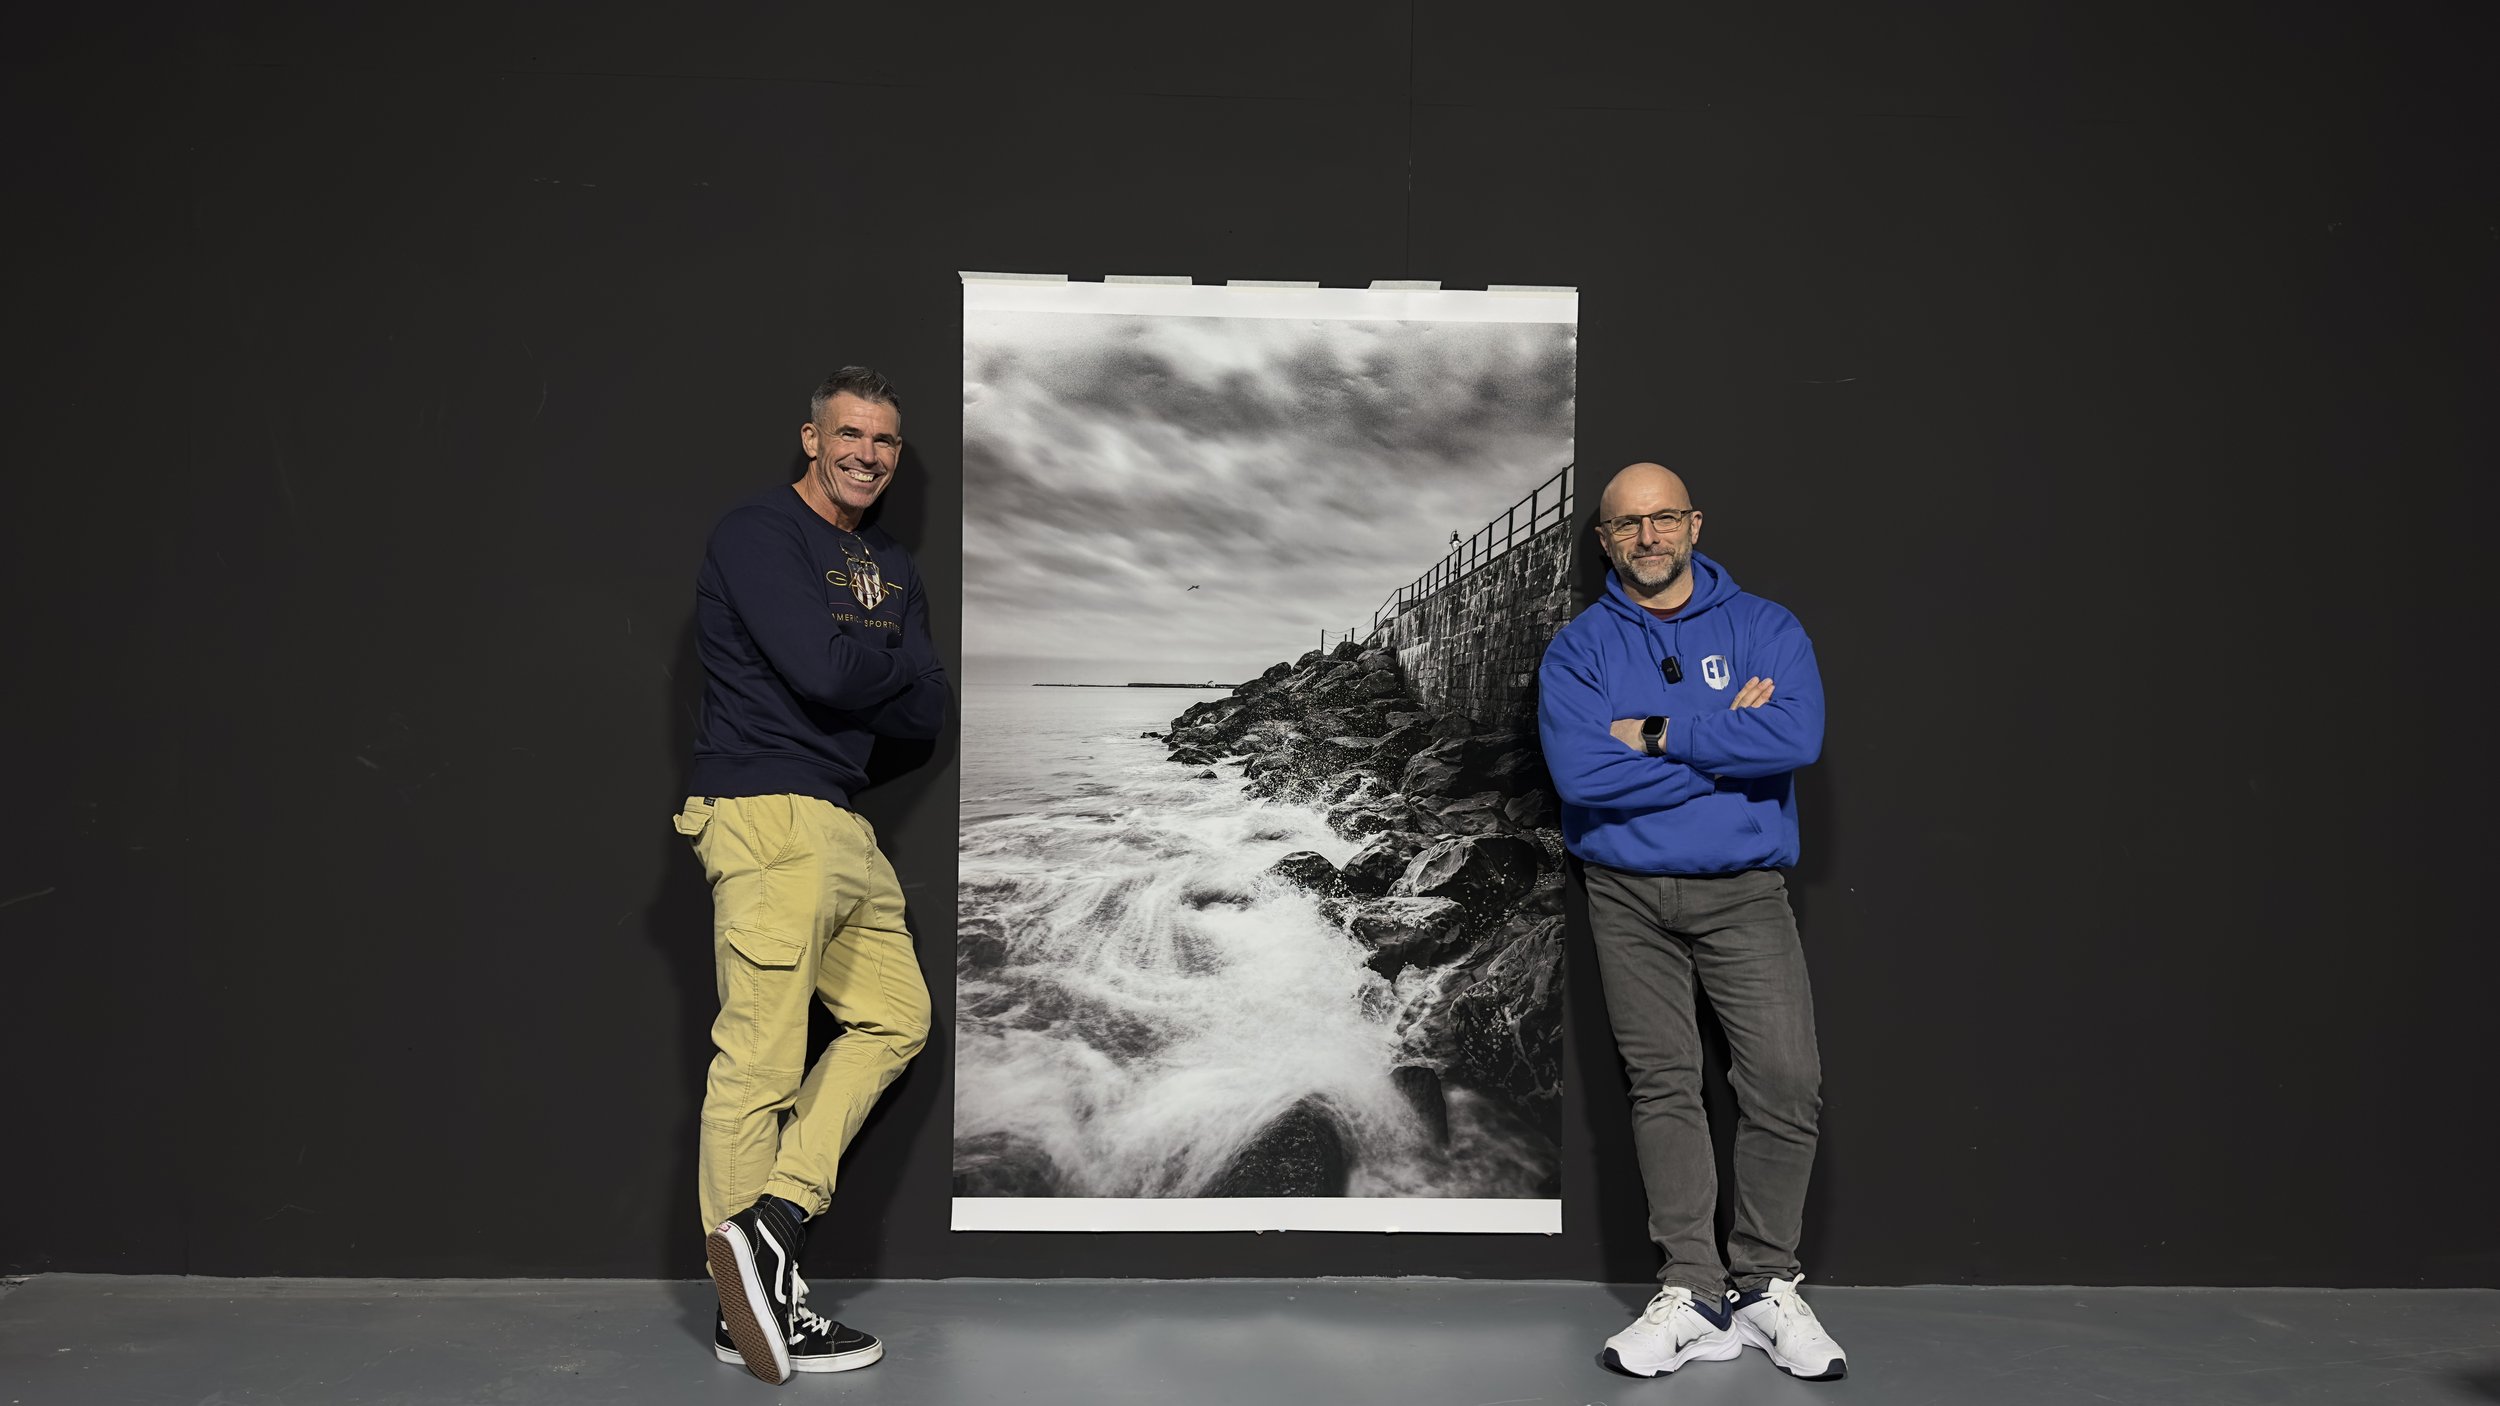
So acceptable in fact that Digitalab even printed one of my iPhone seascapes at 72” on the longest side and it looked incredible …

final retouched portraits

Here though are the final retouched portraits with the Sony file on the left and the iPhone file on the right, and yeah the Sony file is definitely better and that’s to be expected, but looking at the iPhone file the future is going to be VERY interesting indeed!

wrapping up

So more testing to be done which will be interesting as new iOS updates come along and the iPhone 16 later this year.

In the mean time I’m going to carry on taking seascapes with my iPhone because I really enjoy doing them BUT I’ll also be taking them with my Sony too.

As for Portraits I’ll keep taking them with my iPhone but only as an extra bit of fun and experimentation when taking them with my Sony.

Catch you next time
Glyn


iPhone Photography using Neutral Density Filters ... Why ???

With the rise in popularity of mobile photography, a new industry has developed producing add-ons such as grips to make using your iPhone more like using a regular camera along with bluetooth shutter buttons, lenses, filters and more.

I’ll cover lenses in future posts and videos but for now I just wanted to concentrate on filters … in particular ND (Neutral Density) filters.

I’m writing this on Day 1 of the KelbyOne iPhone Photography Conference for which I’m presenting 2 classes, namely … …

  • Capturing Pro Quality Portraits

  • Essential Gear for the Modern iPhone Photographer

It was in the preapration for both of these sessions that I did A LOT of testing and research and in the process learned a lot more, or rather uncovered a lot more about the iPhone.

UnderStanding Neutral Density Filters

First, let's grasp the concept of neutral density filters. These accessories are essentially pieces of glass that reduce the amount of light entering the camera lens without affecting the color or hue of the image. They are commonly used in photography to achieve effects such as blurring motion in bright conditions or using wide apertures in daylight.

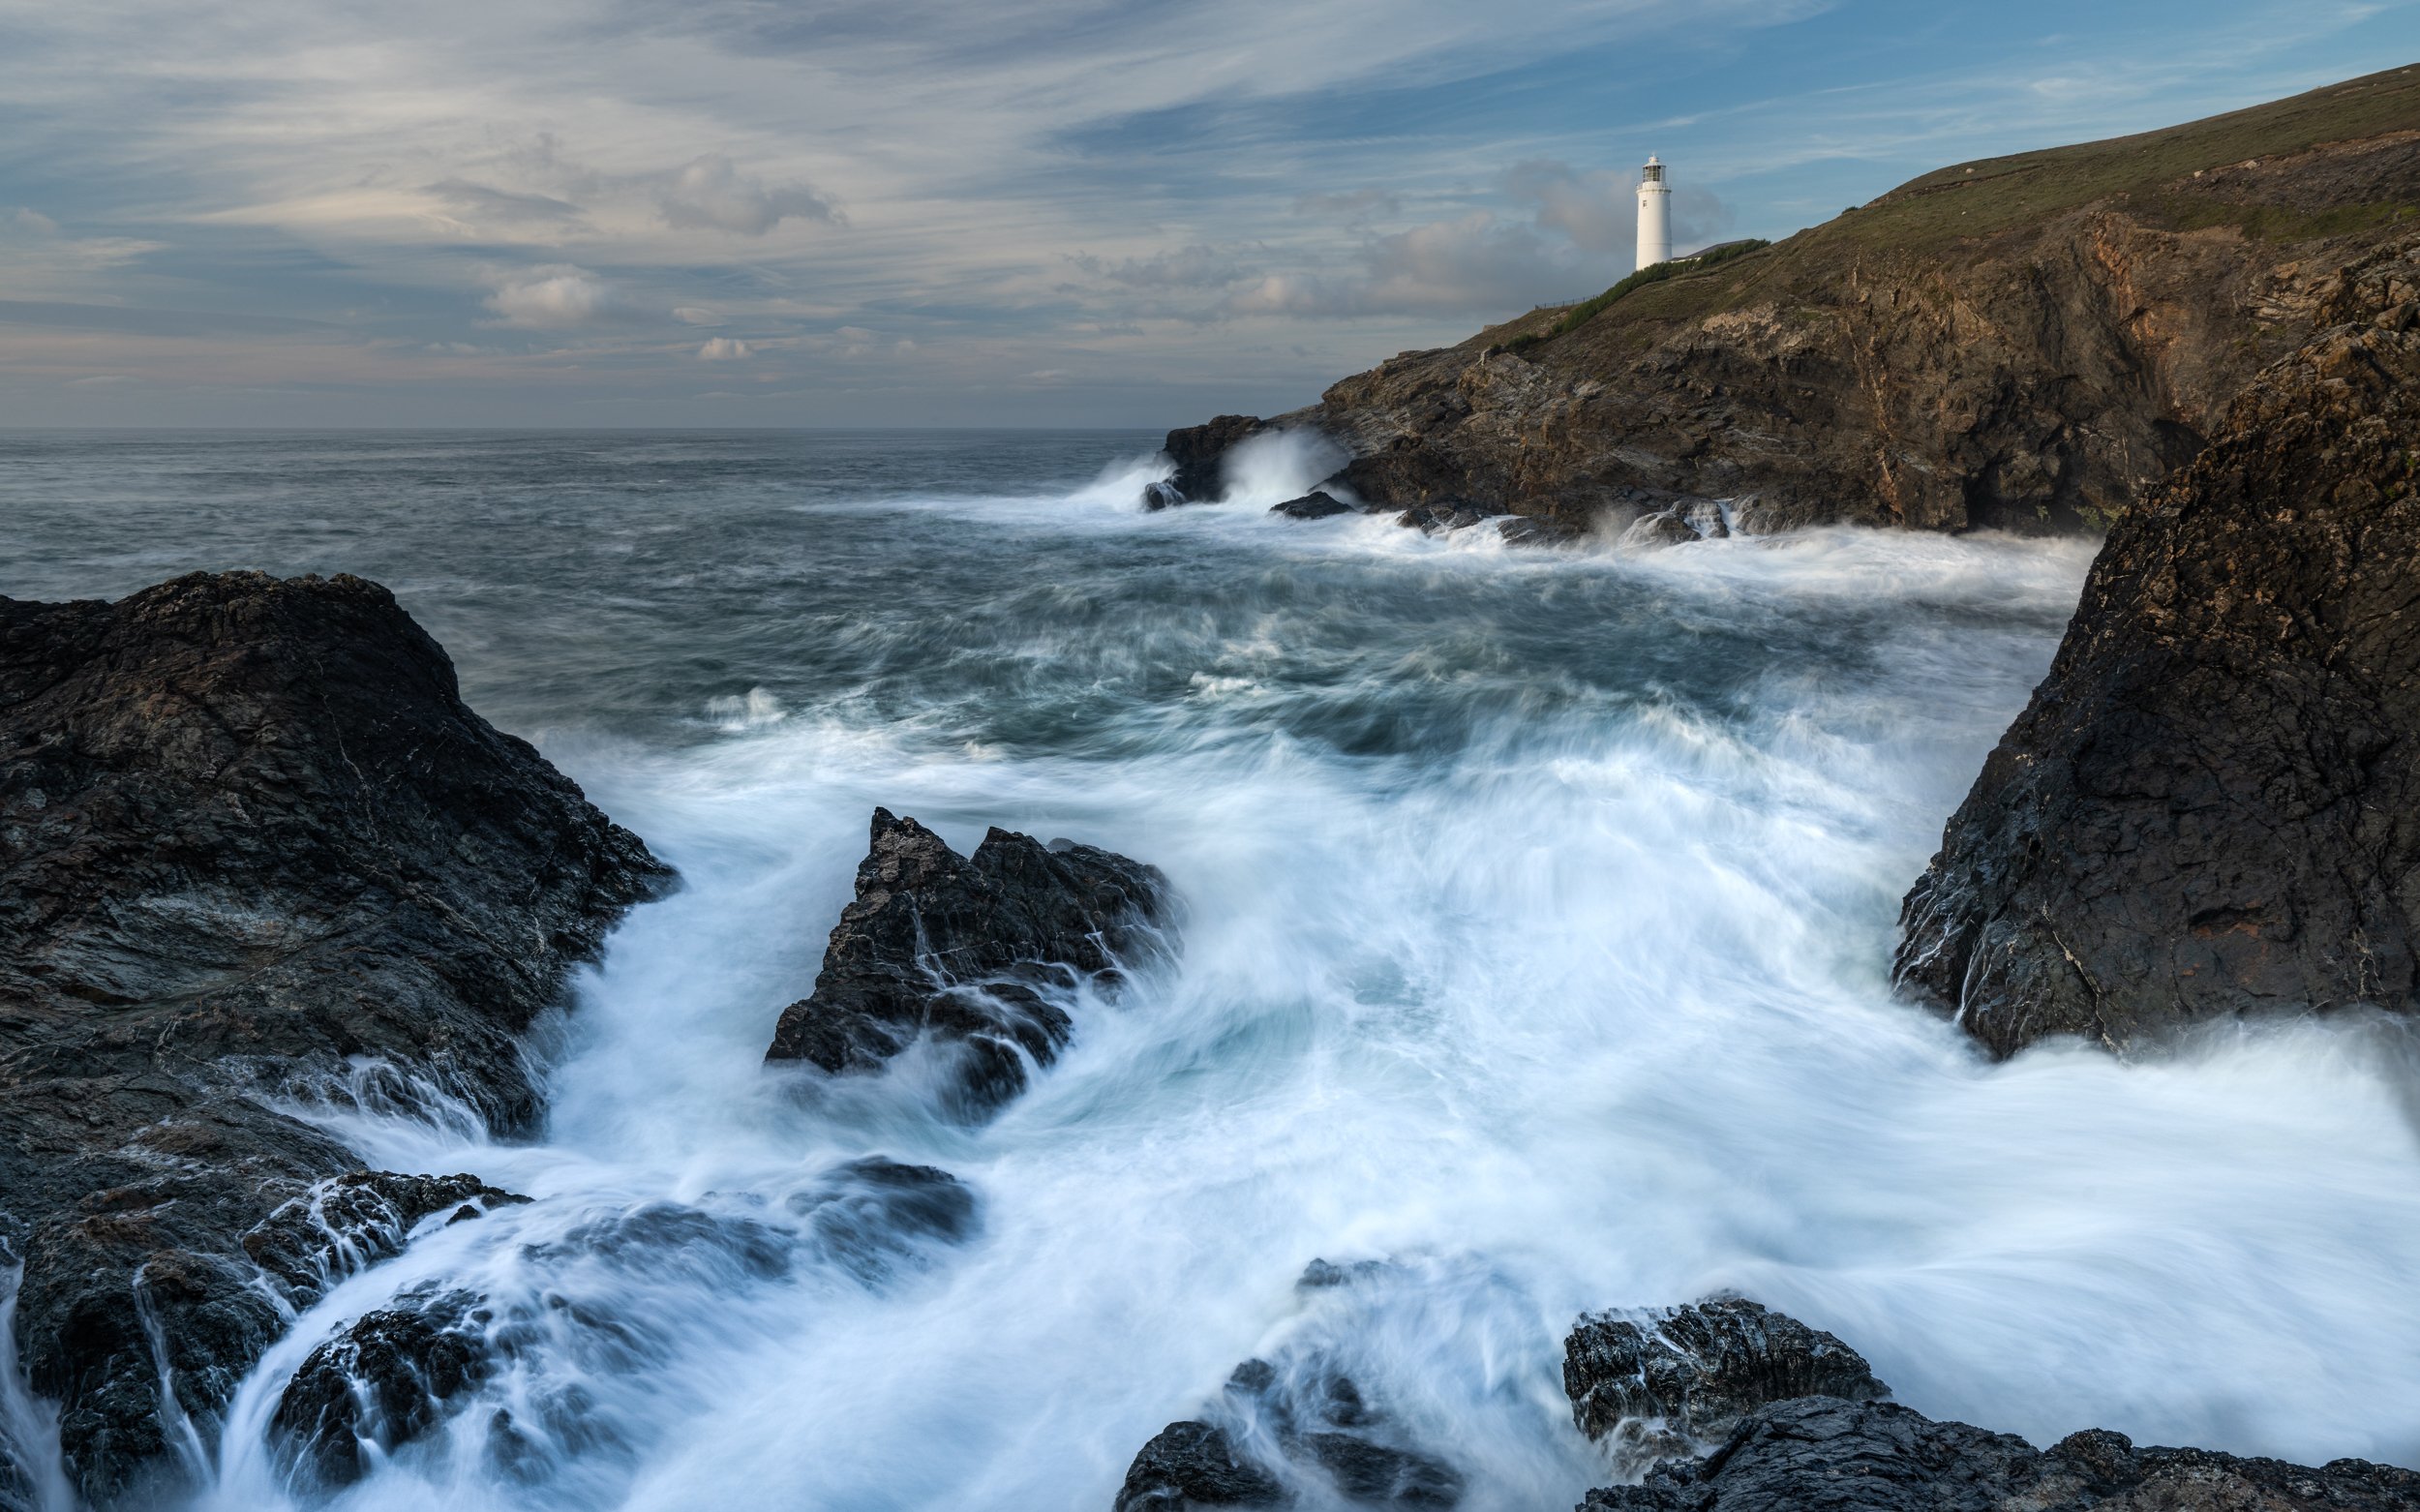
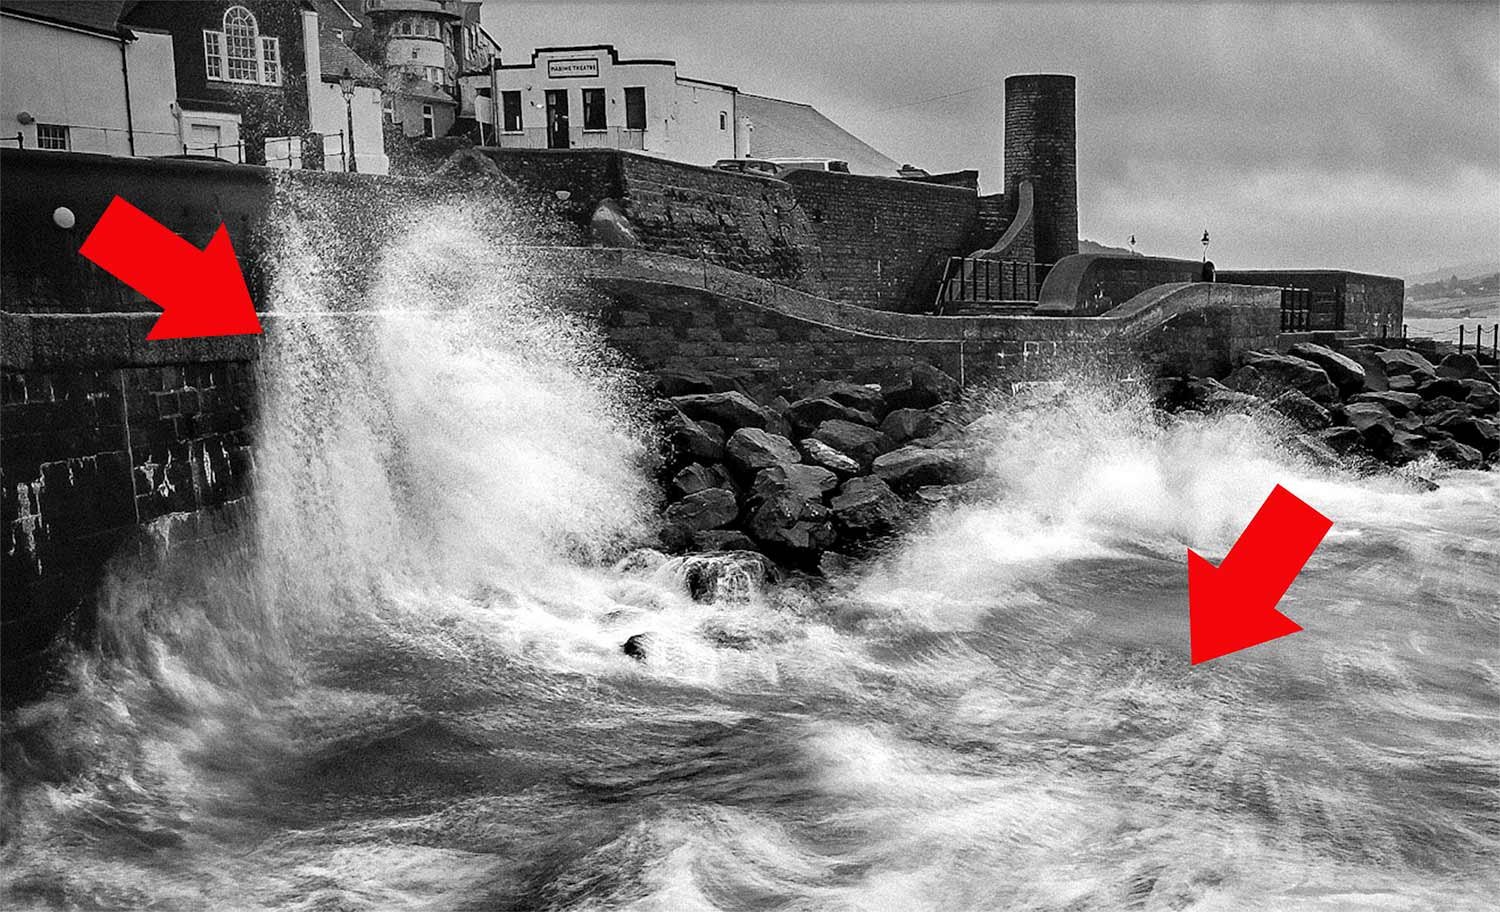
I’ve used them in the past many times with my main camera, my Sony A7RIV when venturing out taking seascape images such as this one here at Trevose Head in Cornwall.

Using Neutral Density Filters made it possible for me to correctly expose the image with a 2 second exposure to give motion and blur to the waves as they crash against the rocks …

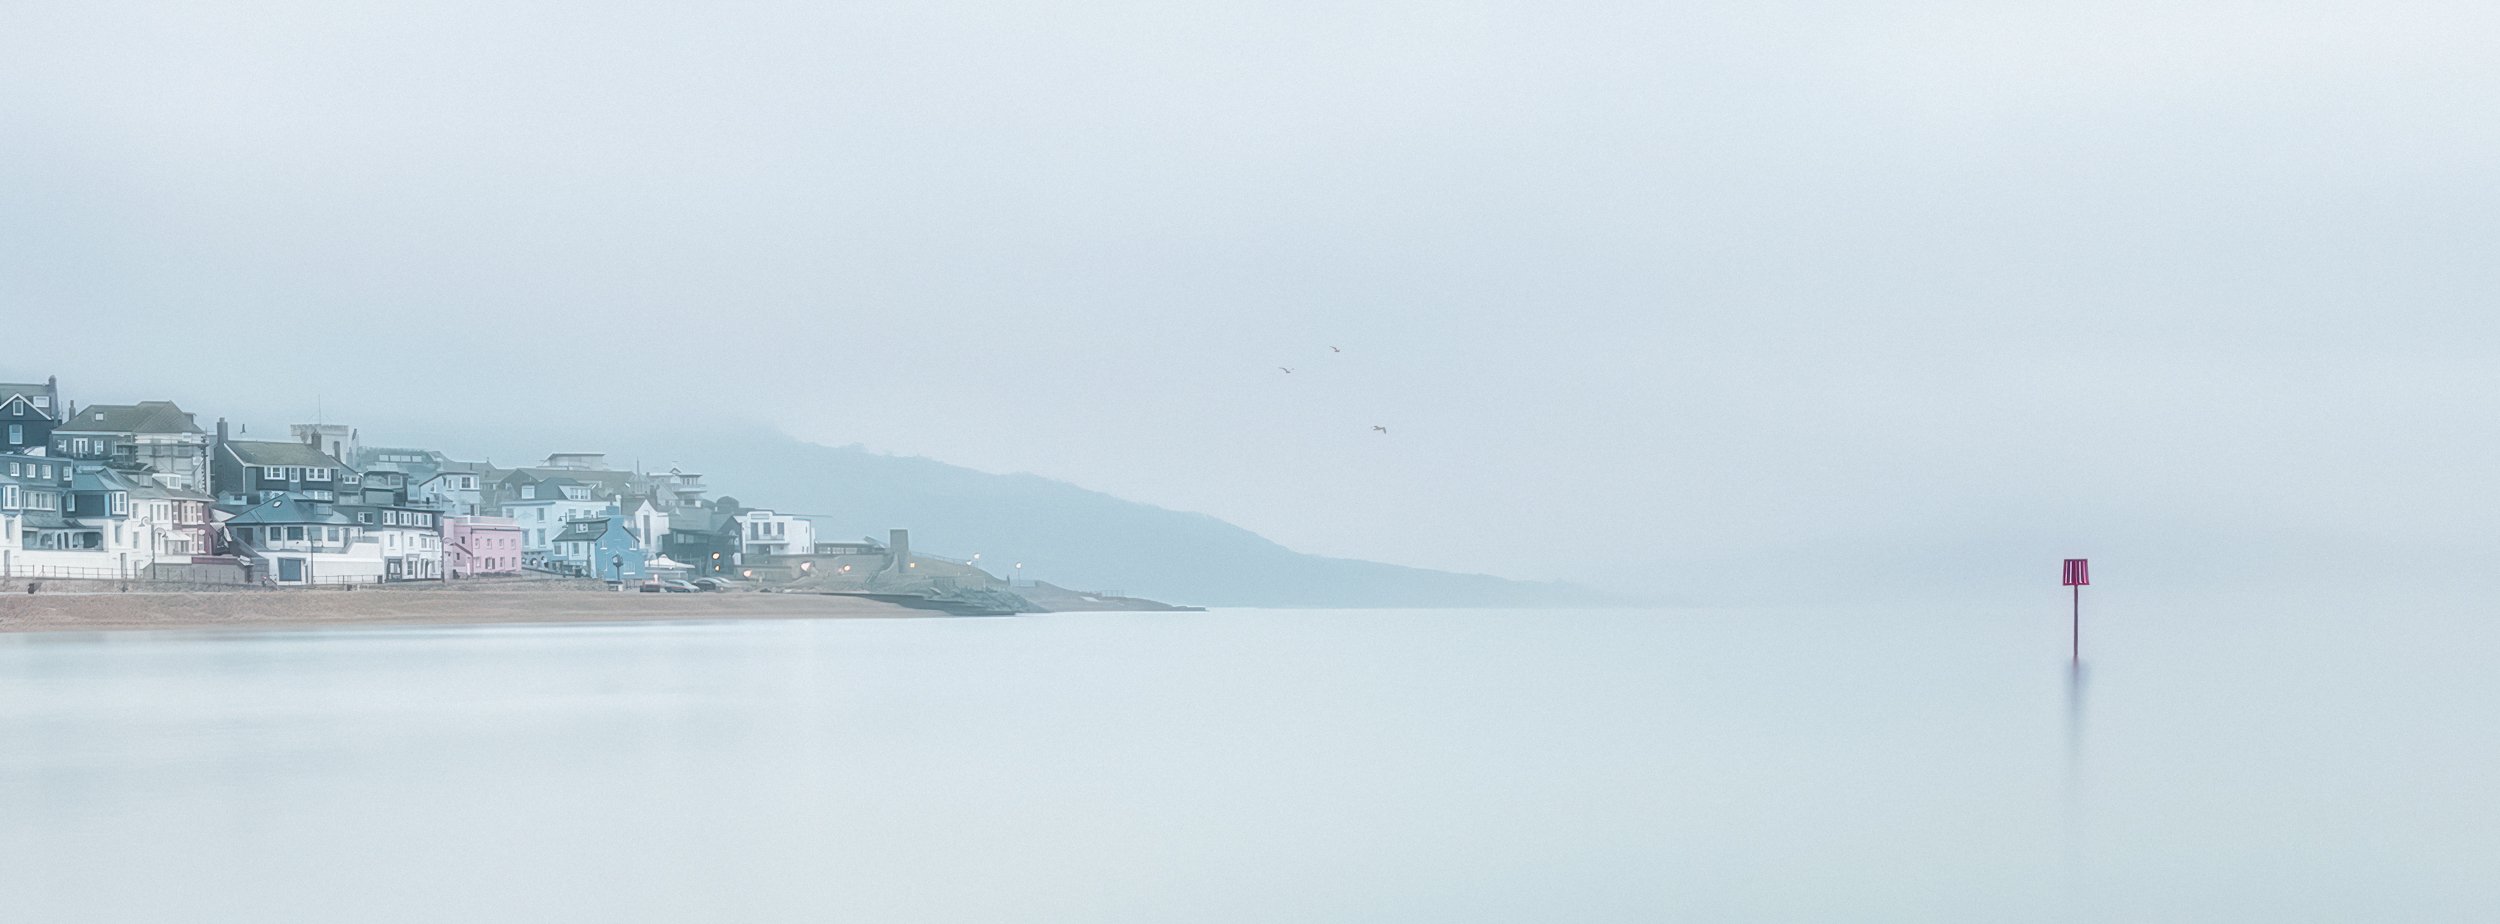
I’ve also used them with my Sony to capture this 30 second exposure of Teignmouth Pier in Devon …

long exposure seascapes with my iphone

Over the past year or so I’ve been capturing seascapes more and more with my iPhone thanks to apps like ReeXpose that make all of this possible by instead of the need for Neutral Density Filter, computatiopnally blending a series of images together to create the long exposure effect … and doing so incredibly quickly.

The app works incredibly well and allows the user to capture exposures from ½ second all the way to Bulb Mode, and using it I’ve taken what I consider my best seascape images to date …

Lyme Regis

Blend of ½ Second and 1 Minute Exposures in Photoshop taken with ReeXpose Long Exposure App

Lyme Regis

1 Minute Long Exposure using the ReeXpose Long Exposure App

Prince of Wales / Severn Bridge over the Bristol Channel

1 Minute Long Exposure using the ReeXpose Long Exposure App

The ReeXpose app produces Raw files, but like every other long exposure app available at the moment, those are limited to 12MP Bayer Raw files, which despite not sounding much by todays standards, are very acceptable and workable. Digitalab even printed one of my iPhone long exposure 12MP Bayer Raw File images at 72” on the longest edge, and it came out looking great …

However, despite being 12MP and me being VERY happy with the results I wish there was a way to produce 48MP long exposure files from my iPhone using these kind of apps but that’s just not possible at the moment.

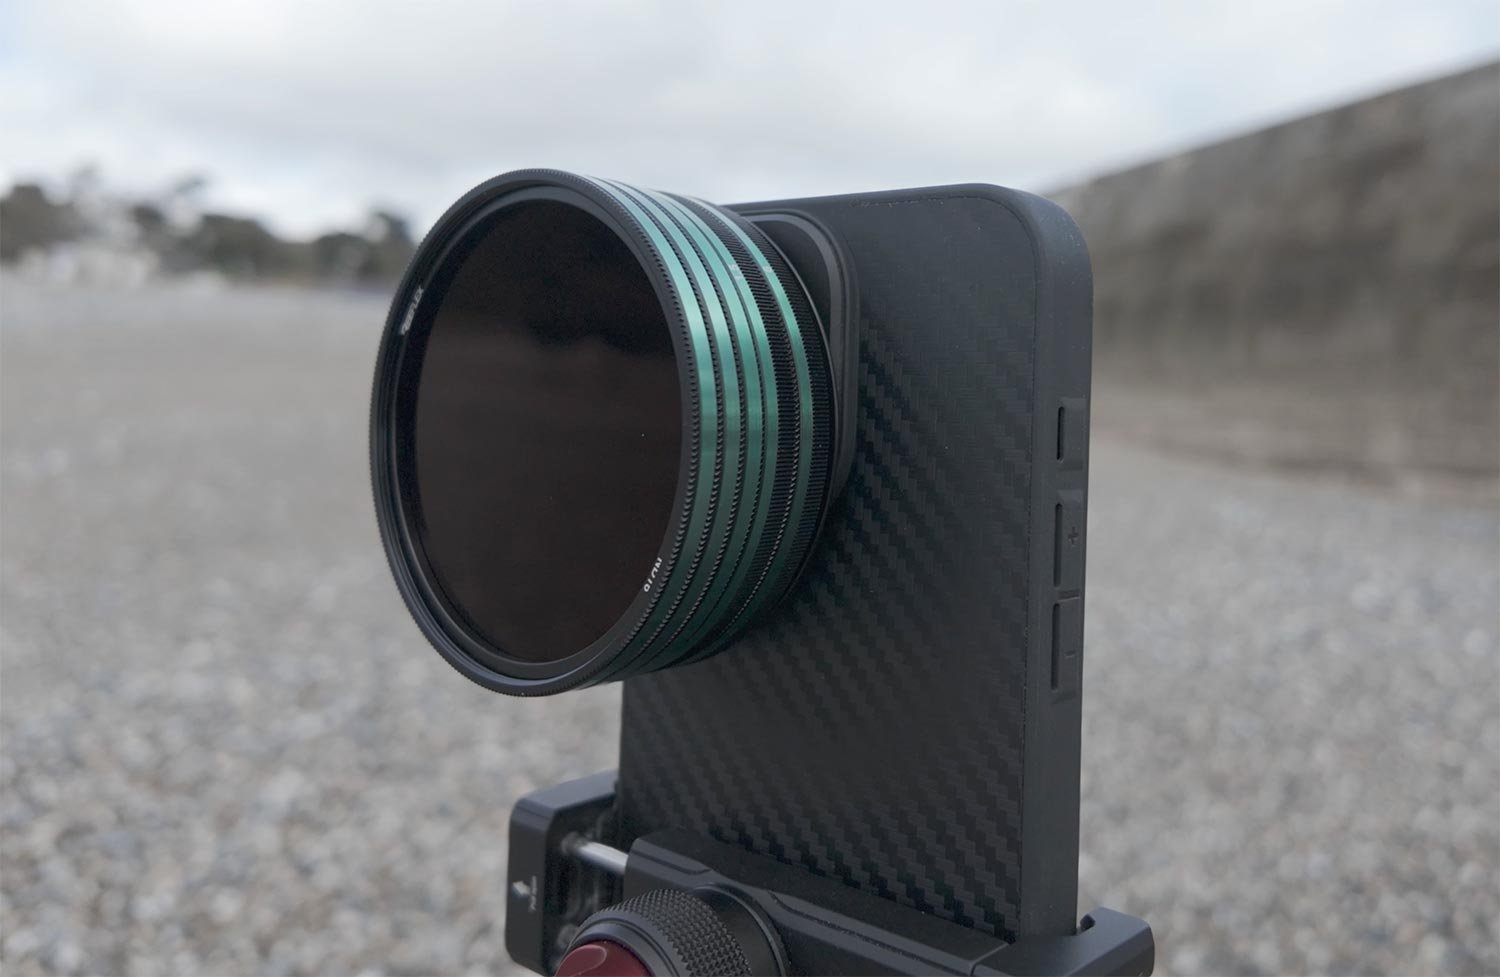
So when I got hold of the new range of Neutral Density Filters from ReeFlex for use with my iPhone it got me thinking …

Would it be possible to use the Neutral Density Filters with one of the Pro Camera Apps that are available so that I could use them to shoot at 48MP in Apple ProRaw AND slow the shutter down … basically capture a long exposure the traditional way? I mean why else would there be Neutral Density filters available for the iPhone?

close but no cigar

So can it be done?

Well, the short answer is NO.

You see first of all when using the iPhone along with one of the Pro Camera Apps available like ReeFlex, Moment, CameraPixels and so on, if you set them to shoot at 48MP in Apple ProRaw and then adjust the exposure using the Shutter Speed or ISO, the file instantly drops to 12MP.

The only adjustment you can make and keep in 48MP is using the EV (Exposure Vlaue) slider which is basically the equivalent of dragging your finger on the screen to brighten or darken image as you would in the native Apple iPhone camera app, so no good for long exposure.

If you leave the settings alone though and then just add on the Neutral Density filters, sure enough you can slow the shutter down … but don’t get too excited, because no matter how many Neutral Density filters you stack on top of each other, the shutter speed will NOT go slower than 1/15 sec

Even with all the ND Filters I have stacked on front of my iPhone … 1/15 sec is all that’s possbile in ProRaw at 48MP.

Oh and by the way that’s 29 Stops of Neutral Density right there 😳

ReeFlex Pro Camera App
48MP ProRaw in AUTO

If you make ANY changes to the Shutter Speed or ISO then the file drops to 12MP …

ReeFlex Pro Camera App
12MP ProRaw

So looking at this, with the way the current iOS works, what is the point of Neutral Density FIlters for Photography with the iPhone?

If you want the scene darker or brighter then you could just use the EV slider and that would remain in Apple ProRaw at 48MP, but you can’t take the shutter speed slower than 1/15sec and remain in 48MP. Period!

are all 12mp files the same?

Now if we just accept the whole 48MP and 12MP thing how about this …

Raw Long Exposure Apps for the iPhone do so by computationally blending a series of shots to create the final long exposure image as a 12MP Bayer Raw File.

You can see this really clearly when you set a ½ second exposure time.

Look at the image below and notice the overlapping of files. You don’t notice this at longer exposure times but with fewer images taken at a faster long exposure (if that makes sense) it makes it harder to blend together … because there’s less files to overlap.

You do need to really look to see it but once you do, you can’t un-see it as shown in the zoomed in image below …

So here then is my thinking, which I hasten to add I am popping out tomorrow morning to test …

Accepting that if I use manual controls the file will drop to 12MP, what if I use the Neutral Density Filters to get a correct exposure with a shutter speed of ½ second or the maximum of 1 second?

Thinking of this in really basic terms … as that’s not being used to blend images together, it should in theory produce a single shot long exposure right? When I’m sat in my office with the phone in those manual settings and move it around the image is blurry so that should work for moving objects like the sea right?

I’ll keep you posted with the testing once I’ve been out tomorrow.

Just to add though … the slowest shutter speed you can set is 1/1 sec so for anything longer than that it calls for one of the long exposure apps that does the computational blending thing.

Apple Proraw isn’t really raw

Whatever the technical reason / limitations there are for this I really do hope in the near future this is overcome, otherwise Apple continually calling the camera system “Pro” could start to get a little bit "Boy who cried Wolf” if you know what I mean.

That said though, because of how Apple ProRaw works, there may well be times you wouldn’t want to use it anyway because of the processing it applies to the files i.e. Noise Reduction and Smart HDR.

I’m going to be covering that very soon in another article and video.

ND FILTERS WITH iPHONE FOR VIDEO ???

This is a definite YES though and I’ll be covering that in a post and video VERY soon.

Right, I’ll go charge my filming kit for tomorrow and keep you posted once I’m done with the testing 👍🏻

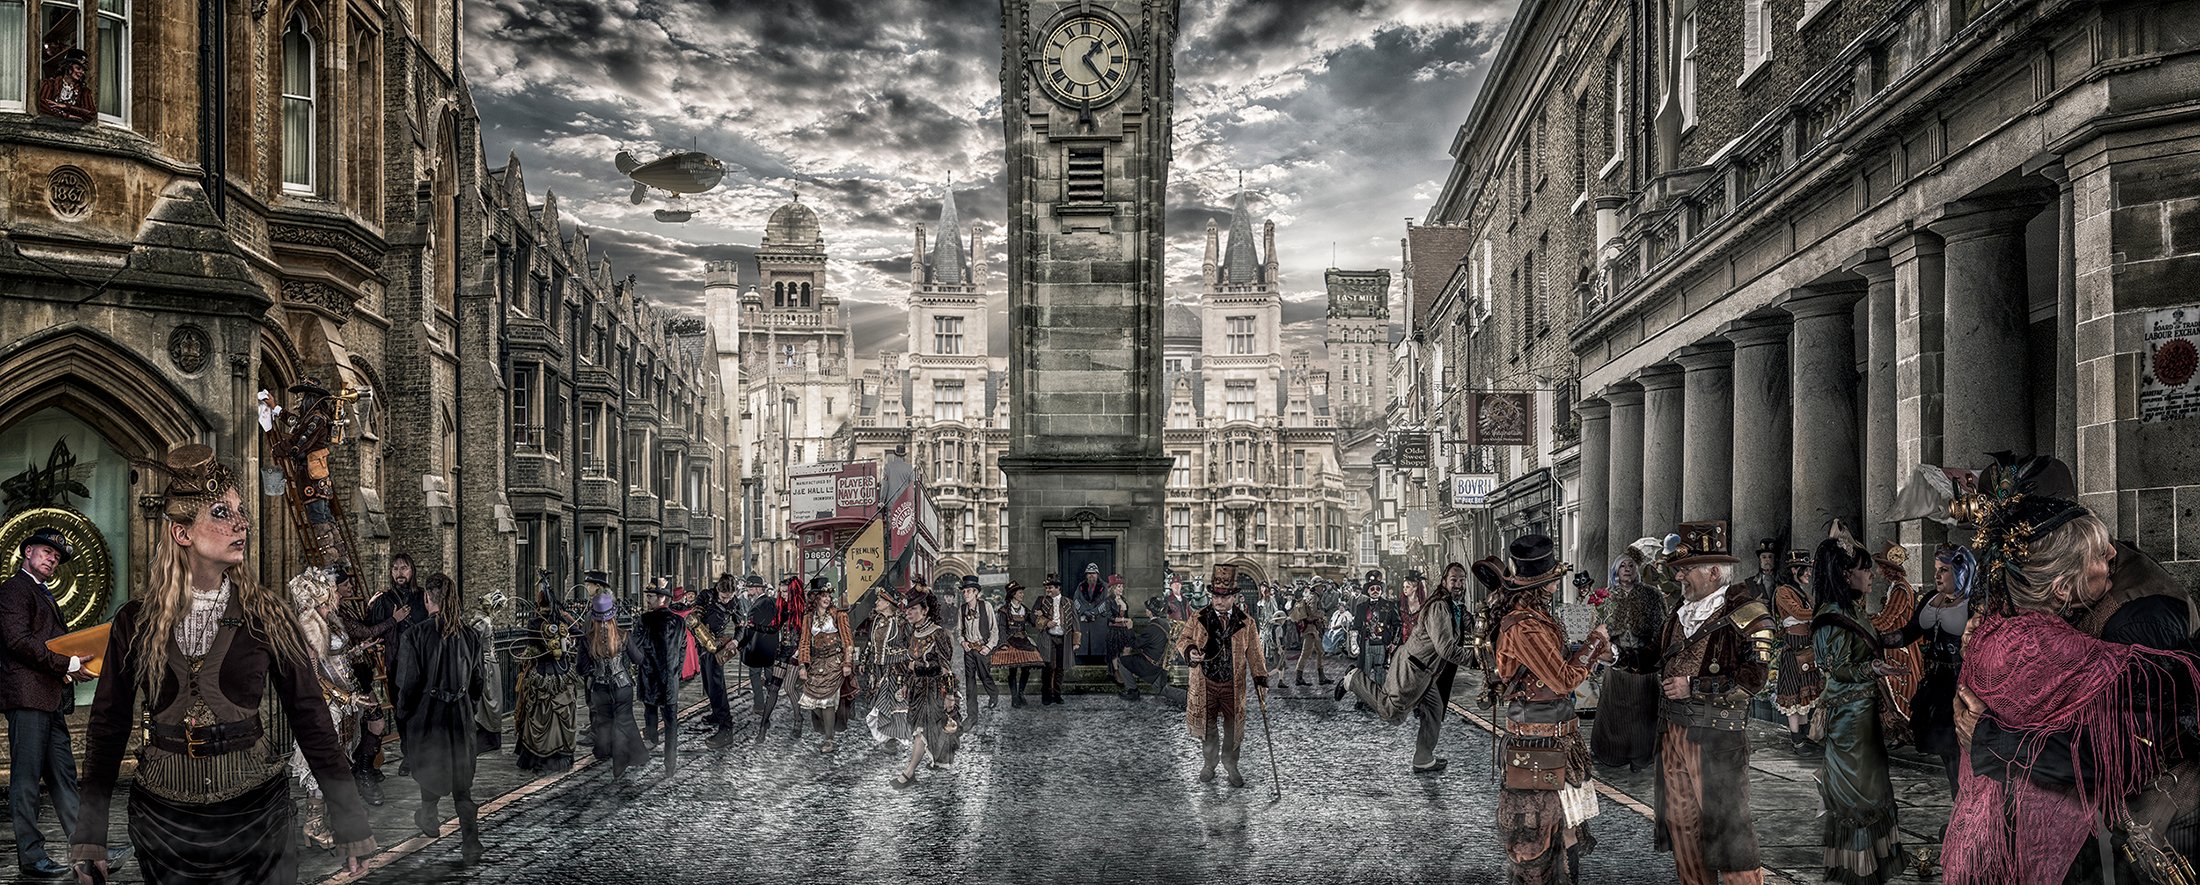
Photographing STEAMPUNK | The World of Historical Science-Fiction | Gary Nicholls

Watch the recording of this LIVE Broadcast as I chat with my friend, Artist Storyteller and Author with a Camera, Gary Nicholls talking about his process, how he finds models, inspiration for his images and exhibiting …

Links mentioned in the video

Gary Nicholls’ website: g-n-p.co.uk

Gary Nicholls on Instagram: @artimaginarium

Gary Nicholls’ Imaginarium on Facebook: faceboom.com/artimaginarium

FINE ART Storytelling Photography, DOGS and MONT BLANC | Ian Munro

Watch the recording of this LIVE Broadcast as I chat with my great friend Ian munro and go Behind the Scenes of his Photography discussing his process, set building, how he comes up with ideas, lighting kit and more PLUS his latest adventure summiting Mont Blanc …

LINKS MENTIONED IN THE VIDEO:

Ian Munro Website:
https://www.ianmunro.co.uk/

Ian’s YouTube Channel:
https://www.youtube.com/@IanMunroArt

Hope Rescue:
https://www.hoperescue.org.uk/

Ian’s Just Giving Page for Hope Rescue Dogs:
https://www.justgiving.com/page/ian-munro-1706473631317

Adventure Base Mont Blanc:
https://adventurebase.com/adventure/climb-mont-blanc/

Ian’s Photography Inspiration

LETURK: https://www.leturk.com/

Teun Hocks: https://www.artnet.com/artists/teun-hocks/

I've started using Constant LED Lighting when taking Portraits and LOVE IT!

Over the last few months I’ve been experimenting more and more with using Constant / LED Light when taking portraits as opposed to solely using a traditional strobe, and early thoughts are that I’m really liking it.

What I’m REALLY liking about using the LED Lighting is the WYSIWYGWhat You See Is What You Get

Because of this, it’s so incredibly quick and easy to set up.

Controling the power output and temperature using the manual dials and touch screen on the L60-B is super easy with the non-fussy interfce, but I could even use the Westcott App on my iPhone; to do the same. this in turn means more focus on the subject and the matter at hand i.e. capturing a great portrait.

For the portrait above that I took of my friend Anthony Crothers, here’s a screen grab from some video that was taken to give you an idea of how the studio looked …

KIT USED

  • Camera: Sony A7RIV

  • Lens: Zeiss 55mm (FE 24-70mm F4 ZA OSS)

  • Light Source: Westcott L60-B Bi-Color COB LED (60W)

  • Modifier: Westcott Rapid Box Switch Oct (Large)

  • Westcott

  • Background: Westcott X-Drop Pro + Vintage Grey Canvas by Glyn Dewis

MODIFIERS

The L60-B can be used with all of the Westcott Modifiers I use which straight away is a HUGE bonus, but interestingly I spoke with friends at Westcott about the L60-B prior to this photo shoot and was advised to use it with the Westcott Rapid Box Switch Medium Octa as opposed to the Large as the light output “might” not fill it; however my experience was that in close as I was using it, the Large Octa worked out great.

The quality of thre light is VERY impressive … especially how easily it is to change the power output and temperature.

I genuinely love how you see exactly what you’re going to get; this alone made it such a different experience for me as a the Photographer (in a positive way) for a whole host of reasons, but interestingly this was also something Anthony commented on …

Having a constant light source made for a far more relaxed, natural and anxiety free experience
— Anthony Crothers

COLOUR CHECKER

To ensure colours (skin tone etc) were as accurate as possible, for this shoot I used a Colour Checker Passport from Calibrite.

Only needing to take one additional shot of Anthony holding the Colour Checker, the process then in Lightroom to create a profile from it was / is incredibly quick and easy. The new Colour Checker doesn’t seem to need a tighter crop to enable the softwre to generate a profile, so really seeing how seamless it was and how little time it took, I can’t justify NOT using it, and to add to that, this is the happiest I’ve been with resulting skin tones in a LONG time!

TIMELESS COURSE

Taking this portrait, using the Colour Checker and more is for part of a BIG update I’m adding into my TIMELESS Photography & Retouching Course which will also include an update the to the Retouching Workflow taking advantage of updates in both Lightroom and Photoshop have been added since the course was first released.

Anyone that has enrolled in my TIMELESS Course receives Lifetime Updates so will be getting all this new content added into the curriculum once it’s ready (expected very early March).

*Note:
Once the update has been added, the price of enrolling in the course will be increasing for new Students …

  • Current Price: $32.40 / £27.60 / €32.35

  • New Price: $45 / £35.40 / €41.50

I’ll be sharing more from using the L60-B over the coming weeks as I do intend to invest in a 2nd unit (invest sounds so much better than buy) so that I can create a different look to the lighting and will give more options.

I’ll be testing out different enviorments, both indoors and outdoors and will make sure to share all the experience with you here and in videos that I’ll likely post up on my YouTube Channel.

Short Film about my Medicine ... Lyme Regis

It’s less than one week until the launch of the very first, and FREE VIDEO CREATORS VIRTUAL SUMMIT and I”m really looking forward to present (for the first time ever) 2 classes on using Adobe Premiere Pro.

This is a completely new area of teaching for me so I can’t wait to share the classes I’ve put together …

  • Masking Essentials in Adobe Premiere Pro

  • Plan, Record, Edit | Creating your First Video

I’ve had such a blast putting these classes together and definitely have some great, fun memories with friends from the Masking Class that I”ll be sharing at some point.

The ‘Creating your First Video’ class has actually been quite an emotional journey though … but in a good way I hasten to add.

I decided to treat it as a way of giving myself an assignment and then sharing the process from planning, recording and editing.

The assignment I gave myself was to record a short film about my favourite place of all which happens to be the area where I live, Lyme Regis, and try to portray why it’s so special to me.

Anyway I thought I’d share it here too, so I hope you like it …

MILITARY PHOTOGRAPHER to WILDLIFE PHOTOGRAPHER | Jamie Peters

Watch the recording of this LIVE Broadcast as I chat with British Army Photographer turned Wildlife Photographer Jamie Peters and discuss KIT , PLANNING , PREPARATION , LESSONS LEARNED , MISTAKES MADE and Behind the Scenes of some of his STUNNING IMAGES!

LINKS MENTIONED IN THE VIDEO:

Jamie Peters’ Website: www.jamiepeters.co.uk

Jamie Peters on Instagram: @jamiepeters.co.uk