The more I use the LED Constant Light for Portraits, the more I fall in love with it.
I know I said it before in an earlier post but when you use it, the whole WYSIWYG (What You See Is What You Get) not only makes setting up so much easier and quicker but also every time I use it, the people I photograph say how much more relaxing it is not having a flash go off in their face.
Just over a week ago I was recording some content for the iPhone Photography Conference and thought it would be an interesting comparison just to see how close I could get a photograph I took with my main camera, my Sony A7RIV Mirrorless and my iPhone 15 Pro Max.

Of course I went into this knowing that the iPhone image wouldn’t equal or surpass the quality of my Sony, but just thought it would be interesting to see how far the quality has moved on and do this with a lit Portrait using the constant light … the Westcott L60-B Bi-Colour LED.
THE SET UP

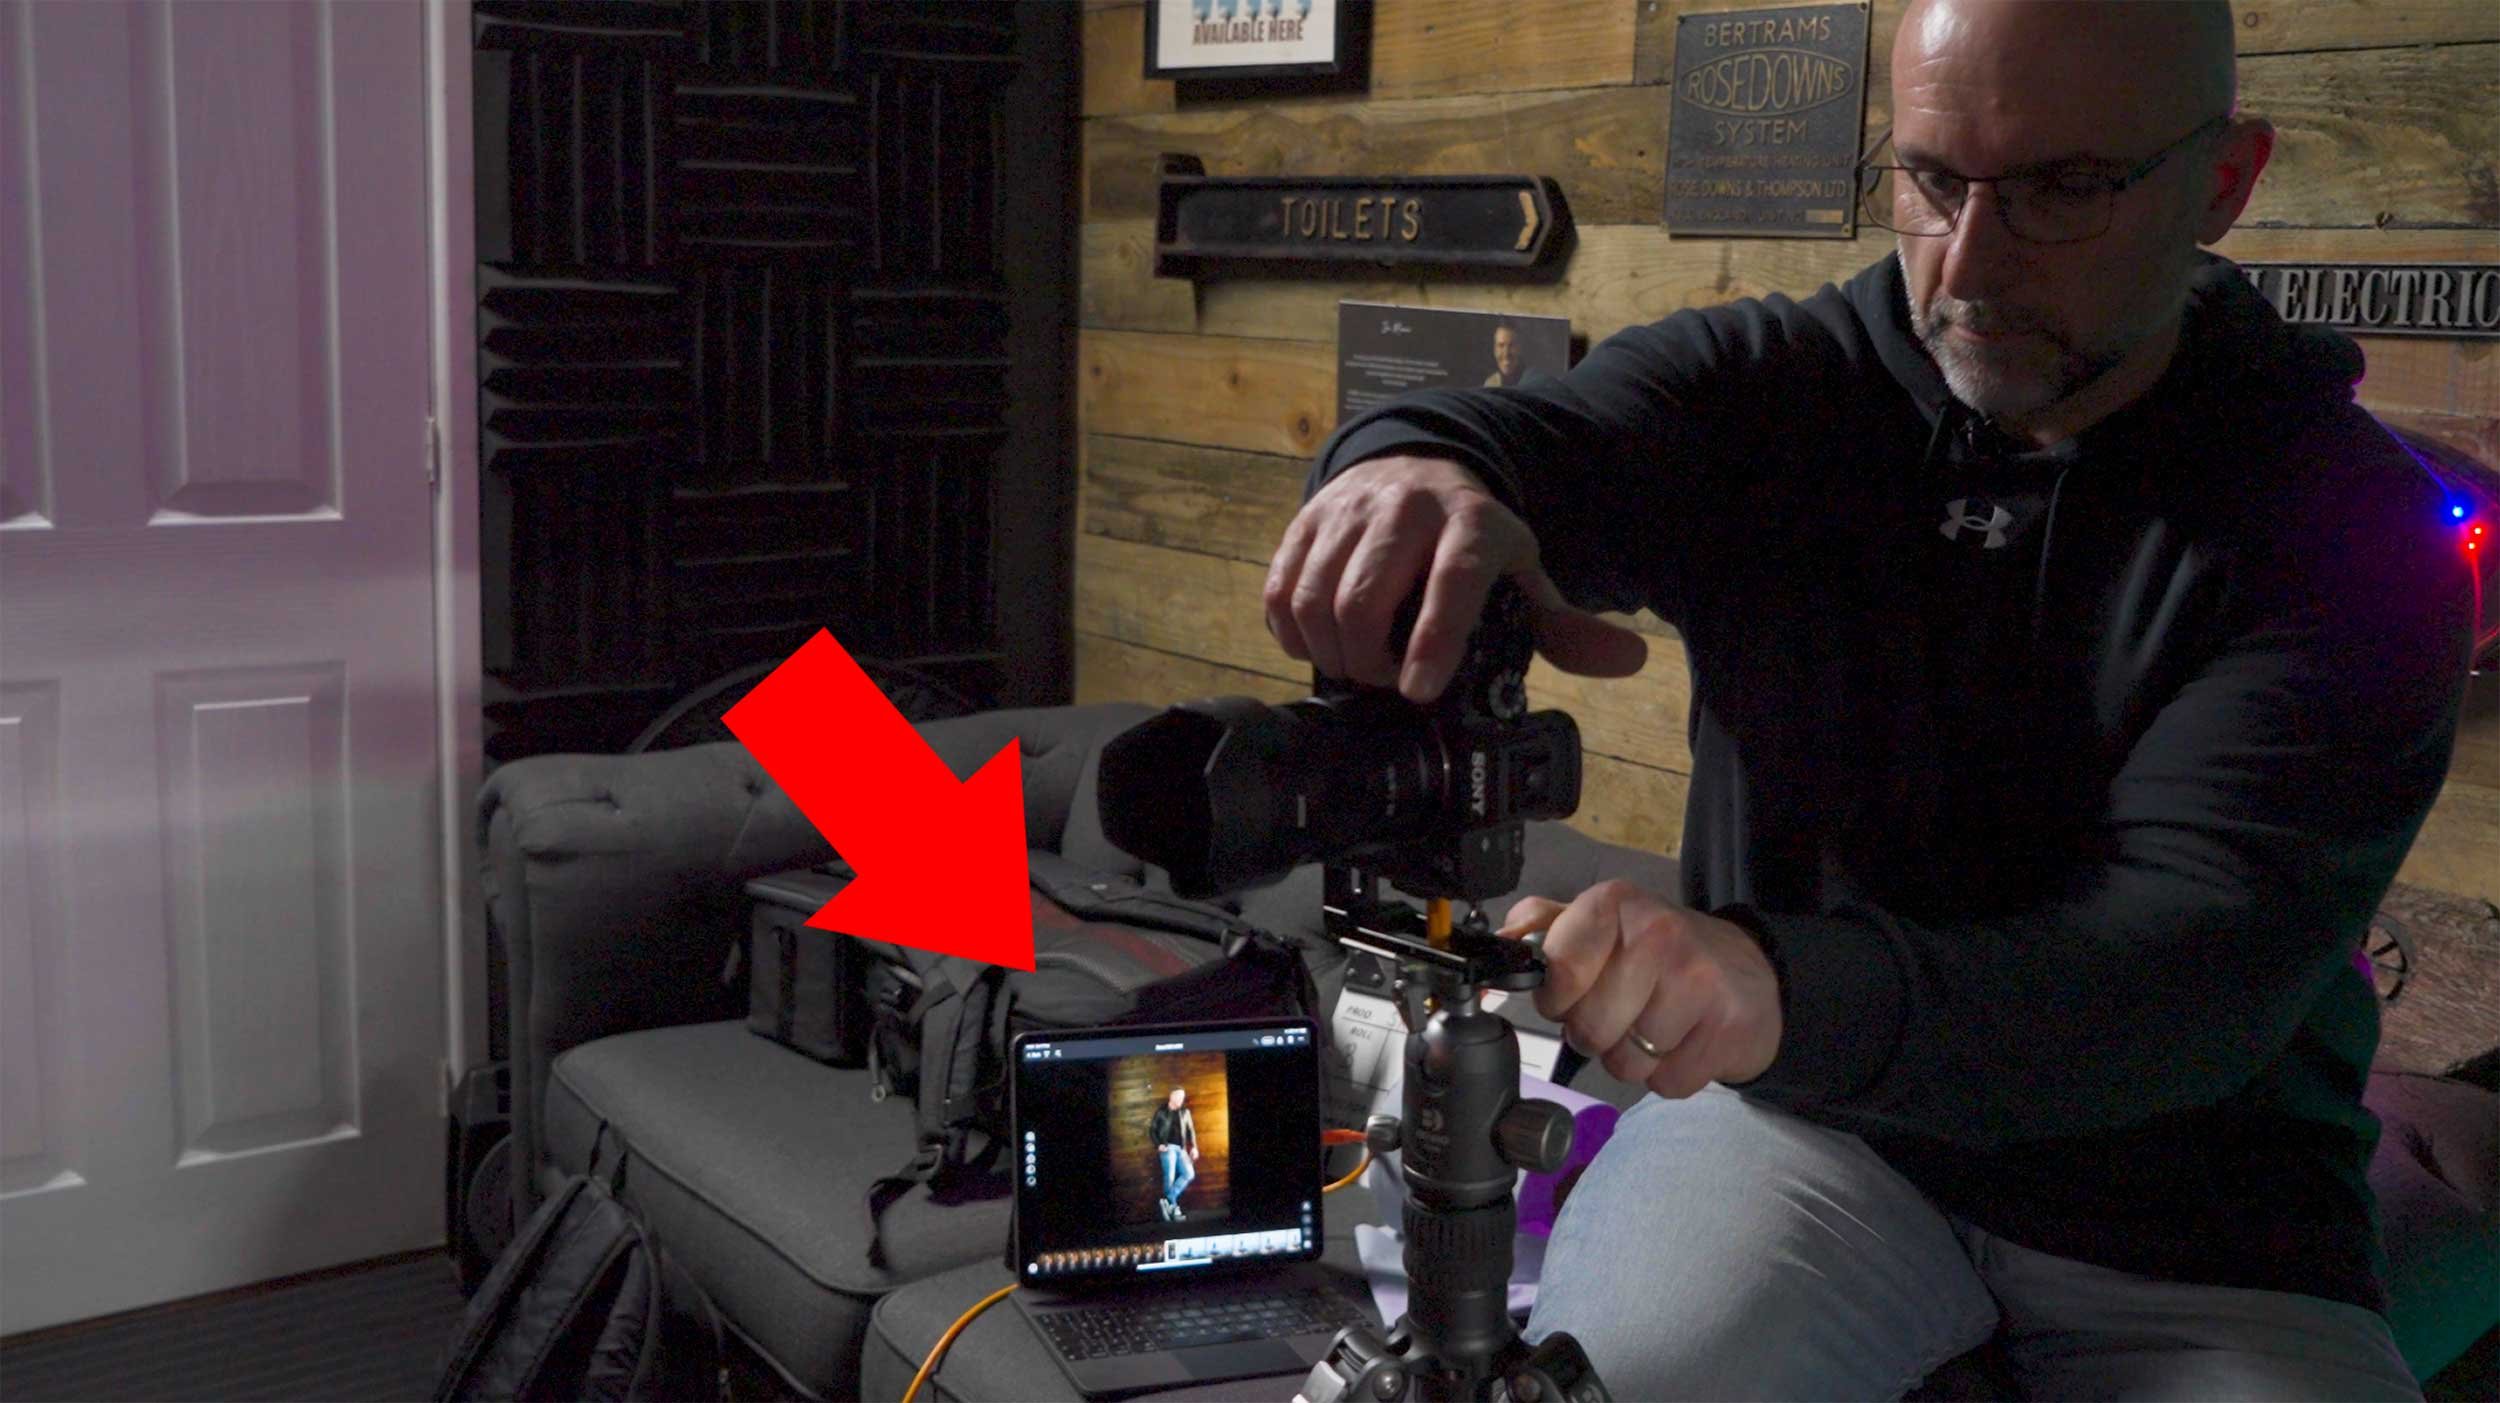
For the lighting. I had originally planned to use just one light, the L60-B, however I couldn’t resist the warm light emitting from the heater that Ian had turned on in the studio. I loved the way it cast a warm glow onto the wood panelling so this was carefully raised off the ground and then became the main light and the L60-B was positioned on the opposite side of Ian further forward and higher up.
The L60-B was given a warmer temperature using the iPhone app which works incredibly well.
As soon as I opened the app it connected to the light and I was able to dial in the power settings, change the temperature and I could even make it perform lighting special effects like lightning, TV and a faulty bulb … but these are obviously for use when doing video.

CAMERA SET UP
So with my Sony A7RIV on my tripod I used my 55mm Zeiss f/4.0 lens and tethered this into CaptureOne on my iPad, which works an absolute treat!
It’s incredibly easy to set up; you literally plug one end of a USB-C cable into the camera, the other end into the iPad, and with the app open i’st connected and ready to go.
I’m using this all the time now when tethering and what I also love about it is that you can stop and start the monthly subscription whenever you want. The subscription is only £4.49 / month so I tend to look at what I have planned and just restart it for that period, then cancel it again.
The only thing I don’t like which might (I hope) be just down to a setting I’ve missed turning on, but the photographs you take are only stored on the iPad. I only discovered this after the first shoot I did using it. I disconnected the camera and went to check the images on the camera and nothing was there. Only once my heart re-started and I looked on my iPad did I realise where they were 😳
CAMERA SETTINGS
The settings dialled into my camera were …
f/4.0
1/60 sec
2000 ISO … which for modern day cameras is nothing
using the iphone
Having taken the portrait with my Sony I then swapped over to my iPhone which was placed on the tripod using the ULANZI ST-27 Phone Mount.
I also attached the 2x Telephoto lens from ReeFlex to the 1x lens on my iPhone using one of their cases that has threads in each of the lens apertures.

The 1x lens is the equivalent of 24mm and is the only lens on the iPhone capable of shooting in ApplePro Raw at 48MP … the highest resolution and largest file my iPhone 15 Pro Max can produce.
With the 2x Telephoto lens attached this made the 1x lens the equivalent of 48mm and did this optically rather than digitally, and so doing everything possible to create the best possible file; not quite 55mm but the closest I could get oto it optically.
iPHONE PRO CAMER APP
To take the photograph with my iPhone I used a Pro Camera App from ReeFlex and called ReeFlex.
This app like most other pro camera apps gives you control over extra settings like Shutter Speed and ISO but it also makes it very clear to see not only what file format you are in but also the resolution.
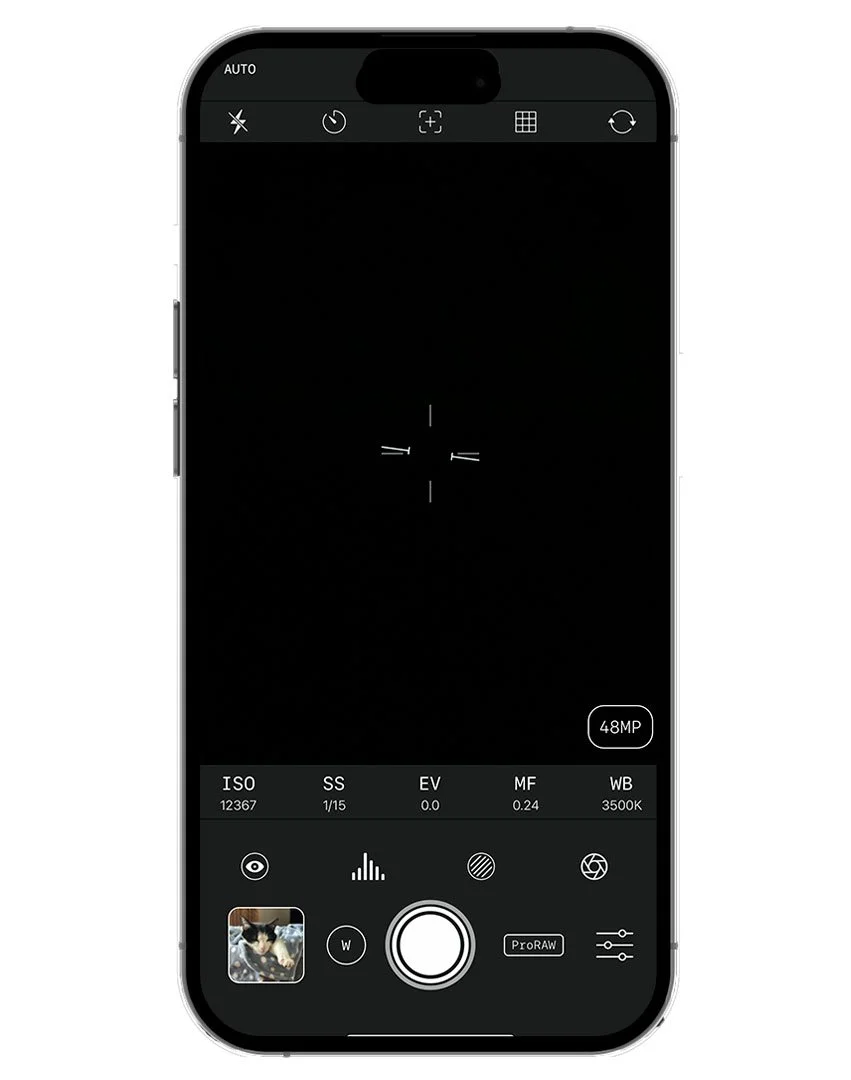
ReeFlex Pro Camera App usinfg 1x lens in Apple ProRaw at 48MP
However here’s the catch …
If when you’re using the 1x lens in Apple ProRaw at 48MP you make changes to the shutter speed and / or ISO then the file size immediately drops from 48MP to 12MP.

ReeFlex Pro Camera App using 1x lens with Shutter Speed Adjusted
So because of this I opted to leave the iPhone in the AUTO settings which kept the 1x lens in Apple ProRaw at 48MP, and these are the out of camera and out of phone results, with the Sony image on the left and the iPhone image on the right …
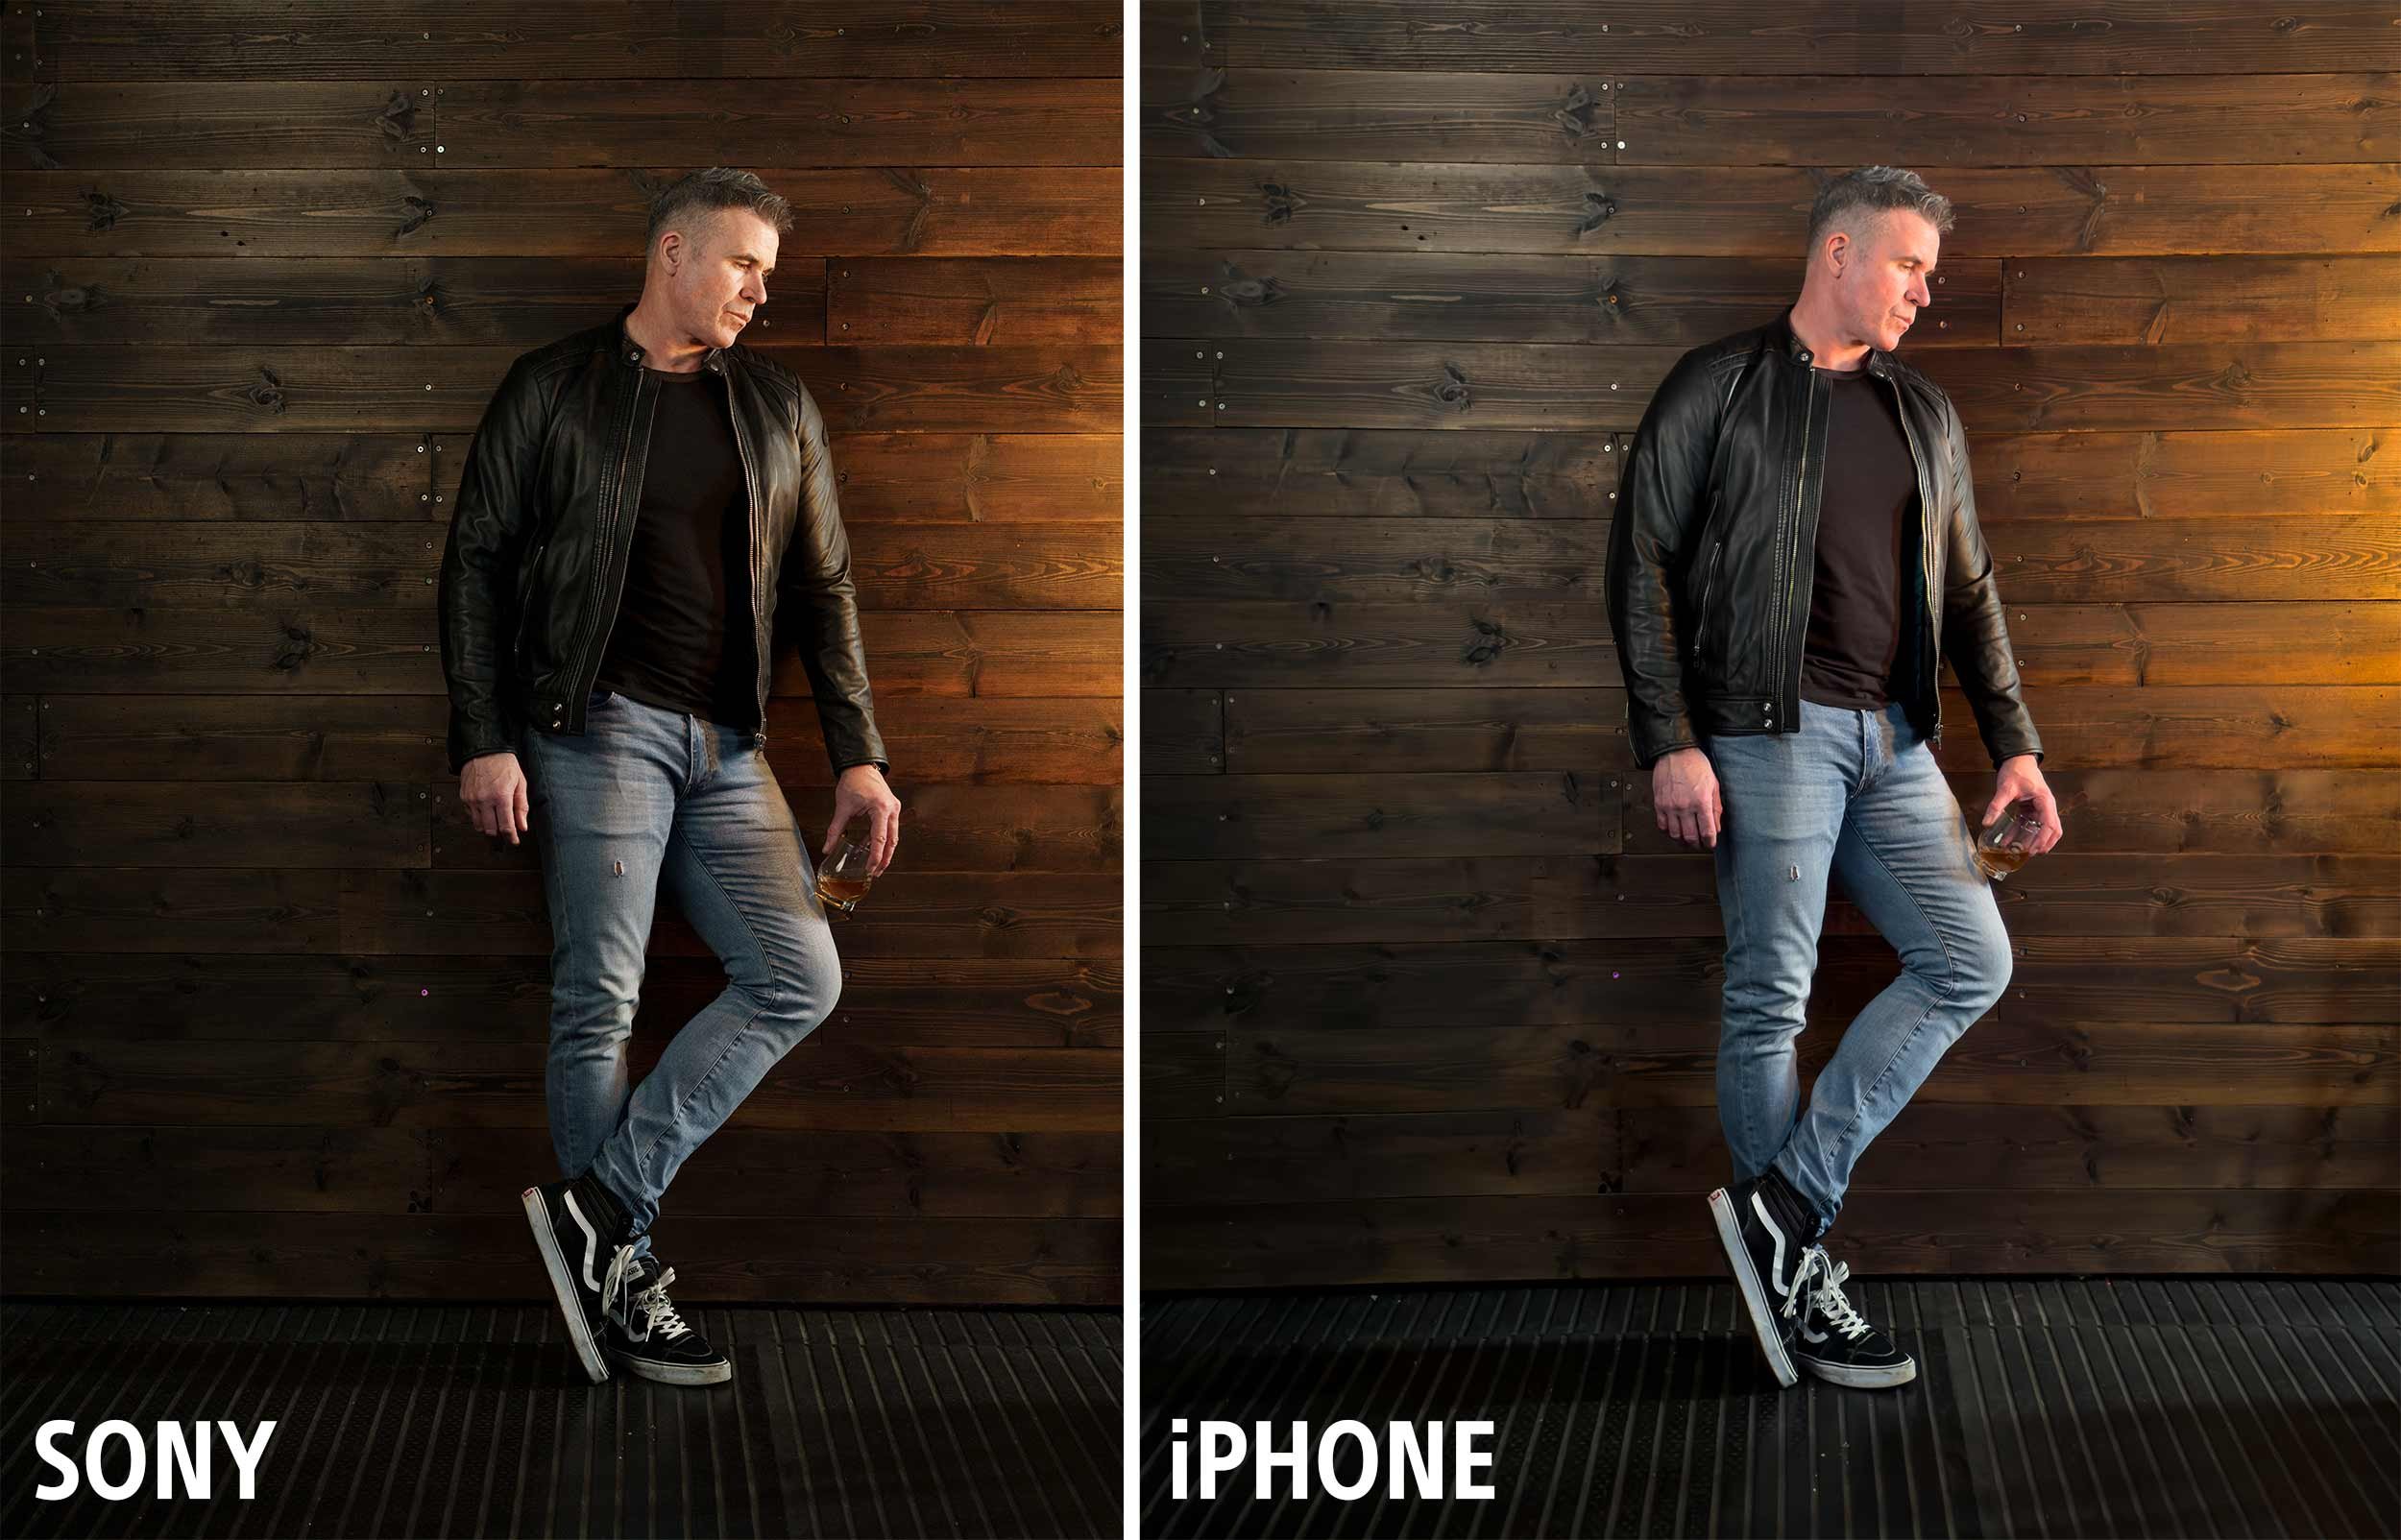
Now at this 100% magnification the iPhone file, although different to the Sony file, certainly looks to be holding up.
However, it’s when you zoom in on that iPhone file that things look VERY different …

Look how the file looks soft and slightly out of focus. Look how the file lacks texture and detail in Ian’s skin, his hair and the wood panelling.
Apple ProRaw
This softening appearance to the image is all because of shooting in the supposed highest resolution settings, AppleProRaw at 48MP and that’s because Apple ProRaw isn’t like a traditional Raw file as we know and understand them.
You see Apple ProRaw files do actually receive some processing such as Noise Reduction ( quite al lot ) and Smart HDR, so the file we end up with is also a blend of a number of images at different exposures taken and processed increibly quickly.
So not REALLY a Raw file as you would expect 🤷♂️
topaz sharpen ai
Running the file thorugh Topaz Sharpen AI does recover alot of that lost detail as you can see here …
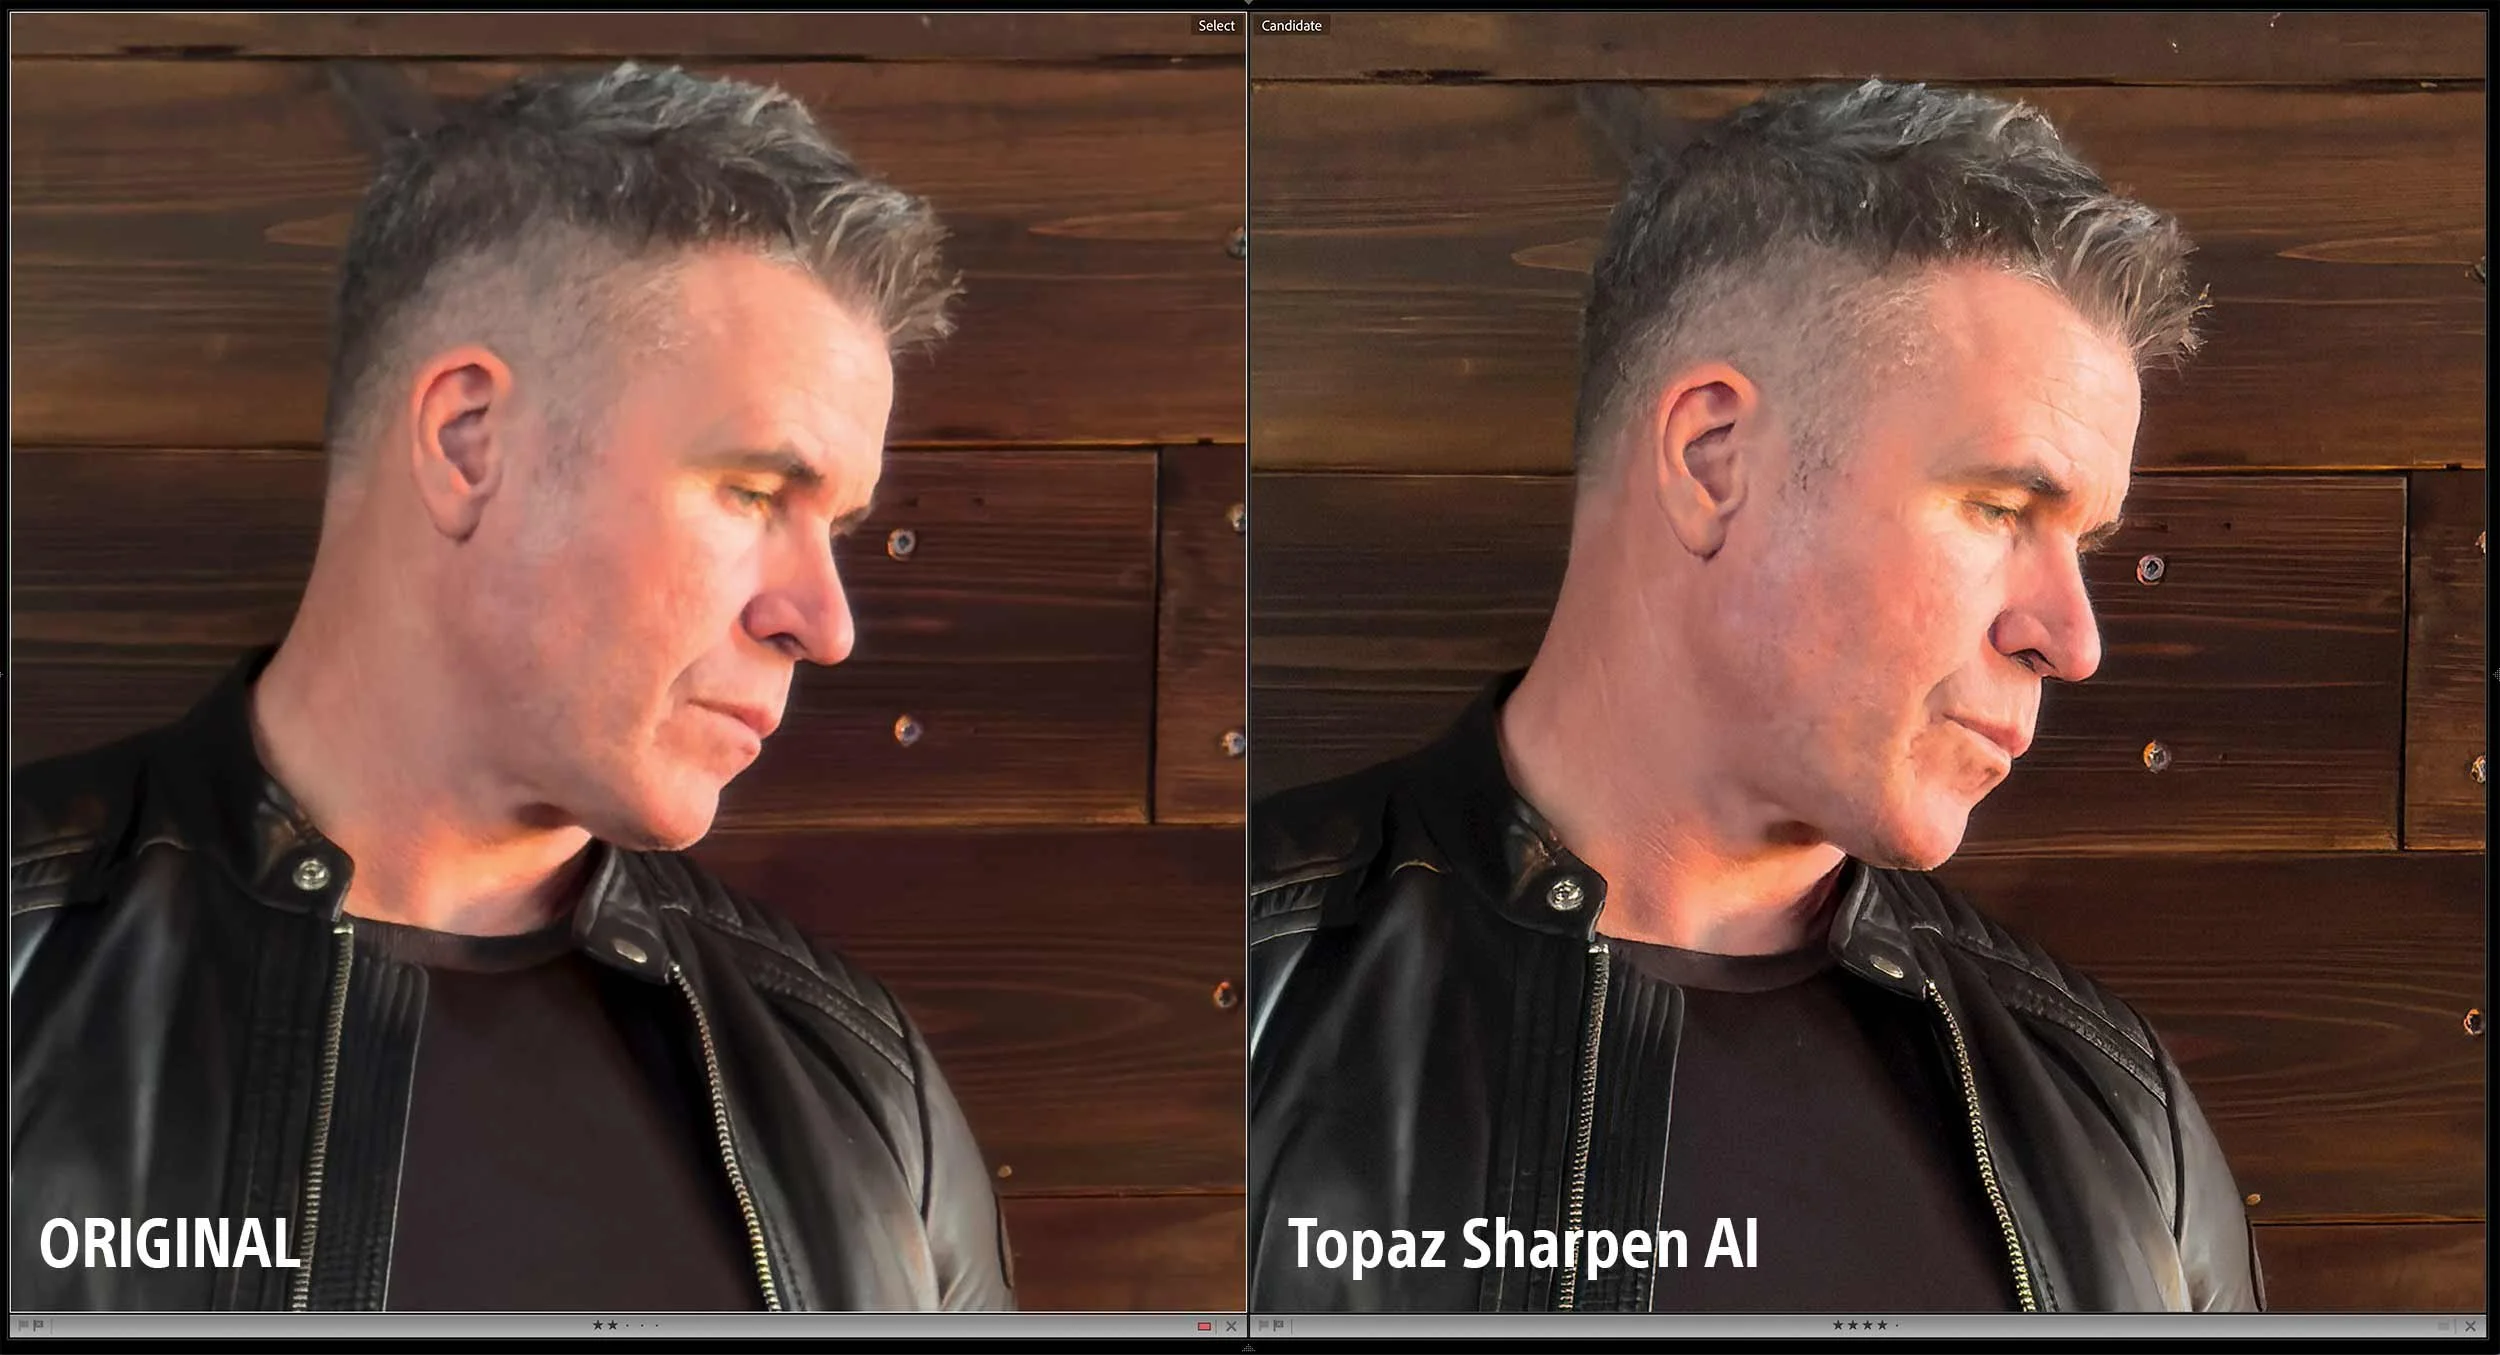
However knowing what Apple ProRaw does to your files does arm you with a bit of knowledge so that you can make the decision to use it or not.
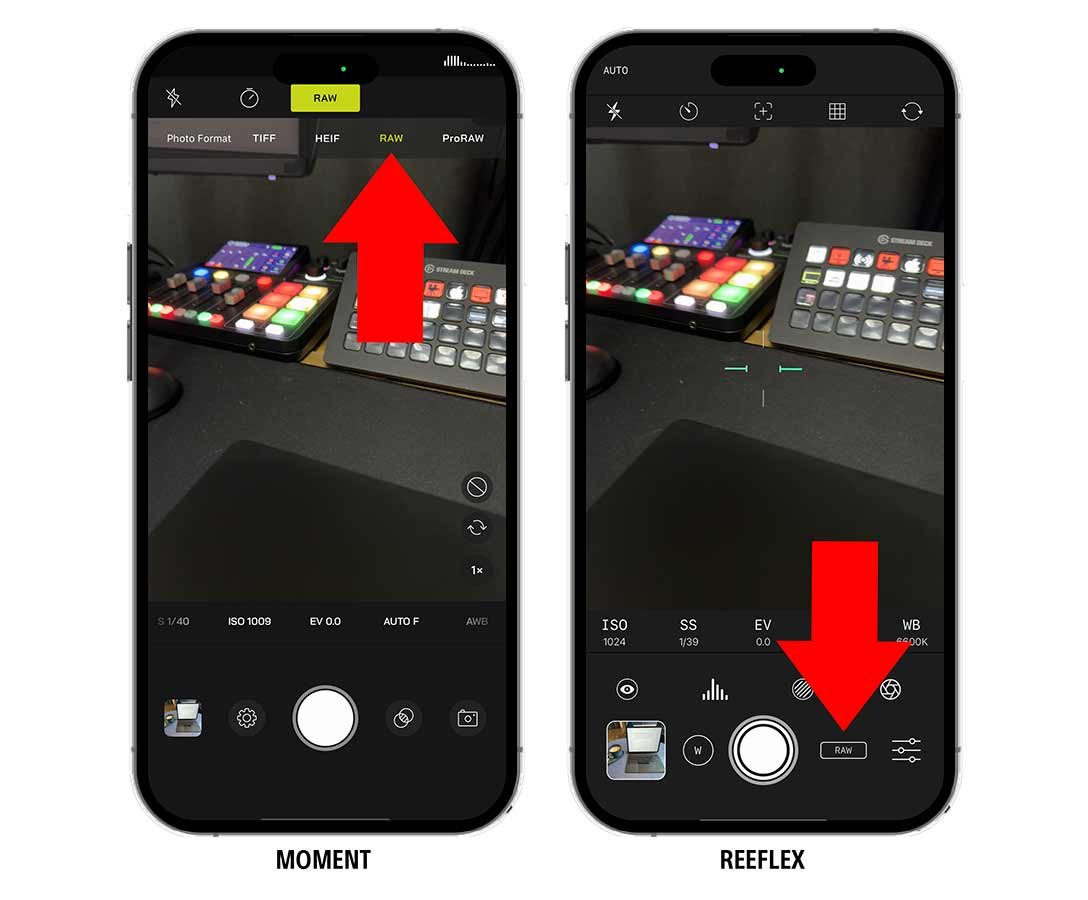
Depending on how serious you are about your iPhone photography you might want to consider shooting in 12MP Raw which Pro Camera apps like Moment and ReeFlex allow you to do …
Naturally we always want the highest resolution file possible but the noise reduction that Apple ProRaw does, might make you reconsider.
12MP Bayer raw files
Currently ALL Raw Long Exposure apps produce 12MP Bayer Raw files and that’s what all of my seascape images are and I’m more than happy with them.
Sure more resolution would be good but until that time, these 12MP Bayer Raw files are very acceptable …


So acceptable in fact that Digitalab even printed one of my iPhone seascapes at 72” on the longest side and it looked incredible …

final retouched portraits
Here though are the final retouched portraits with the Sony file on the left and the iPhone file on the right, and yeah the Sony file is definitely better and that’s to be expected, but looking at the iPhone file the future is going to be VERY interesting indeed!
wrapping up
So more testing to be done which will be interesting as new iOS updates come along and the iPhone 16 later this year.
In the mean time I’m going to carry on taking seascapes with my iPhone because I really enjoy doing them BUT I’ll also be taking them with my Sony too.
As for Portraits I’ll keep taking them with my iPhone but only as an extra bit of fun and experimentation when taking them with my Sony.
Catch you next time
Glyn