
How did I not know about this?
A setting in Lightroom Mobile that when turned on makes it possible for fantastic Long Exposure Photography ... handheld or on a Tripod by taking multiple photographs VERY quickly and blending them together!
How did I not know about this?
A setting in Lightroom Mobile that when turned on makes it possible for fantastic Long Exposure Photography ... handheld or on a Tripod by taking multiple photographs VERY quickly and blending them together!
VERY excited that Westcott have recently upgraded their popular X-Drop Background system to the new, X-Drop Pro …
I’ve been using the original X-Drop for years.
If you’ve seen portraits I’ve taken over the past 3 years and any of my World War 2 Veterans Portraits from my 3945 Project then you’ll definitely have seen it …

But, more recently I’m now using the new X-Drop Pro which is a whole new design; bigger, sturdier and easier to set up, pack away and with the now foldable backgrounds, way more convenient and portable …

The X-Drop Pro has a completely new design to the main collapsible support and the arms / legs with a thicker structure which still maintains its light weight …

The clips to extend and close down the legs / arms are bigger too which altogether makes this a much more, grounded, sturdy system when installed …

The X-Drop Pro also has larger backgrounds measuring 8’ x 8’ and 8’ x ‘12 but the X-Drop Pro can still be fitted with the 5’ x 7’ and 5’ x 12’ backgrounds, be they on a roll or foldable material. based.
On the topic of material backgrounds, Westcott now have their printed backgrounds, which ordinarily came on canvas or vinyl, available now on foldable, machine washable and dryer resistant.
This to me, dare I say, is a Game Changer because although the previous X-Drop Background System was portable, this new one is even more so despite being bigger when installed, because of the foldable material backgrounds.
My signature ‘Glyn Dewis Vintage Grey’ which has proven incredibly popular is available on foldable material and in all is`es: 5’ 7’ , 5’ x 12’ , 8’ x 8’ and 8’ x 12’
If you’ve used or seen the X-Drop system in the past, you will see a BIG difference with the now Pro version.
Way to go Westcott!
*Note:
For folks in the UK (and Europe) , Carmarthen Cameras are an Official Westcott Distributor based in Wales. Speak to Krish and tell him I said hi 😃
Color is a HUGE topic! sRGB , Adobe RGB , ProPhoto RGB ... What to use, Why to use it and When?!?
In this video I explain it all for editing , printing , web and sharing so you get the very BEST and CONSISTENT results 🌈
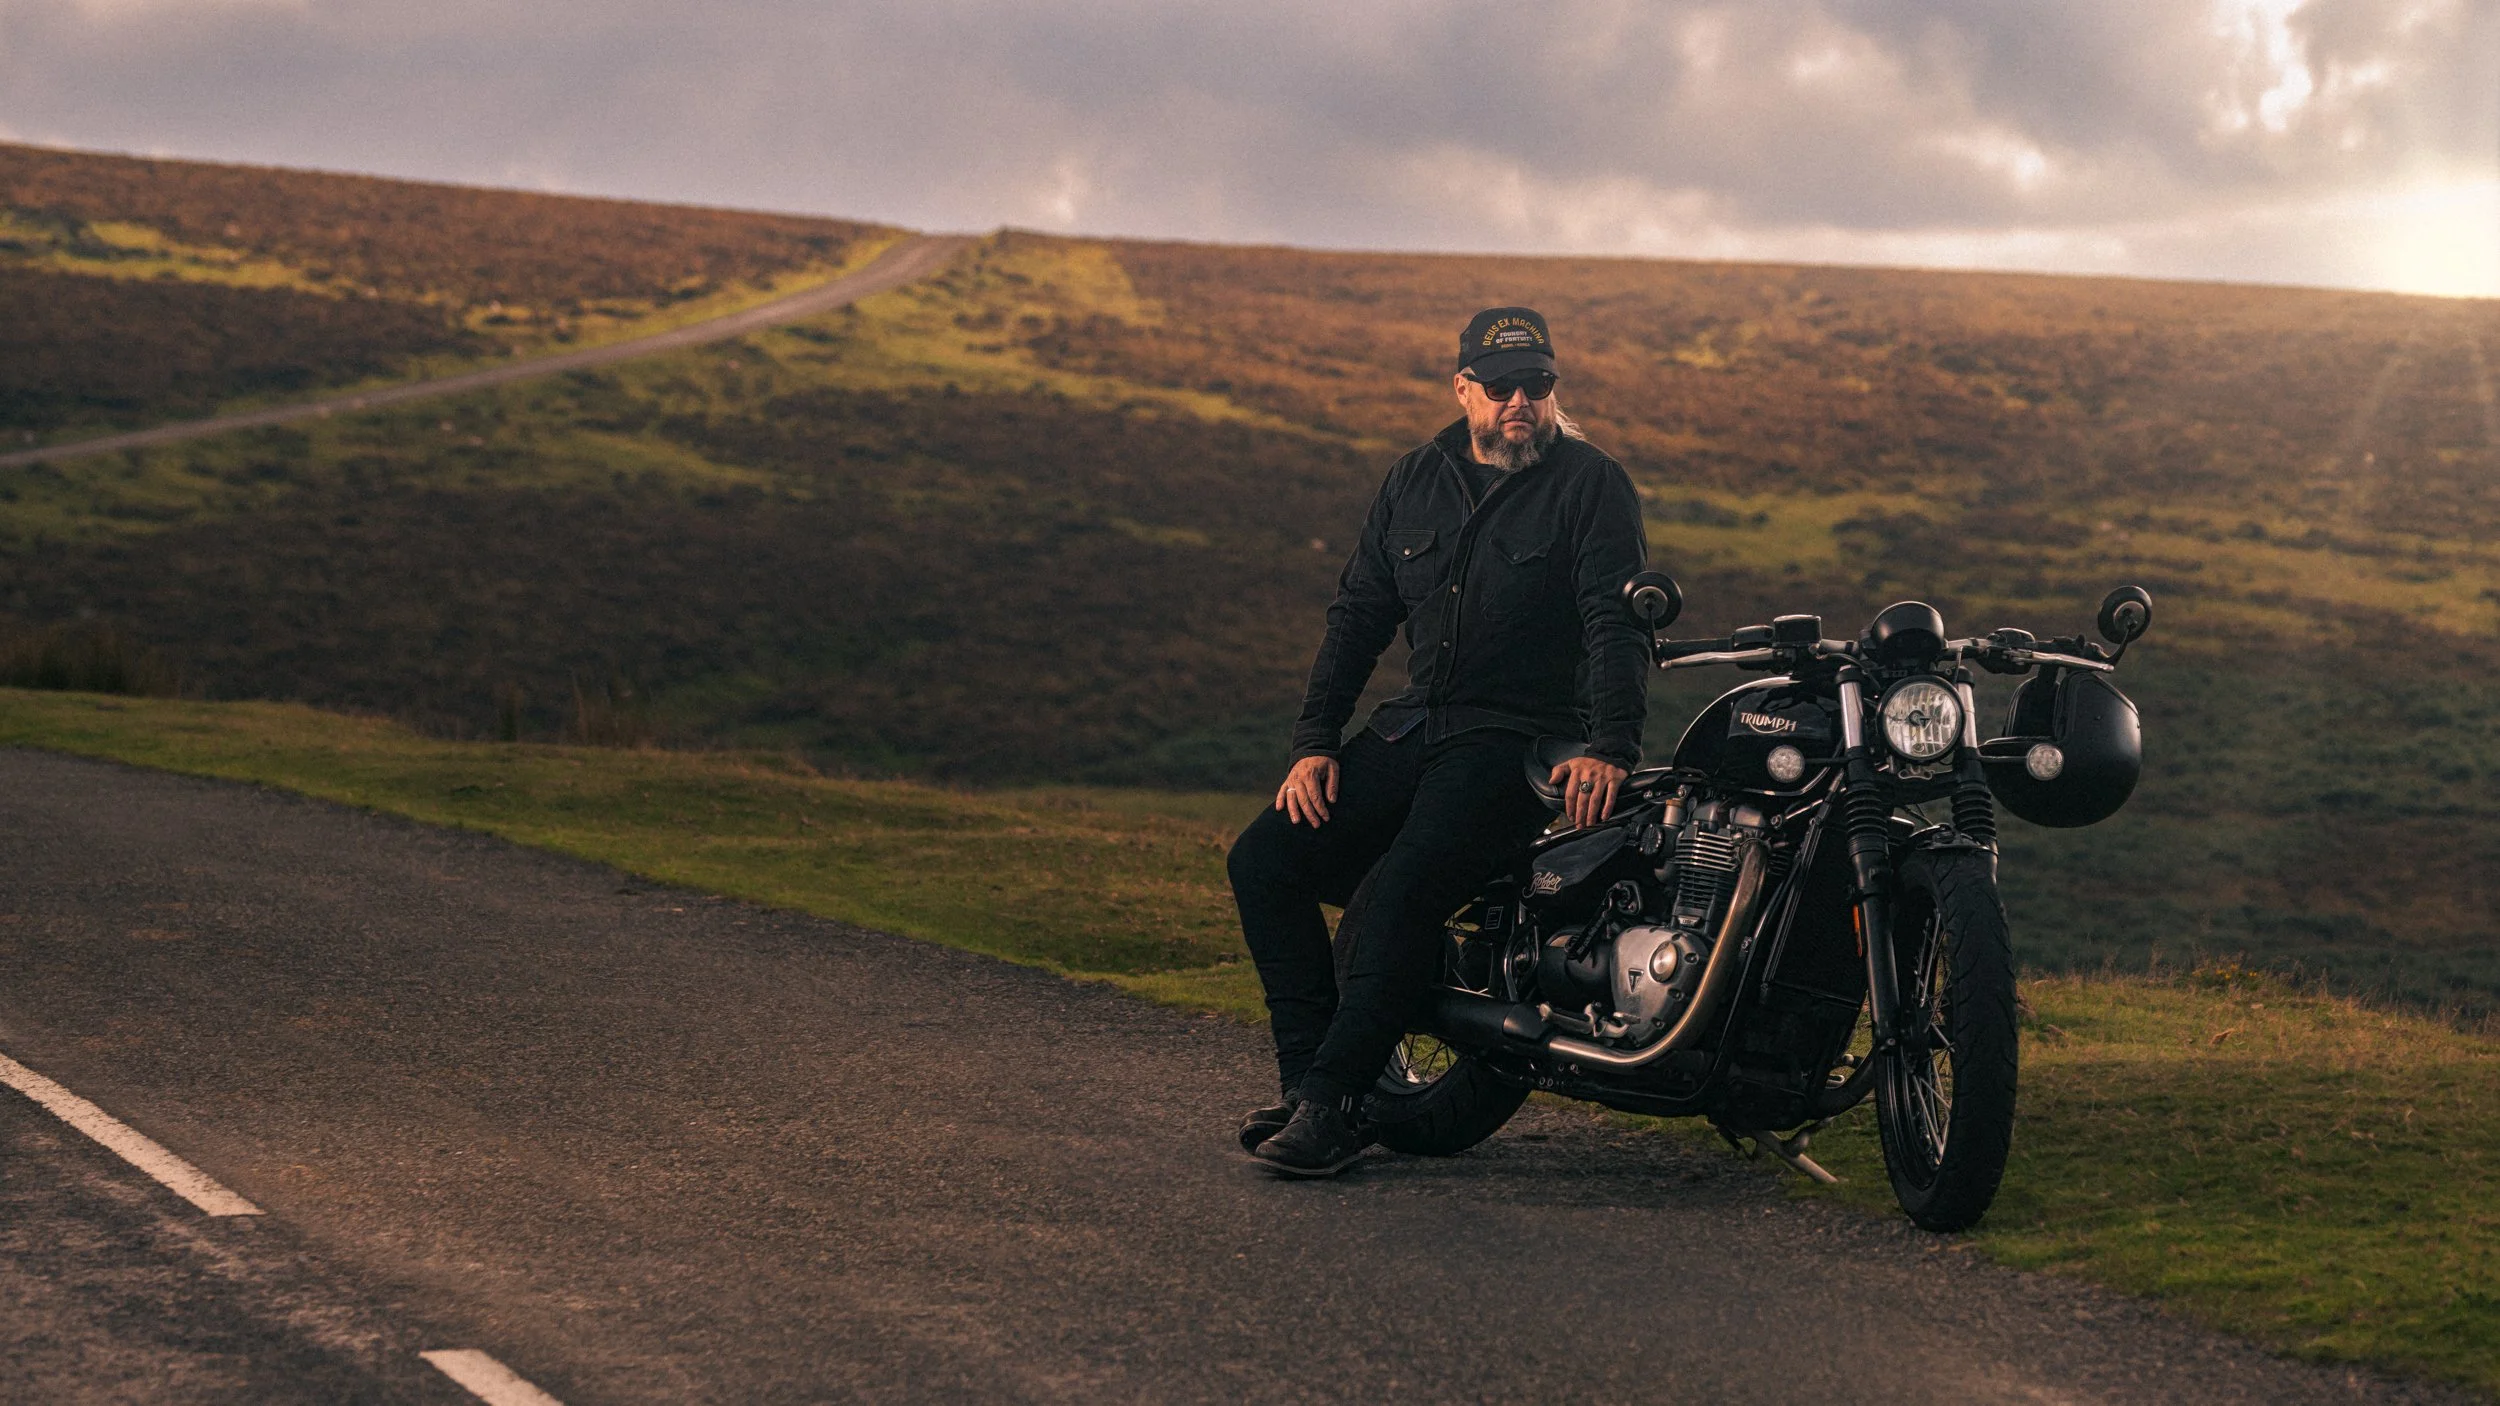
So last week I was out in the Dartmoor National Park in the South West of the UK photographing a GREAT Guy and a GREAT Motorcycle.
With rolling hills and roads that twist and turn and disappear over the horizon line, Dartmoor is a fantastic location for photography … especially the motorbike kind, so when Matt agreed to being in front of my camera, we just had to head out …
When there, the very first thing to do was to find a composition; not an easy task with so many possibilities but so few safe areas to park up with the roads being narrow.
Finding the composition is always the hardest part, and it’s all about finding a fine balance between the background, but also where you are going to place the subject.
Now this here (below) would have been great, and maybe I'll try next time, but placing the subject (Matt and his Triumph) to the right of the frame would have meant that his head would be blocking part of the road in the distance.
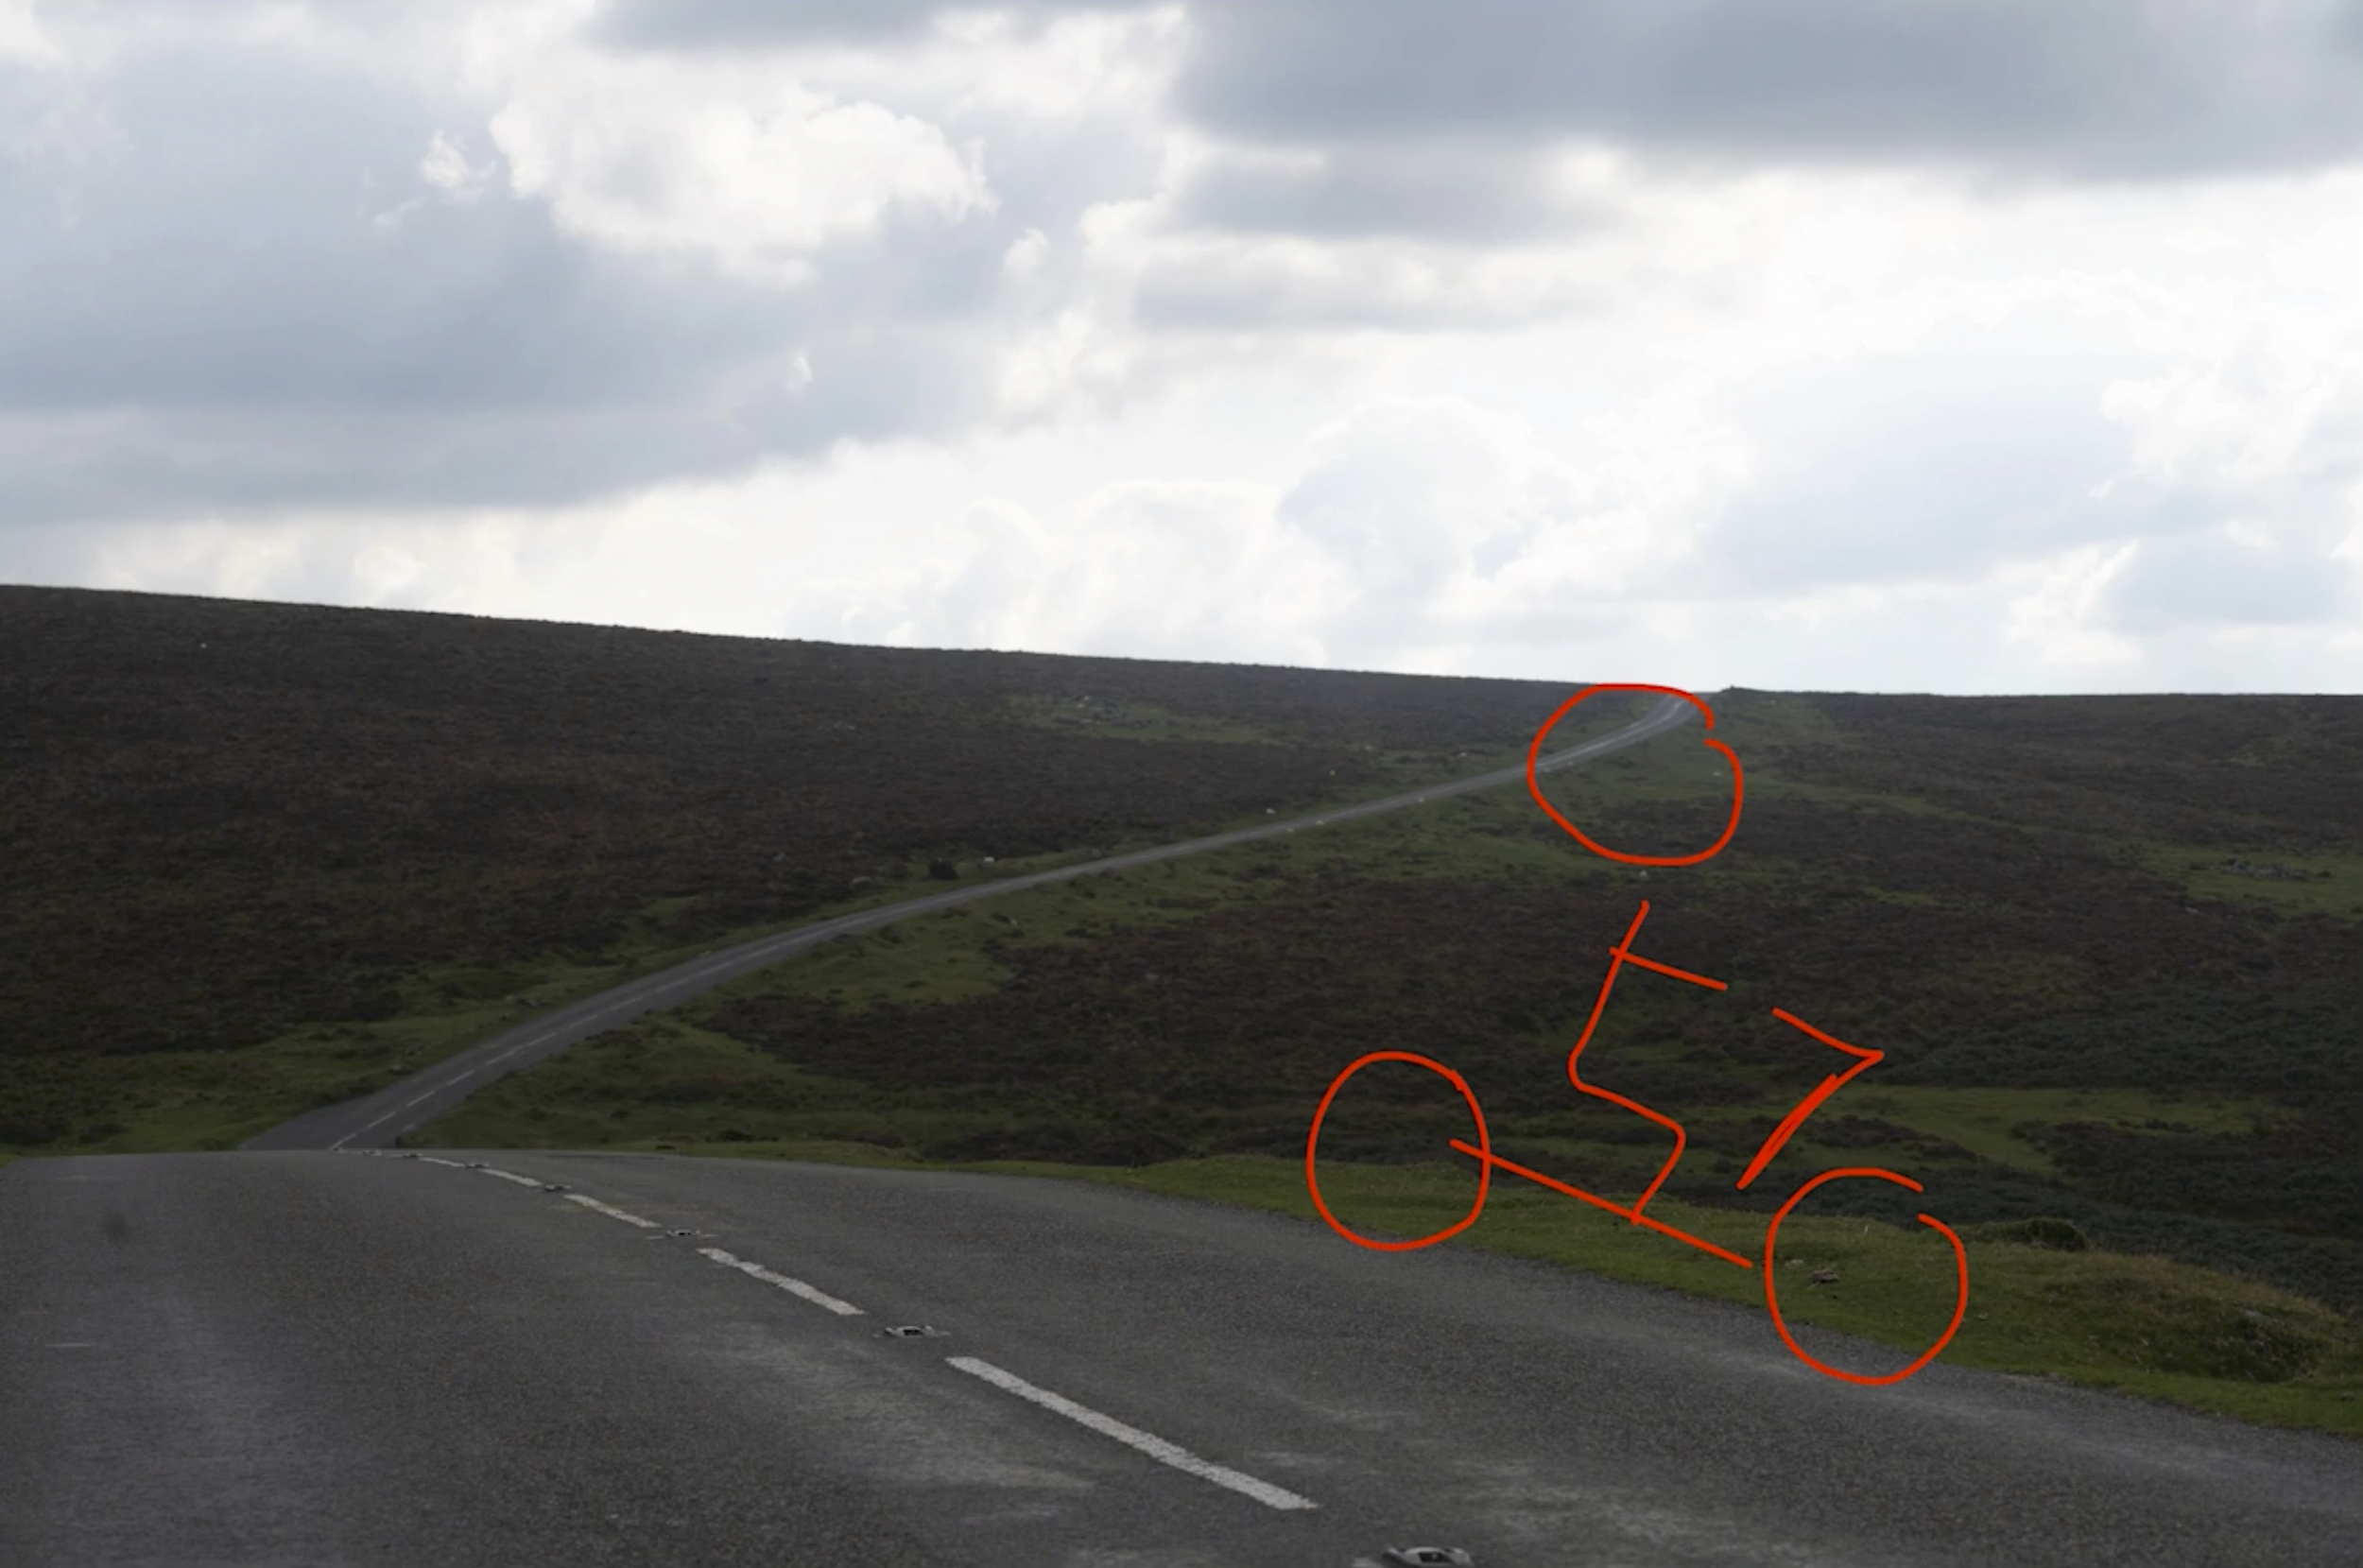
So that didn't work for me.
We tried moving along a little bit and tried some different compositions, some with the camera angle, much lower down so that Matt was above the horizon line to give a bit more of a dramatic feel …

But, the one I was most happy with was the one below, which to me gives a nice balance between the scenery, the road and the biker, and although you don't see the way the road twists off to the left down and then up, you do still know it's the same road that the bike is on, that then goes off into the distance …

Now you'll notice in this behind the scenes pictures that I'm using a telephoto lens, this was a 70 to 200mm f/4 lens, and I used that to compress the background because a telephoto lens will bring those distant areas much closer to form part of the final picture.

You can see what I mean here with this photograph taken with my iPhone from when I was looking for a composition, how the distant road just seems so well, distant …
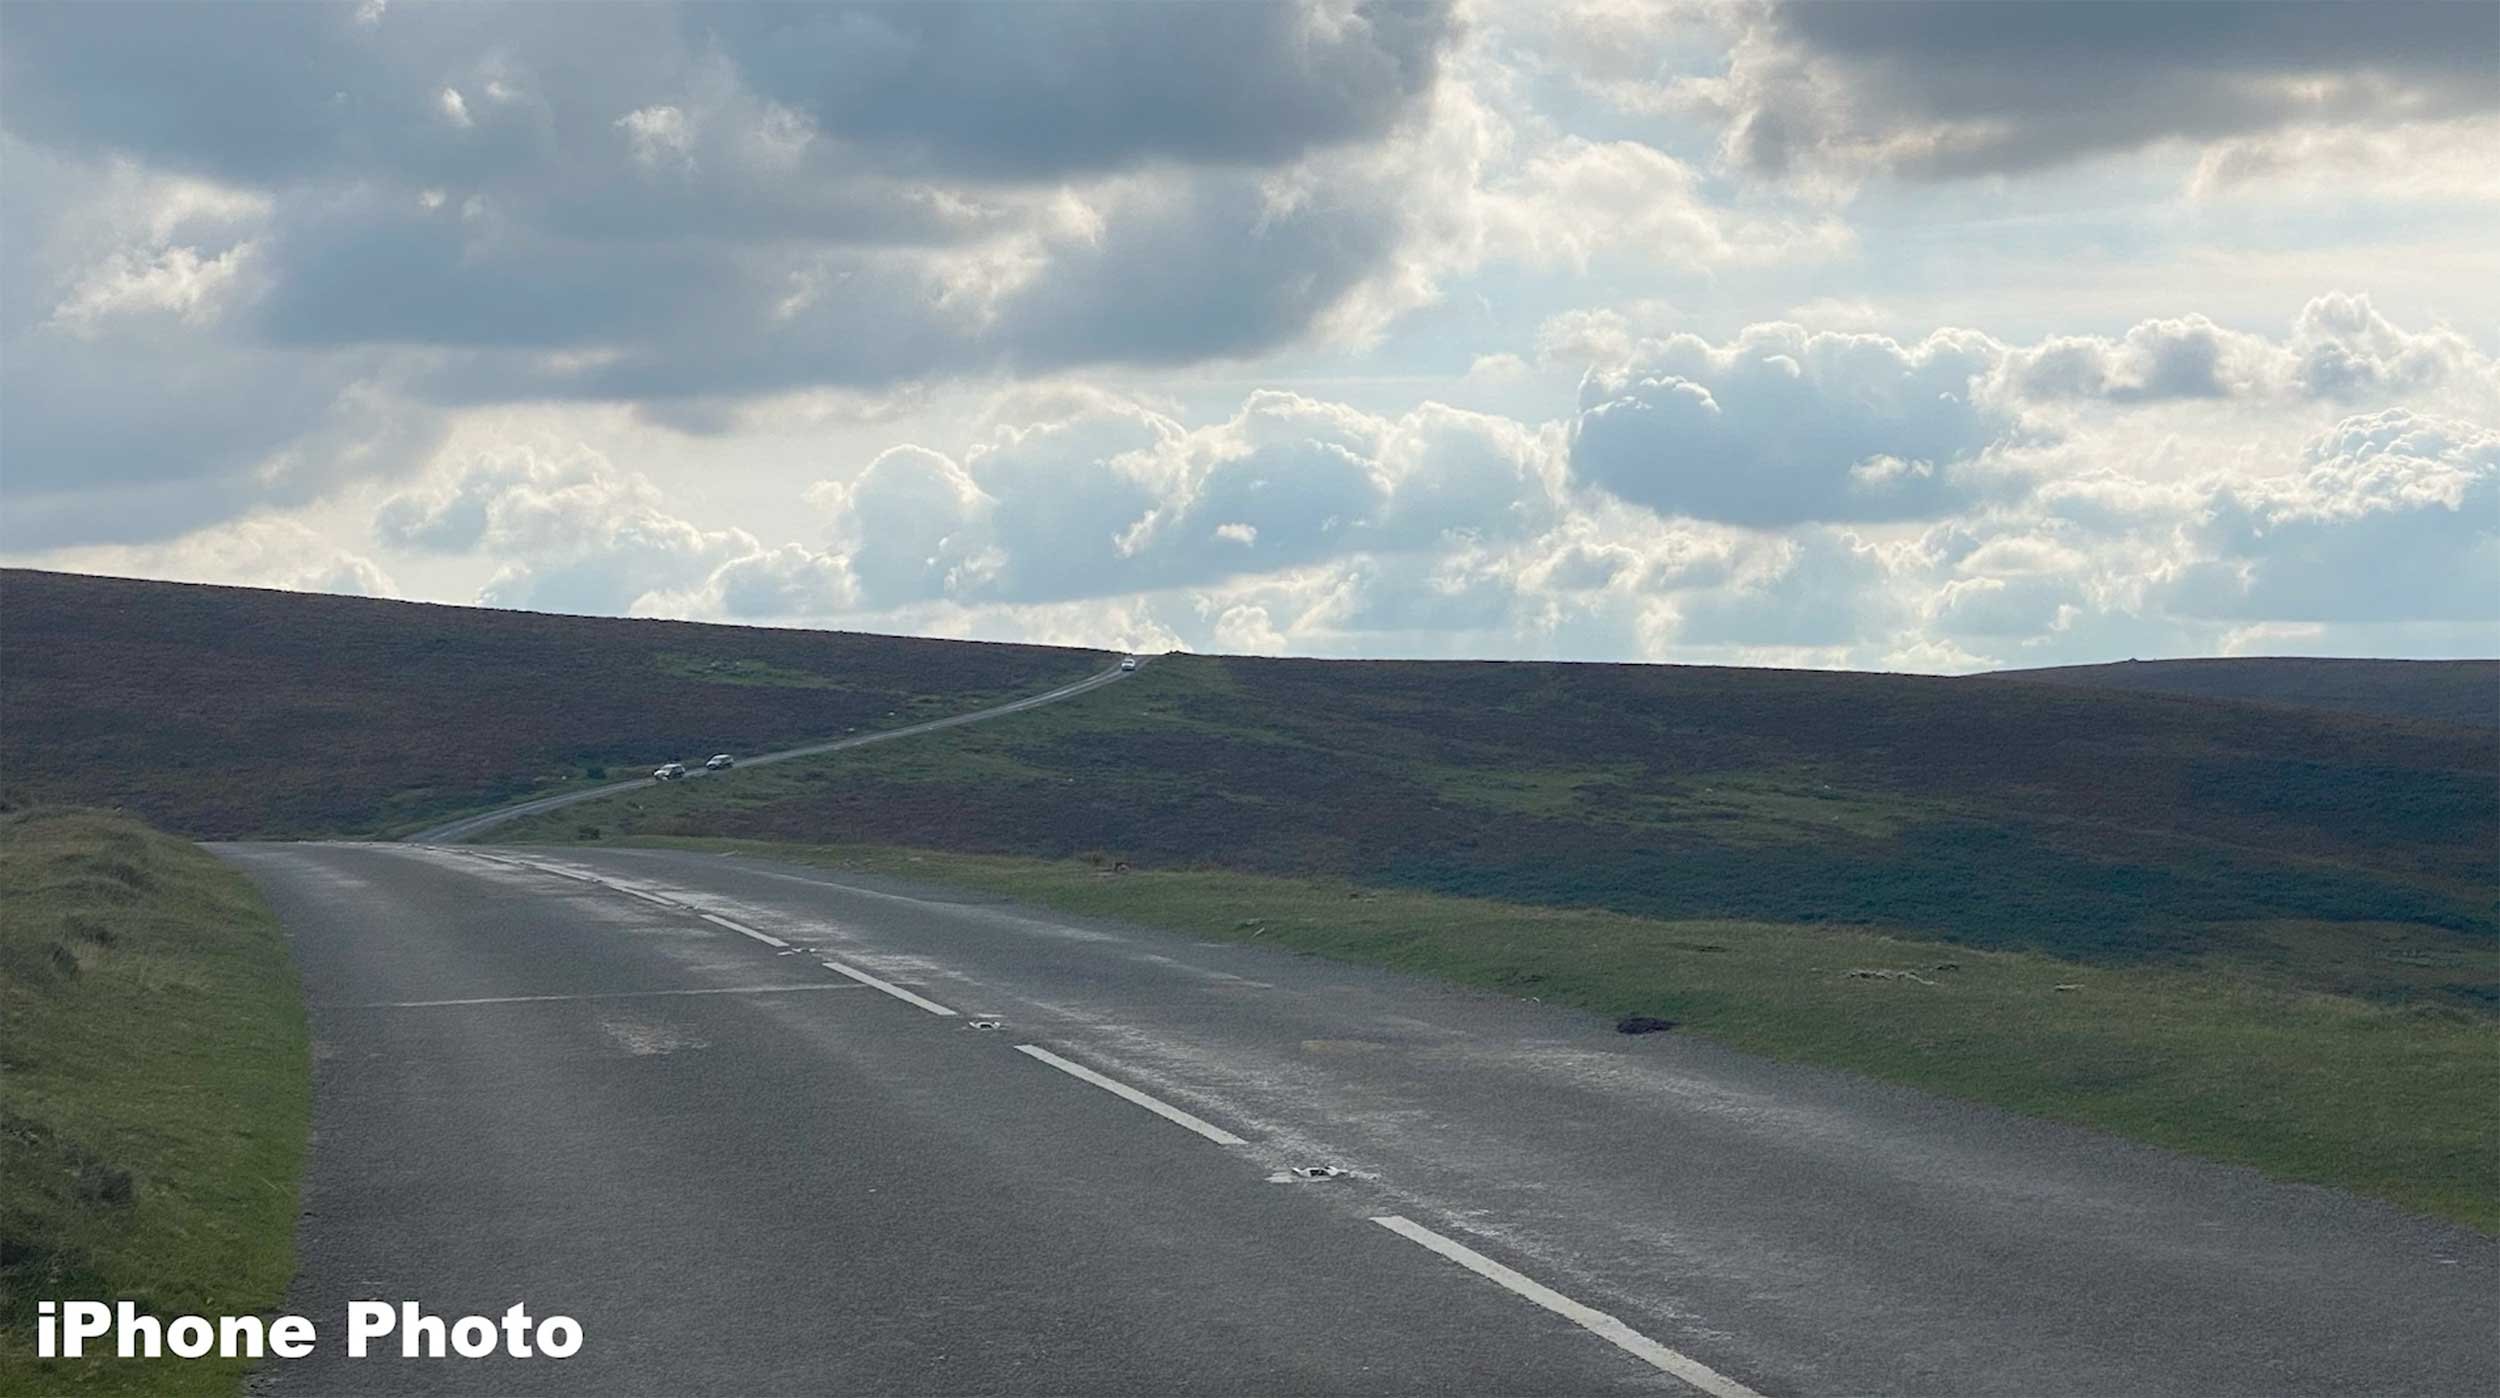
But compare that one to the final retouched image and hopefully you can see how the road in the distance has been brought closer by the using that telephoto lens …

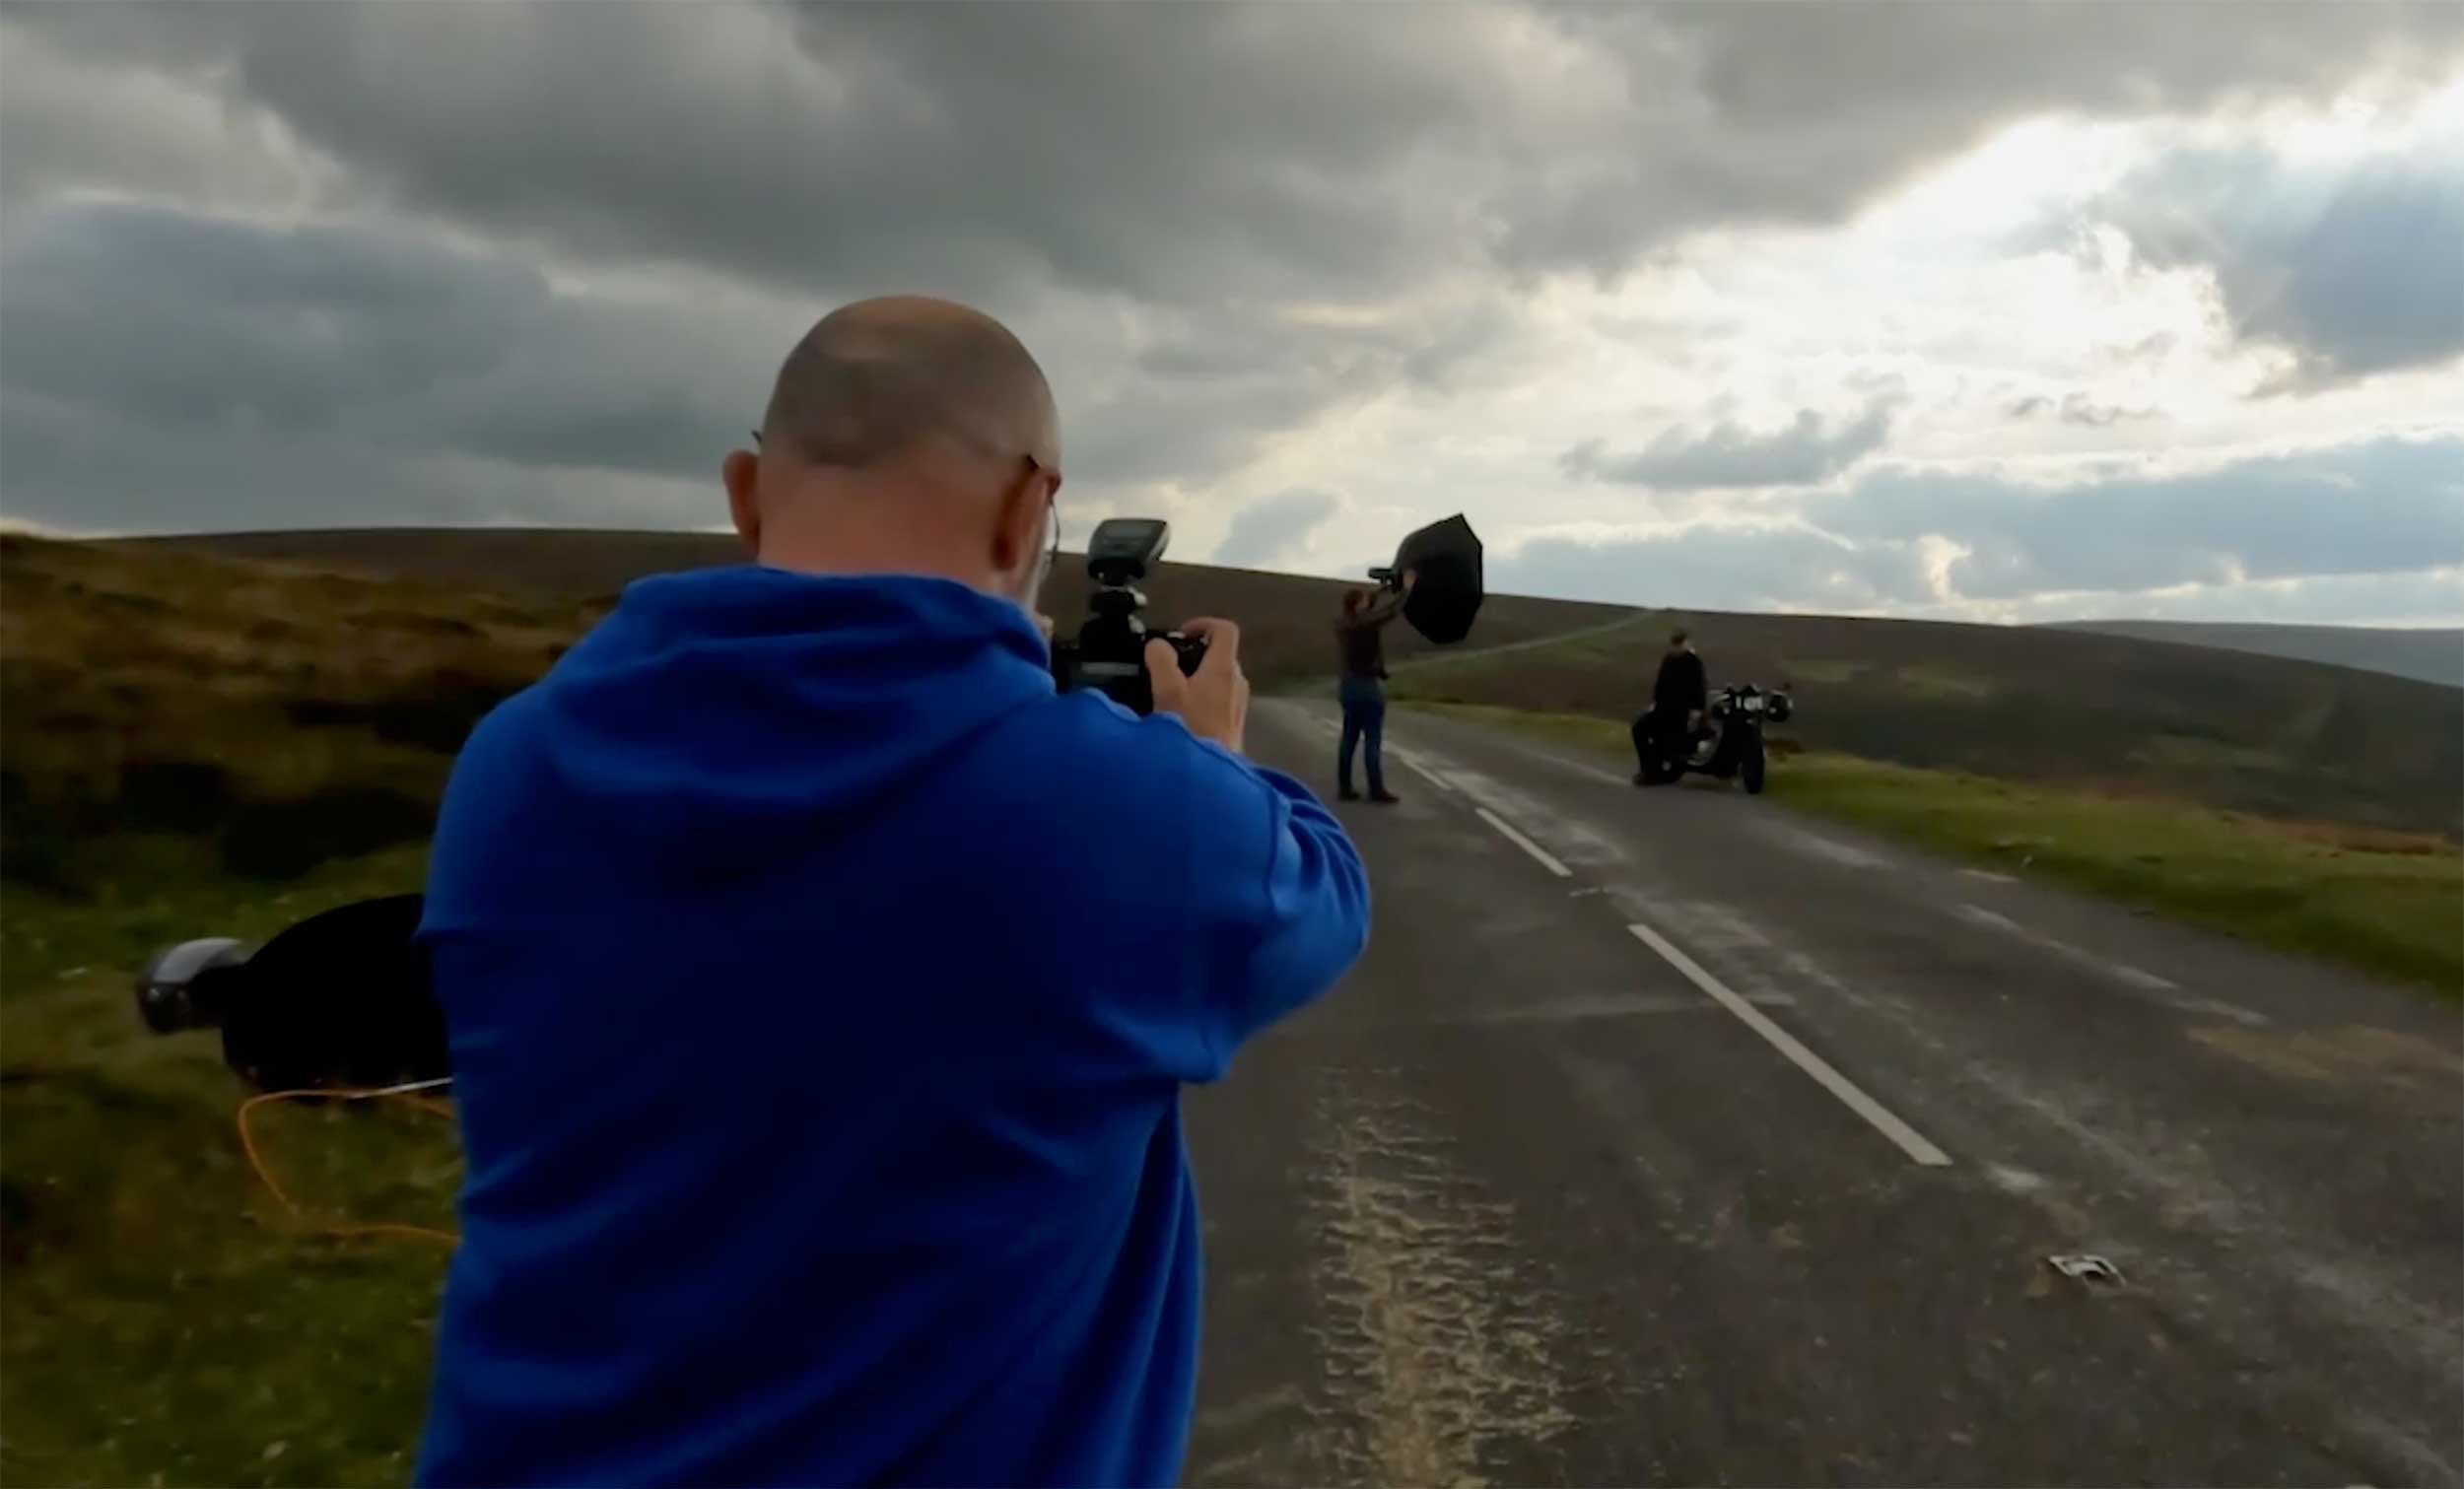
For the lighting side of things, this was actually quite a challenge because even though the location felt like it was in the middle of nowhere, the road we were on did end up being quite busy.
We had to go back in and out of the road with the lighting (thanks Jacob) , but also the clouds in the sky … one minute they were there, the next minute they were gone. They were moving incredibly fast.
This meant one moment we had nice soft diffuse lighting and the next minute we had quite harsh lighting.
The light I used was a Wescott FJ 400; a 400ws light that has its own battery, and I used that with the Large Octa (Rapid Box Switch) which measures 48 inches; the combination of these made them very portable and easy to move around (thanks again Jacob)
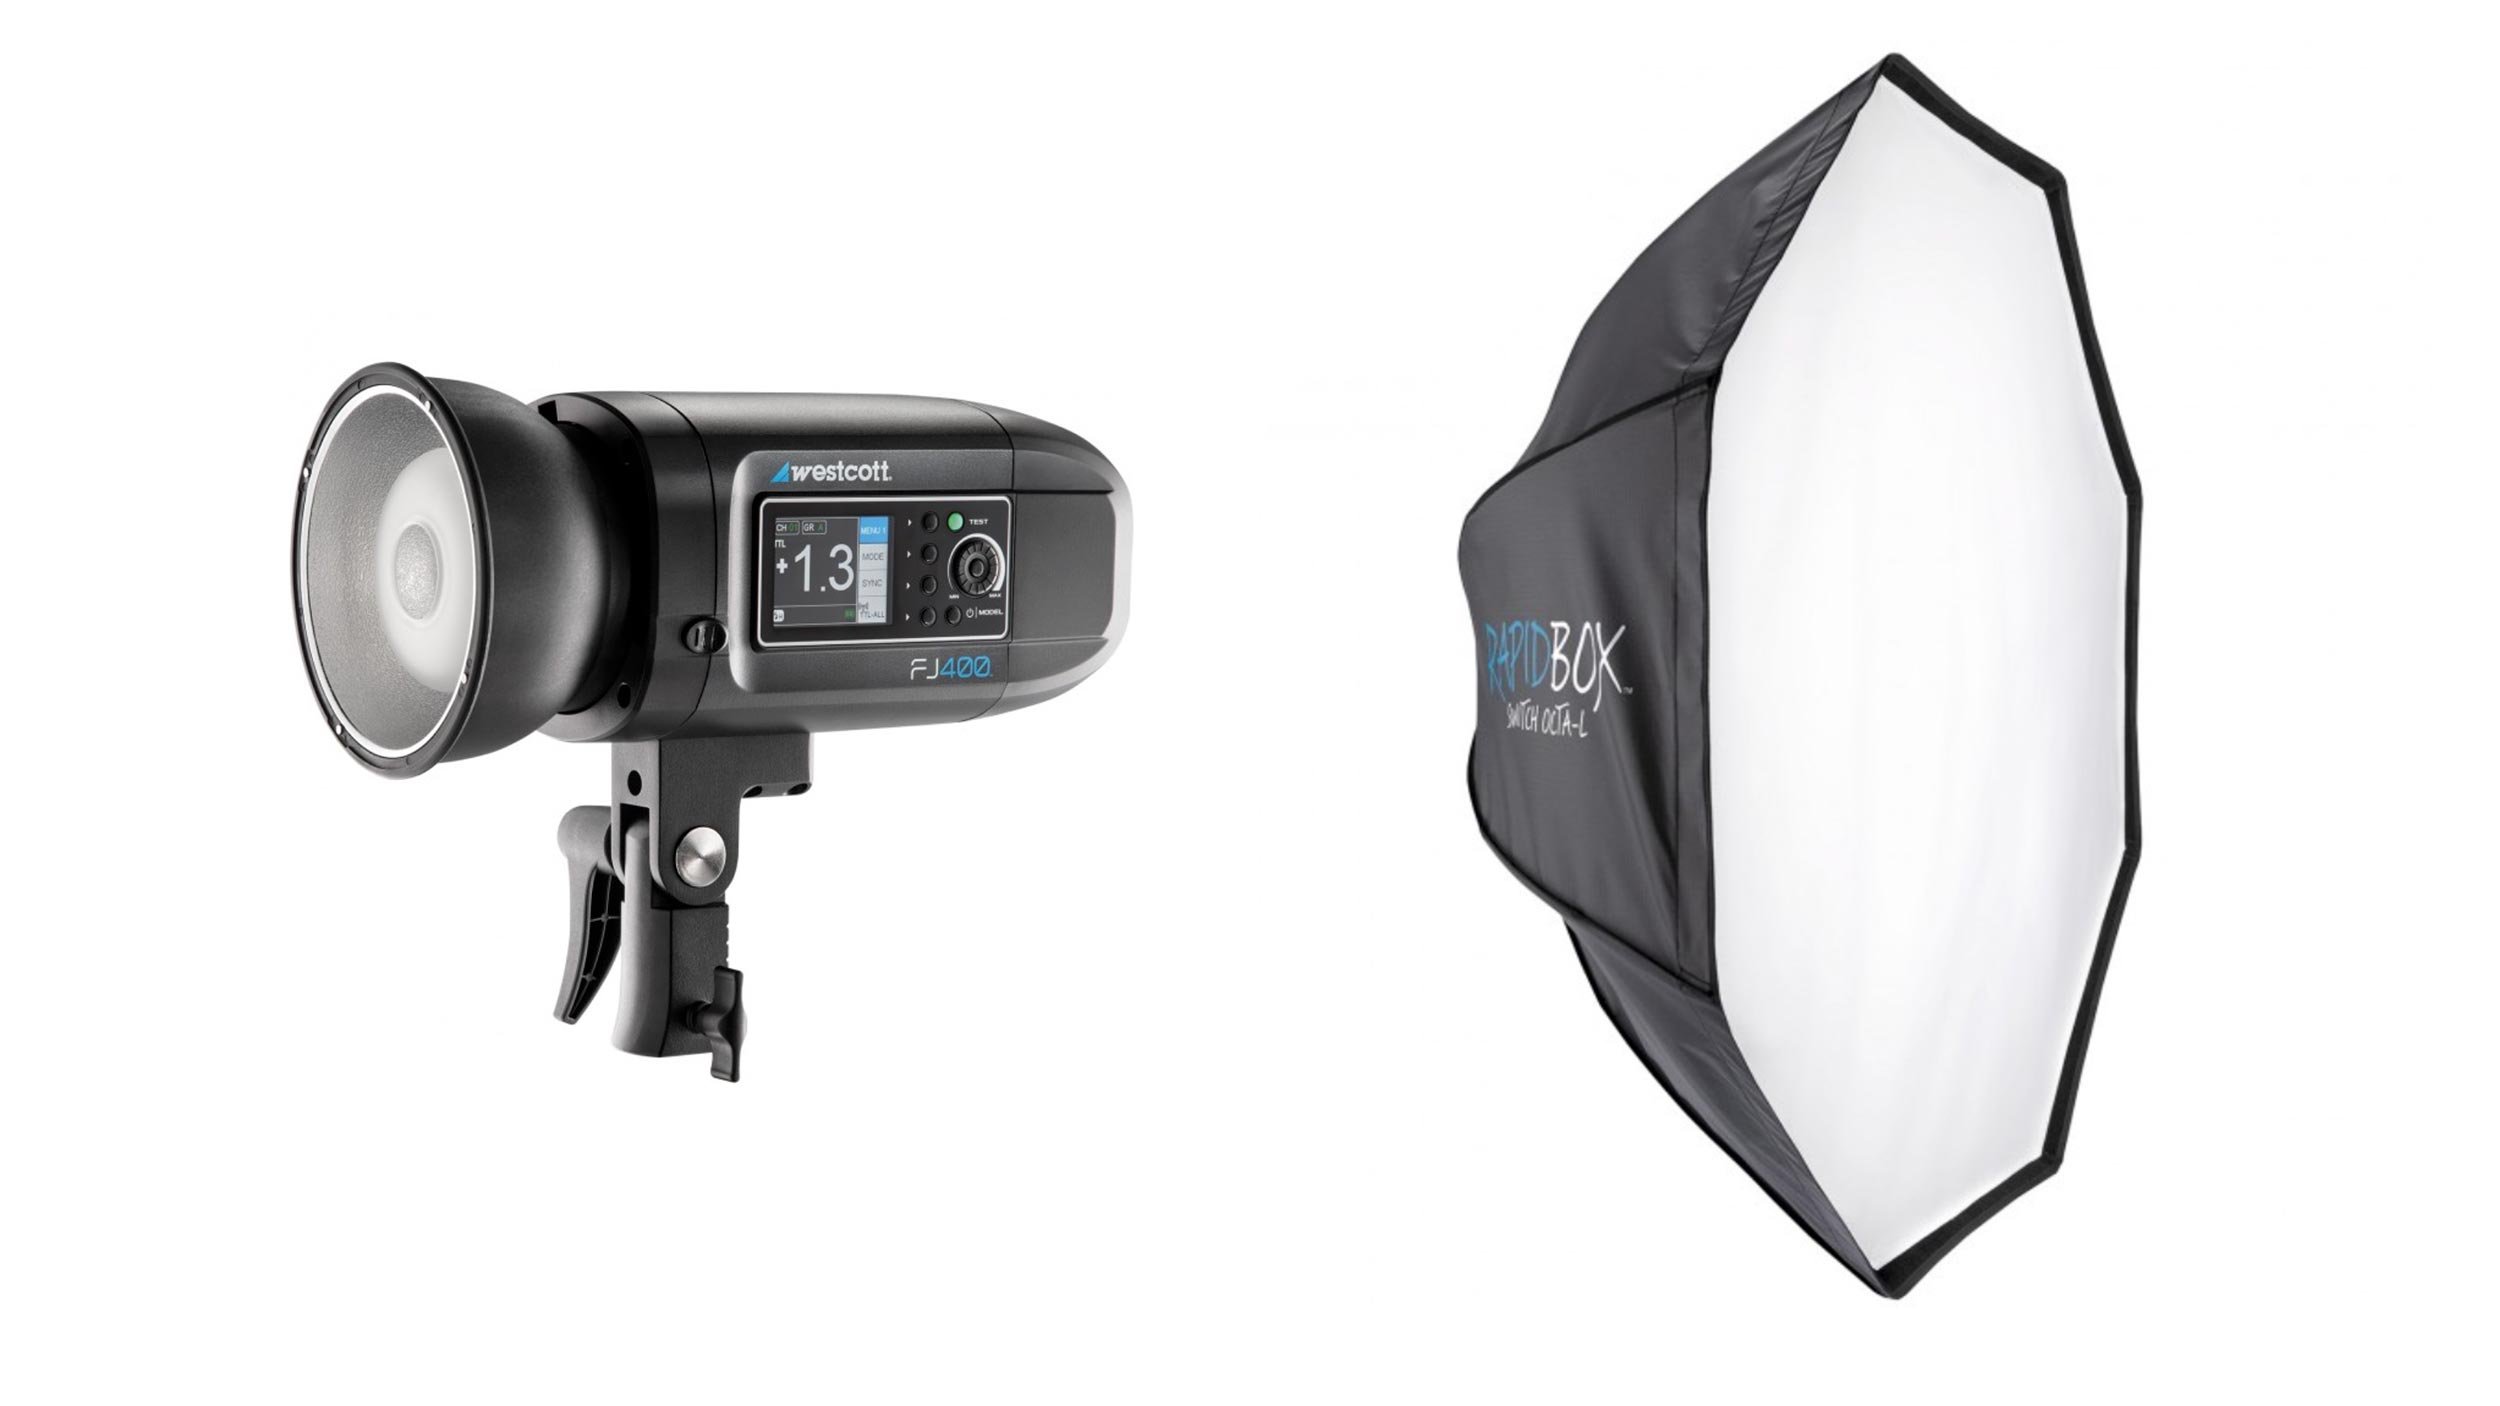
Now because it was a bright day I needed as much power out of the light as possible, but I also needed a soft-ish kind of light to match the lighting in the scene. So to do that, I removed the outer diffusion material of the soft box, meaning there was only one layer of diffusion.

This gave just the right amount of balance between softness and hardness, but also didn't kill too much of the power out of the light (roughly one stop)
Because I was tethering to my laptop I was able to see, on a larger screen, what the images were looking like and check things such as sharpness, composition and so on.
This also really helped with checking out the detail in the sky and although in the out of camera shots there looks to be no detail, there was actually plenty of information there to bring back during post production. No sky replacement needed here 😃

This ultimately meant that I didn’t need to use High Speed Sync (HSS) which although great, because of how it works reduces the output of the flash / strobe so it needs to be in closer. Not using HSS meant I could have the light positioned further away out of the frame.
So there you go, a quick run through of what went on Behind the Scenes.
With the location and the conditions presenting a few challenges, keeping things simple definitely help but also the tethering came in very handy being able to not just see the images that were coming through and REALLY see what was there.
As always, if you have any questions just add them in the section below and I’ll make sure to respond.
Cheers,
Glyn
The Depth Blur Filter in Photoshop works great on landscape pictures BUT trying using it on a Portrait and WOW!
Totally brings it to life and gives the feel of the portrait coming forward of the screen / print! I've been experimenting with this lately and am loving the results! In this video I show you my 3 Step Process...
I'm genuinely thrilled to announce that I’ll be teaching at the Lightroom Virtual Summit 2022, on October 3rd thru 7th, 2022, and that registration is open so you can grab a FREE PASS now …

October 3 - 7, 2022
15 expert instructors teaching 45 classes - over 33 hours of content! … and you can watch it for free!
After the success of the first Lightroom Summit, I’m genuinely over the moon to be teaching alongside a great line-up of instructors: Anthony Morganti, Ben Willmore, Chris Orwig, Colin Smith, Daniel Gregory, Jared Platt, Jesús Ramirez, Kristina Sherk, Lisa Carney, Matt Kloskowski, Nicole Young, Rob Sylvan, Sean McCormack, and Tim Grey.
The change this year too is that we’re all doing 3 classes each!
All classes are free to watch for a 48 period once they go live, and there's an optional VIP Pass available for purchase that gives you lifetime access to the recordings of all classes, along with audio recordings, instructor-provided class notes and exclusive bonuses.
You can get all the details and see the descriptions of all the classes right here: LINK
If the first Lightroom Summit is anything to go by, this is going to be an amazing week!
Hope to see you there … virtually of course 😃
Here’s the result from a recent portrait shoot with Trigga whom I met at a GREAT local Bikers' Café; a completely free spirit who lives life his way embracing and respecting nature and his surroundings.
This was our first shoot together; completely relaxed and gave us time to hang out and chat, so now I simply CANNOT wait for the next one which will be out on location in the Devon Countryside with a Harley.
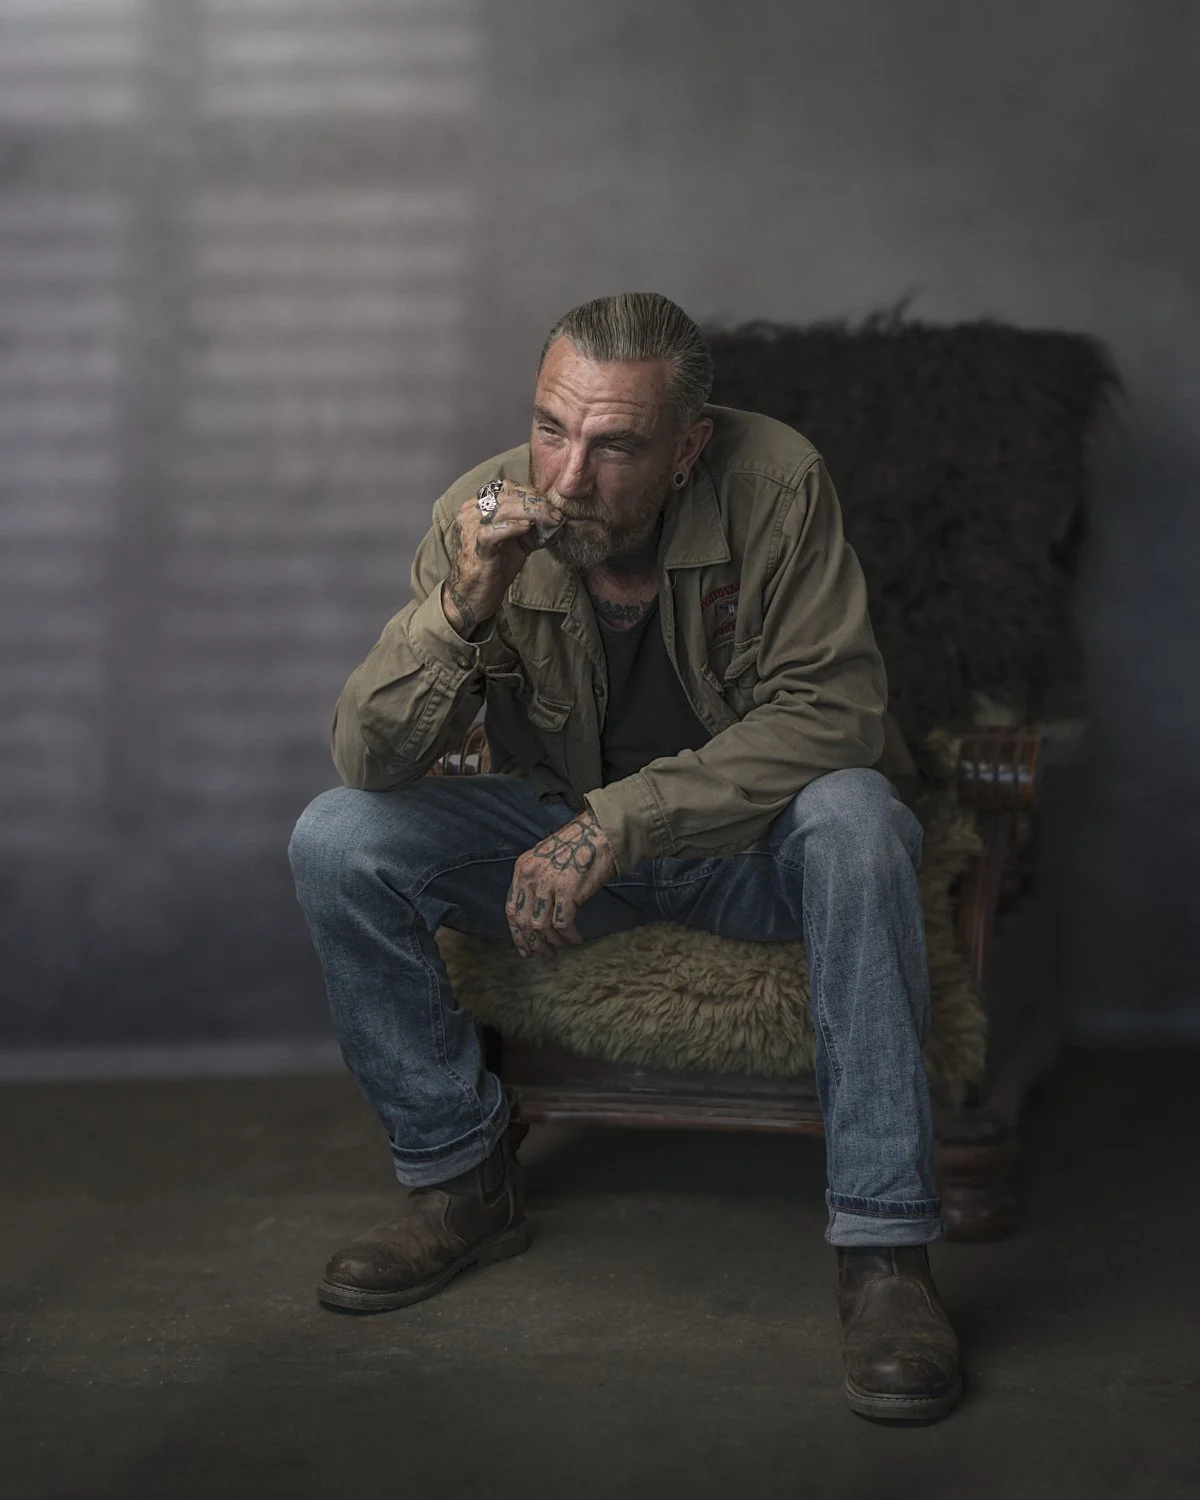
I get a real kick out of how, by using lighting, we can change the look and feel of a location taking especially when doing so takes just a small amount of kit…
If you’re like me, I love to see Behind the Scenes (BTS) so I thought I’d share a grab shot that I took with my phone just before packing away, that gives you a look at what I used and where it was positioned to take the portrait of Trigger…
Westcott Silver / White Reflector - to add a little bit of fill light on opposite side of main light

This was actually the first photo shoot I got to use the new X-Drop Pro Background Stand and my new Glyn Dewis Vintage Grey Canvas Background that is now a material and able to be folded making it way more convenient to transport, PLUS it comes in 8‘ x 8’ and 7‘ x 5’ sizes.
I’ll be sharing a video very soon giving a look at the new X-Drop Pro because, if you’ve seen or have the original X-Drop, this new Pro version is VERY different in a VERY good way!
You can check out the kit above and the new X-Drop Pro over on my GEAR Page.
Anyway, I really hope you like the portrait of Trigga … such a great guy, and I’ll be sure to share images when we get out in the Devon Countryside taking photographs of Bikers and their Harleys, Triumphs, Royal Enfields and so on…
Cheers,
Glyn
Even if you do everything right when printing your own photographs, it might not be your fault they still don't look good ... it could be that you're a Mac user and you're using Apple AirPrint to connect wirelessly to your printer.
Why is this important?
In this video I show why AirPrint is definitely a No-GO and a USB connection is BEST!
With all the recent updates to Lightroom including Presets and Masking, we're able to edit our images FASTER and EASIER than ever before!
In this video I quickly go through the editing / retouching steps from a recent landscape / seascape photo shoot using my drone from capture, blending, changing perspective, colour grading and printing…
Weather Apps … ✅
Tide Times … ✅
Drone Assist and NOTAMS … ✅
Kit Checked and Batteries Charged … ✅
With everything ready, a couple of evenings ago we popped down to Boscastle, Cornwall with the idea of grabbing dinner and taking some photographs in what can only be described as a stunning location.
As it happens, although I had intended to, I didn’t end up taking any photographs with my main camera BUT thankfully had brought along my drone (DJI Air 2S) and with conditions being perfect for some aerial photography, I couldn’t resist…

For the above image looking out from mouth of Boscastle Harbour across the sea, I set the drone up to take 5 photographs in quick succession with each a different exposure (AEB) and then blended them together in Lightroom to create a HDR (High Dynamic Range) image.

I love creating panoramic shots with my drone too; this one and the one below taken using the 180 pano setting in Raw, and then merging together in Lightroom to create the stitched together image.

And of course, I couldn’t resist a Top-Down …

All of the images were processed using both Lightroom Classic and Lightroom Cloud; using both together opens up so many more editing possibilities due to the cloud and Adobe’s A.I. which is a great way to edit fast and get inspired.
I’m thinking about covering this in an video over on my YouTube Channel so if you think it would be worth doing, I’d really appreciate a YEs or a NO in the comments section below.
Also I’m looking at putting together a video and post showing what I check (weather, no fly zones, NOTAMs etc), what I take with me and everything I do to ensure a safe (and legal) and successful flight with my drone when filming or taking photographs, so again if you think that would be something worth sharing, just let me know.
Thanks for looking in,
Glyn
© Glyn Dewis 2024