
I’d not managed to get out for some landscape or seascape photography this past few weeks, what with a new site and recording some new content, however, last Friday I did, as I headed down to Sandymouth in Cornwall and met up with my friend, Doug Insole.

Sandymouth, being North Cornwall, didn’t take too long to get there (a little over an hour) and this was to be my first time there. Doug had been a couple of times before and I’d seen some of the photographs he’d taken there which were stunning, so I was really looking forward to heading down and also having a catch up.

What3Words ///options.whizzing.tight
Doug had done all the research with regards to the tide times, expected wave height, weather conditions, cloud cover and all that kind of stuff and sure enough when we got there, the Weather Guessers seemed to have hit the nail on the head.
Conditions were absolutely perfect for some long exposure photography, and wow, what a stunning location!
We arrived around 5pm with the high tide expected at 5.20pm, and had to wait maybe an hour or so before some of the hidden rock formations became visible. This gave us plenty of time to set up kit and think about where we would position ourselves; this being made a lot easier from Doug having been there before.
Waiting for the tide to recede so that we could get closer to the rocks
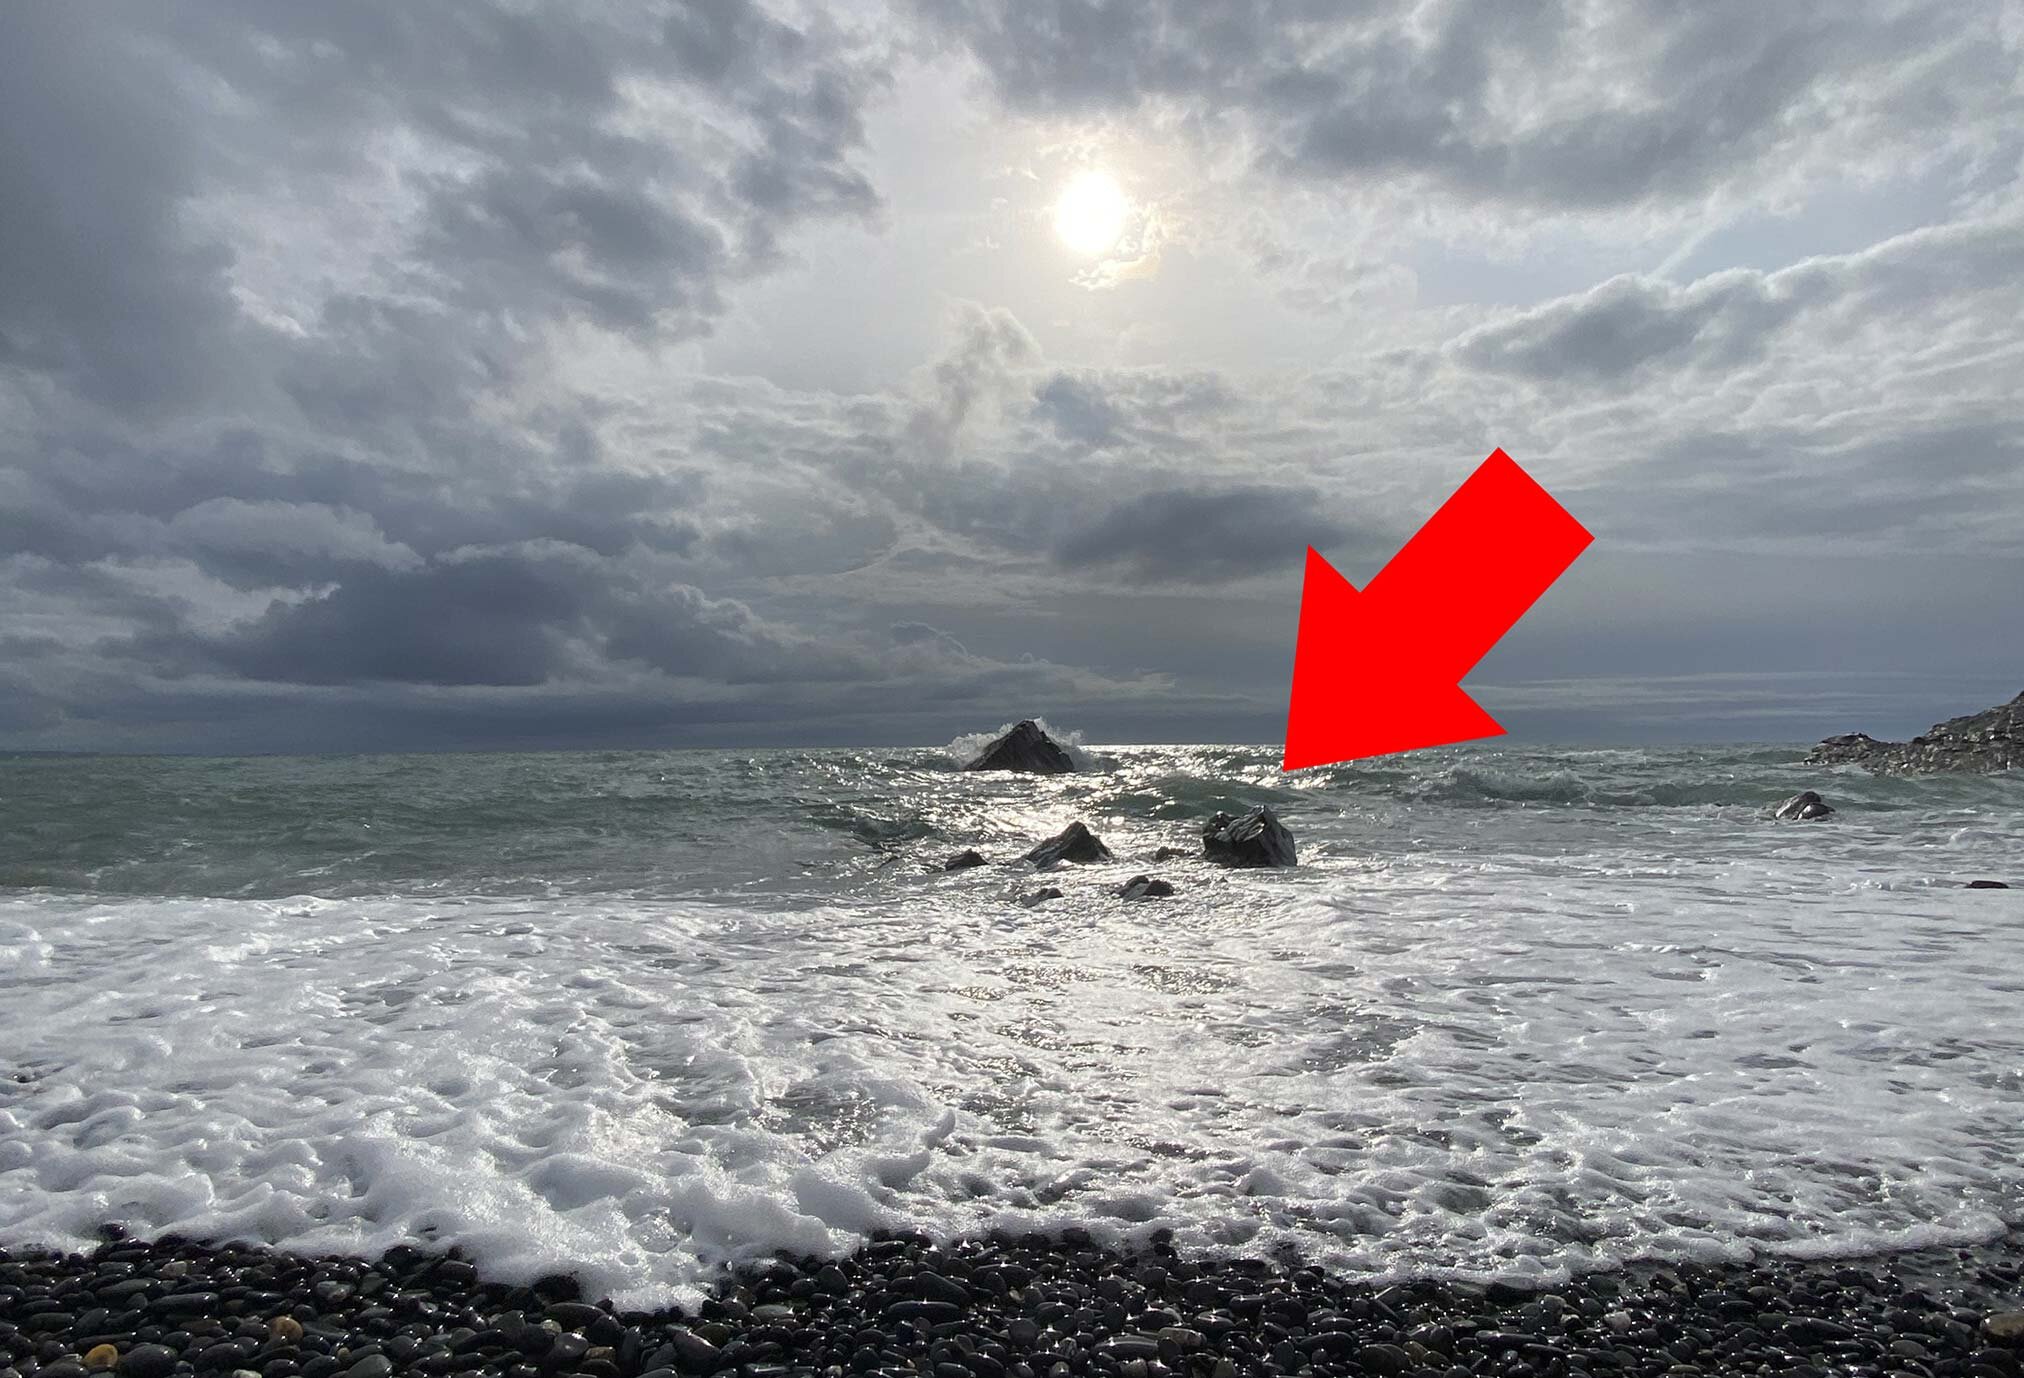
Soon enough, the rocks that Doug had mentioned about started to reveal themselves, and with quite a lot of movement in the sea with waves crashing against them, we just knew this was going to be good.
We both started taking a few test shots in preparation, to see what shutter speed we’d both be looking at to get the look we were after for the sea…

Random test shots to help decide on a Shutter Speed
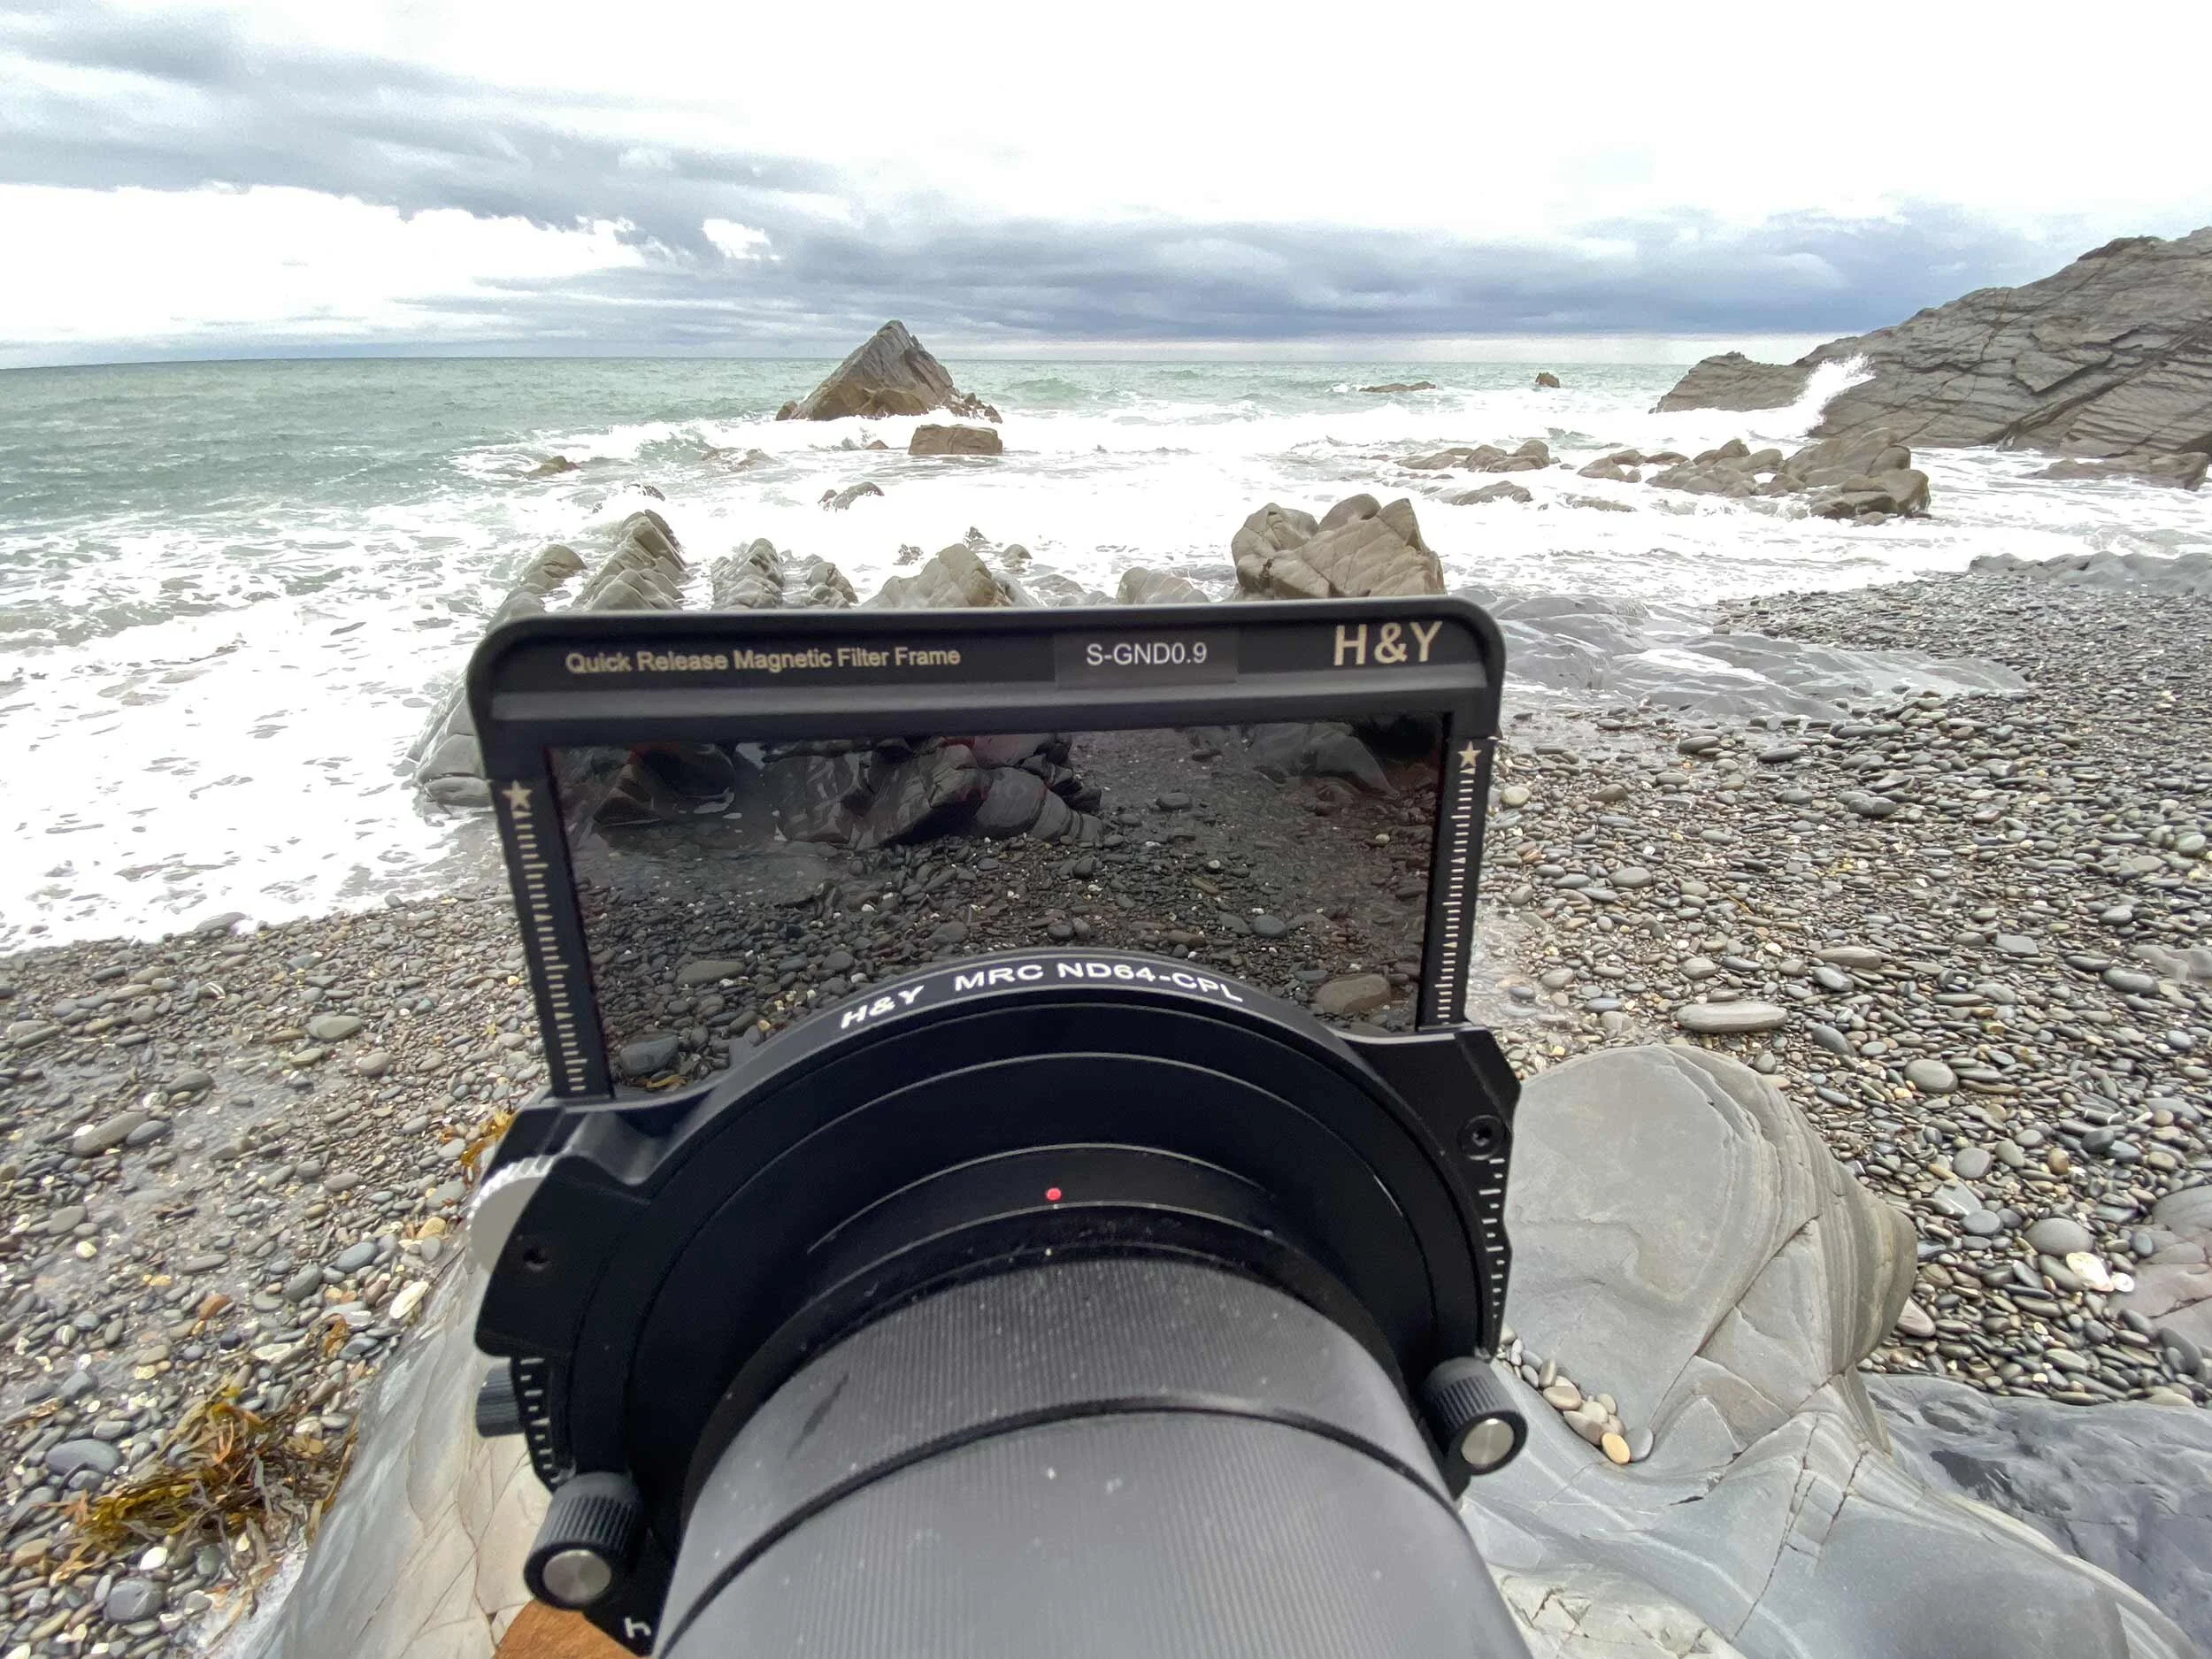
I can’t remember what Doug went for, but using a 6 Stop Neutral Density Filter and a 3 Stop Soft Graduated ND Filter (kit list below) my settings were always around ISO 50, f/11 and a 1 second exposure, so as to guarantee me not just the look I was after but also a clean, sharp file.
It always amazes me how quickly the tide changes and the speed in which it goes out (or comes in) because it wasn’t long before we were able to move further forward down the beach to line up a better composition…

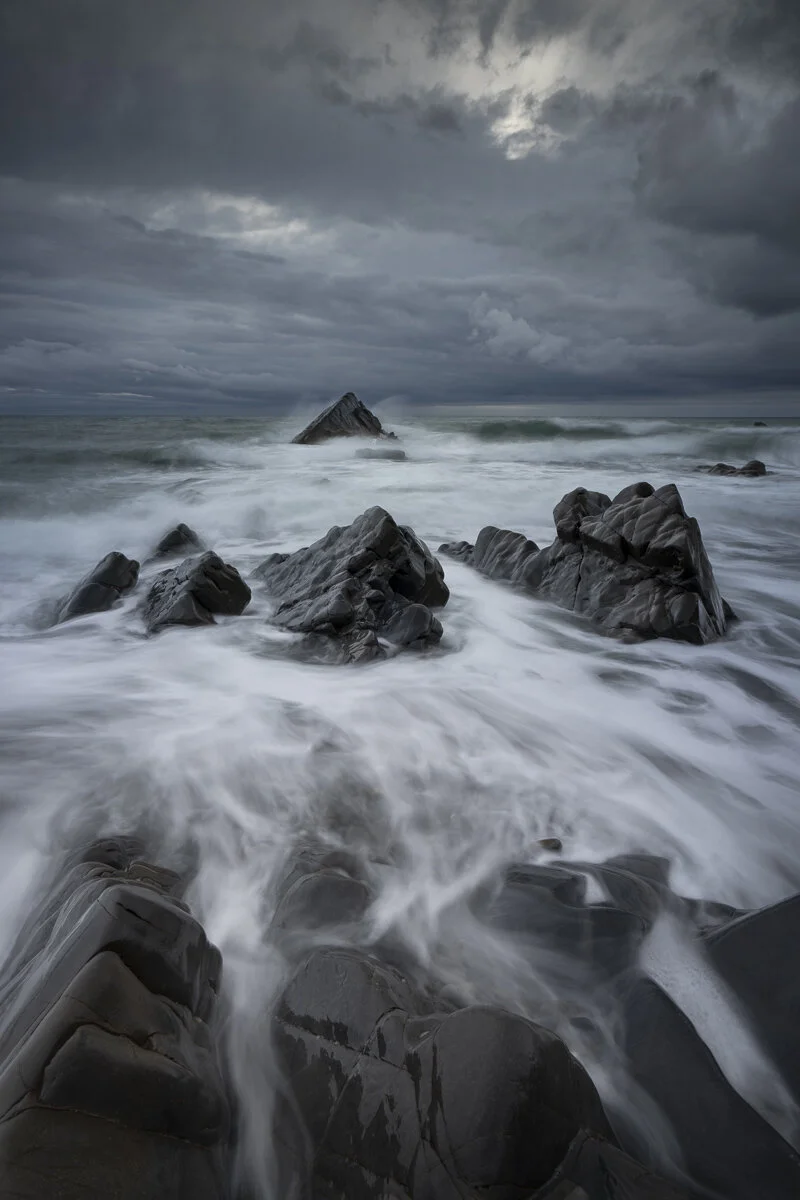
Using a cable release meant that once I’d set the focus about 1/3rd of the way into the scene, I was then able to stand up, hold it in my hands and relax, watching the sea and anticipating when a wave would crash against the pyramid shaped rock in the background.
Note: With the focus, I’ve set my camera up to use Back Button Focus, meaning that the shutter release has one purpose and that is to take the photograph, unlike the default being a half de-press activating focus. This basically means that when I press the cable release there is no delay from the camera trying to focus before taking the shot.
Here’s a couple of my favourites that I captured from this point, trying both a portrait and landscape orientation…

We stayed at this particular point, making slight changes to composition, until the foreground interest of the sea around the rocks, had receded, and then made our way through (and when I say through I really do mean through) a gulley to get to a part of the beach that is only accessible once the tide starts to go out…

Heading through the gulley still had the sea not far short of waist high in places, so before doing so, we both packed our kit away into our backpacks, and used the tripod with legs extended as an added bit of support when stepping on rocks and being in and out of the water.
Note: This is only advisable and safe to do, on an outgoing tide
I got a few shots in this location but nothing that I’m as happy with as the first location. Still, that doesn’t matter because it was such a great spot and there’s always a next time.

KIT / GEAR
Ok so with regards to kit / gear, here’s what I was using…
Sony A7RIV
Sony 16-35mm f/4.0 Zeiss
Tripod & Cable Release
H&Y Circular ‘Drop In’ 6 Stop ND Filter and Polariser
H&Y 3 Stop Soft Grad’ Neutral Density Filter (Magnetic)
I’m loving using filters when out ‘in the field’ having never used them in my portrait work; controlling the brightness of the sky whilst maintaining detail in the lower areas of the scene, the creative options with slow shutter speeds and so on.

H&Y Circular ‘Drop In’ 6 Stop ND Filter and Polariser (LINK)

H&Y 3 Stop Soft Grad’ Neutral Density Filter (Magnetic) (LINK)
Strange as it may sound coming from a portrait photographer, but using this kind of kit and seeing the picture develop on the back of the screen as you slide a gradient into place or rotate a polariser, feels so different. It kind of feels therapeutic. A totally different feeling to when I am taking portraits, which I of course love doing; this is an equally enjoyable but very different experience, and I can’t get enough of it.

When the tide had receded, the sea had calmed and we were losing light, we then headed back to the car park which is just a couple of minutes off the beach, and took time to just chat and have a bit of a picnic of a scotch egg, cheese & onion roll and a mug of coffee, which finished off what was a superb evening of photography; stunning location, fresh sea air, perfect weather conditions and great company which, as someone once said, “Doesn’t get better than this”