Lightroom is for Photographer's who take the picture correctly ... REALLY???

Had to share this and to ask your thoughts...

So my most recent video which is only 9 minutes long is all about Color and which Color Space (sRGB , Adobe RGB , ProPhoto RGB ) to use for Photography ... Editing , Printing , Sharing , Posting on the Web ... Comments have been fantastic BUT one posted yesterday stopped me in my tracks; this is it...

Photoshop is for people who are engineering images.
Lightroom is for photographers who take the picture correctly the first time.

I disagree.

Lightroom is getting better and better. It's exciting to see the enhancements BUT there are things we can do in Lightroom now that only a short while agree would only have been possible in Photoshop; in fact, Lightroom's full name is ... Adobe Photoshop Lightroom.

We would always see and hear the “I like to get it right in camera” comments (well...don't we all?!?) but this made me think ... will we now start to see the 'I only edit in Lightroom' comments as being the modern day Put Down attempt ?

Images are edited.

They ALWAYS have been.

Even choosing a paper is (in my opinion) editing, because paper influences the look / feel of the final image.

Just a thought 🤔

Anyway, if you haven’t see my Color Space video, here it is …

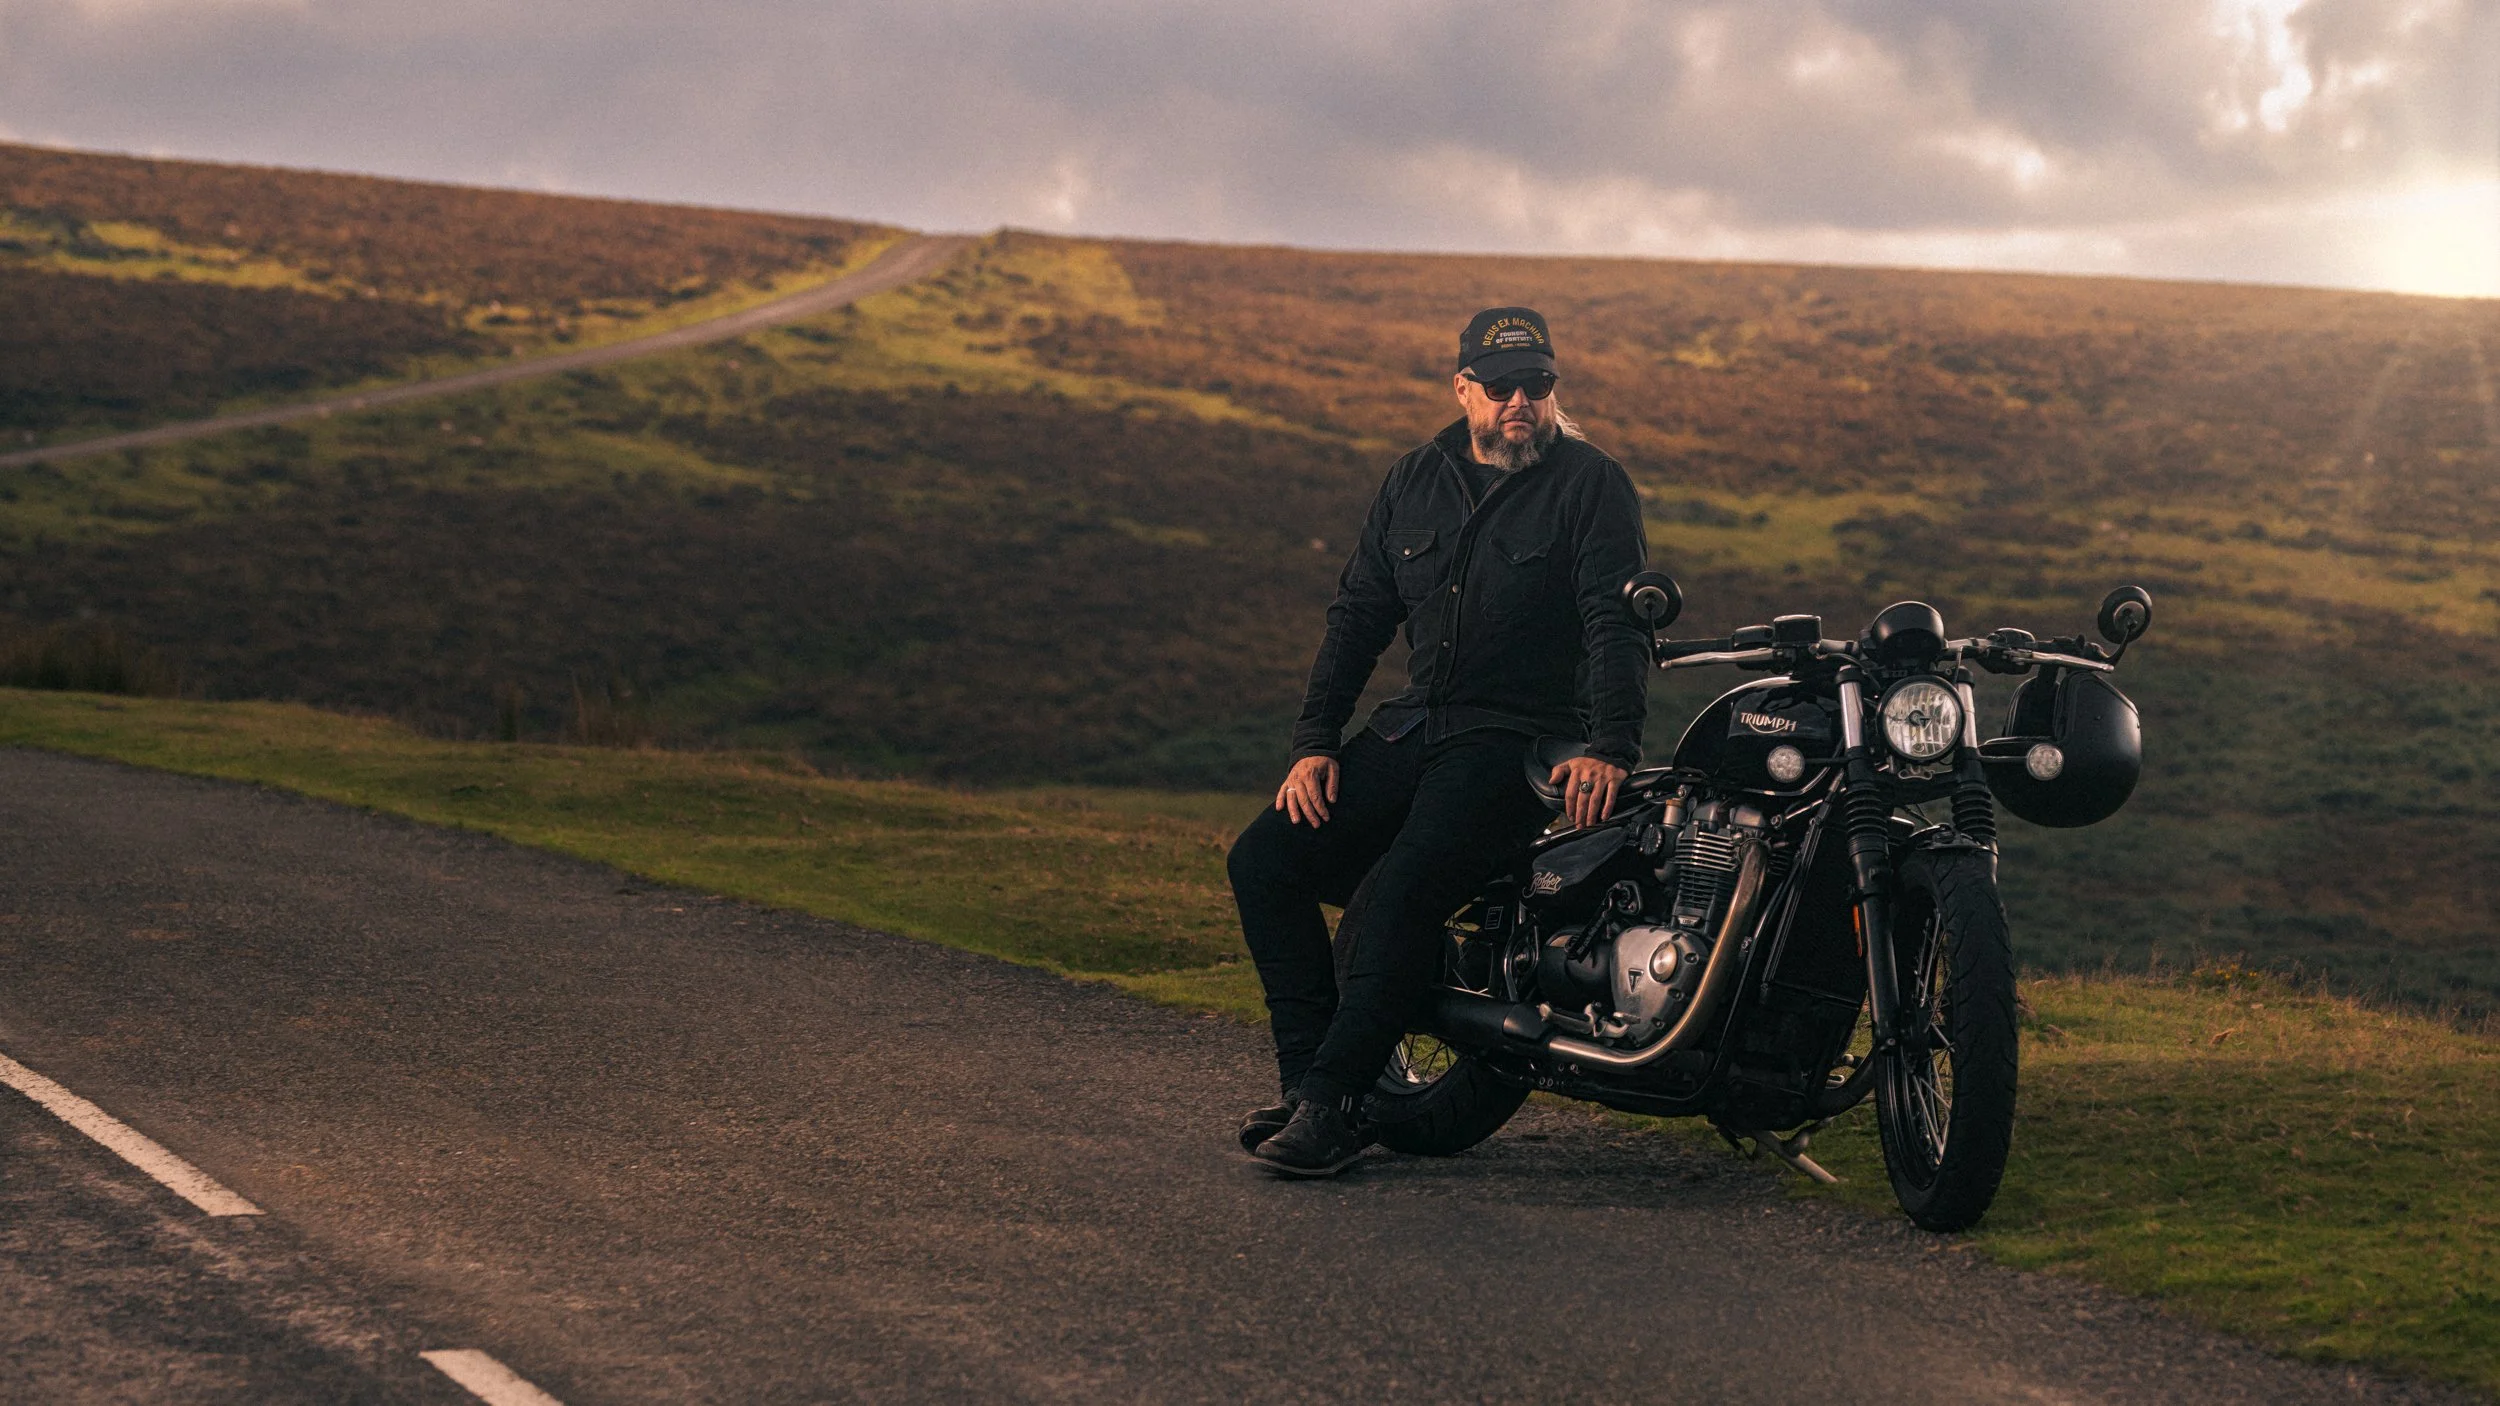
Portrait of a Biker with his Triumph on Dartmoor (Behind the Scenes)

So last week I was out in the Dartmoor National Park in the South West of the UK photographing a GREAT Guy and a GREAT Motorcycle.

With rolling hills and roads that twist and turn and disappear over the horizon line, Dartmoor is a fantastic location for photography … especially the motorbike kind, so when Matt agreed to being in front of my camera, we just had to head out …

When there, the very first thing to do was to find a composition; not an easy task with so many possibilities but so few safe areas to park up with the roads being narrow.

Finding the composition is always the hardest part, and it’s all about finding a fine balance between the background, but also where you are going to place the subject.

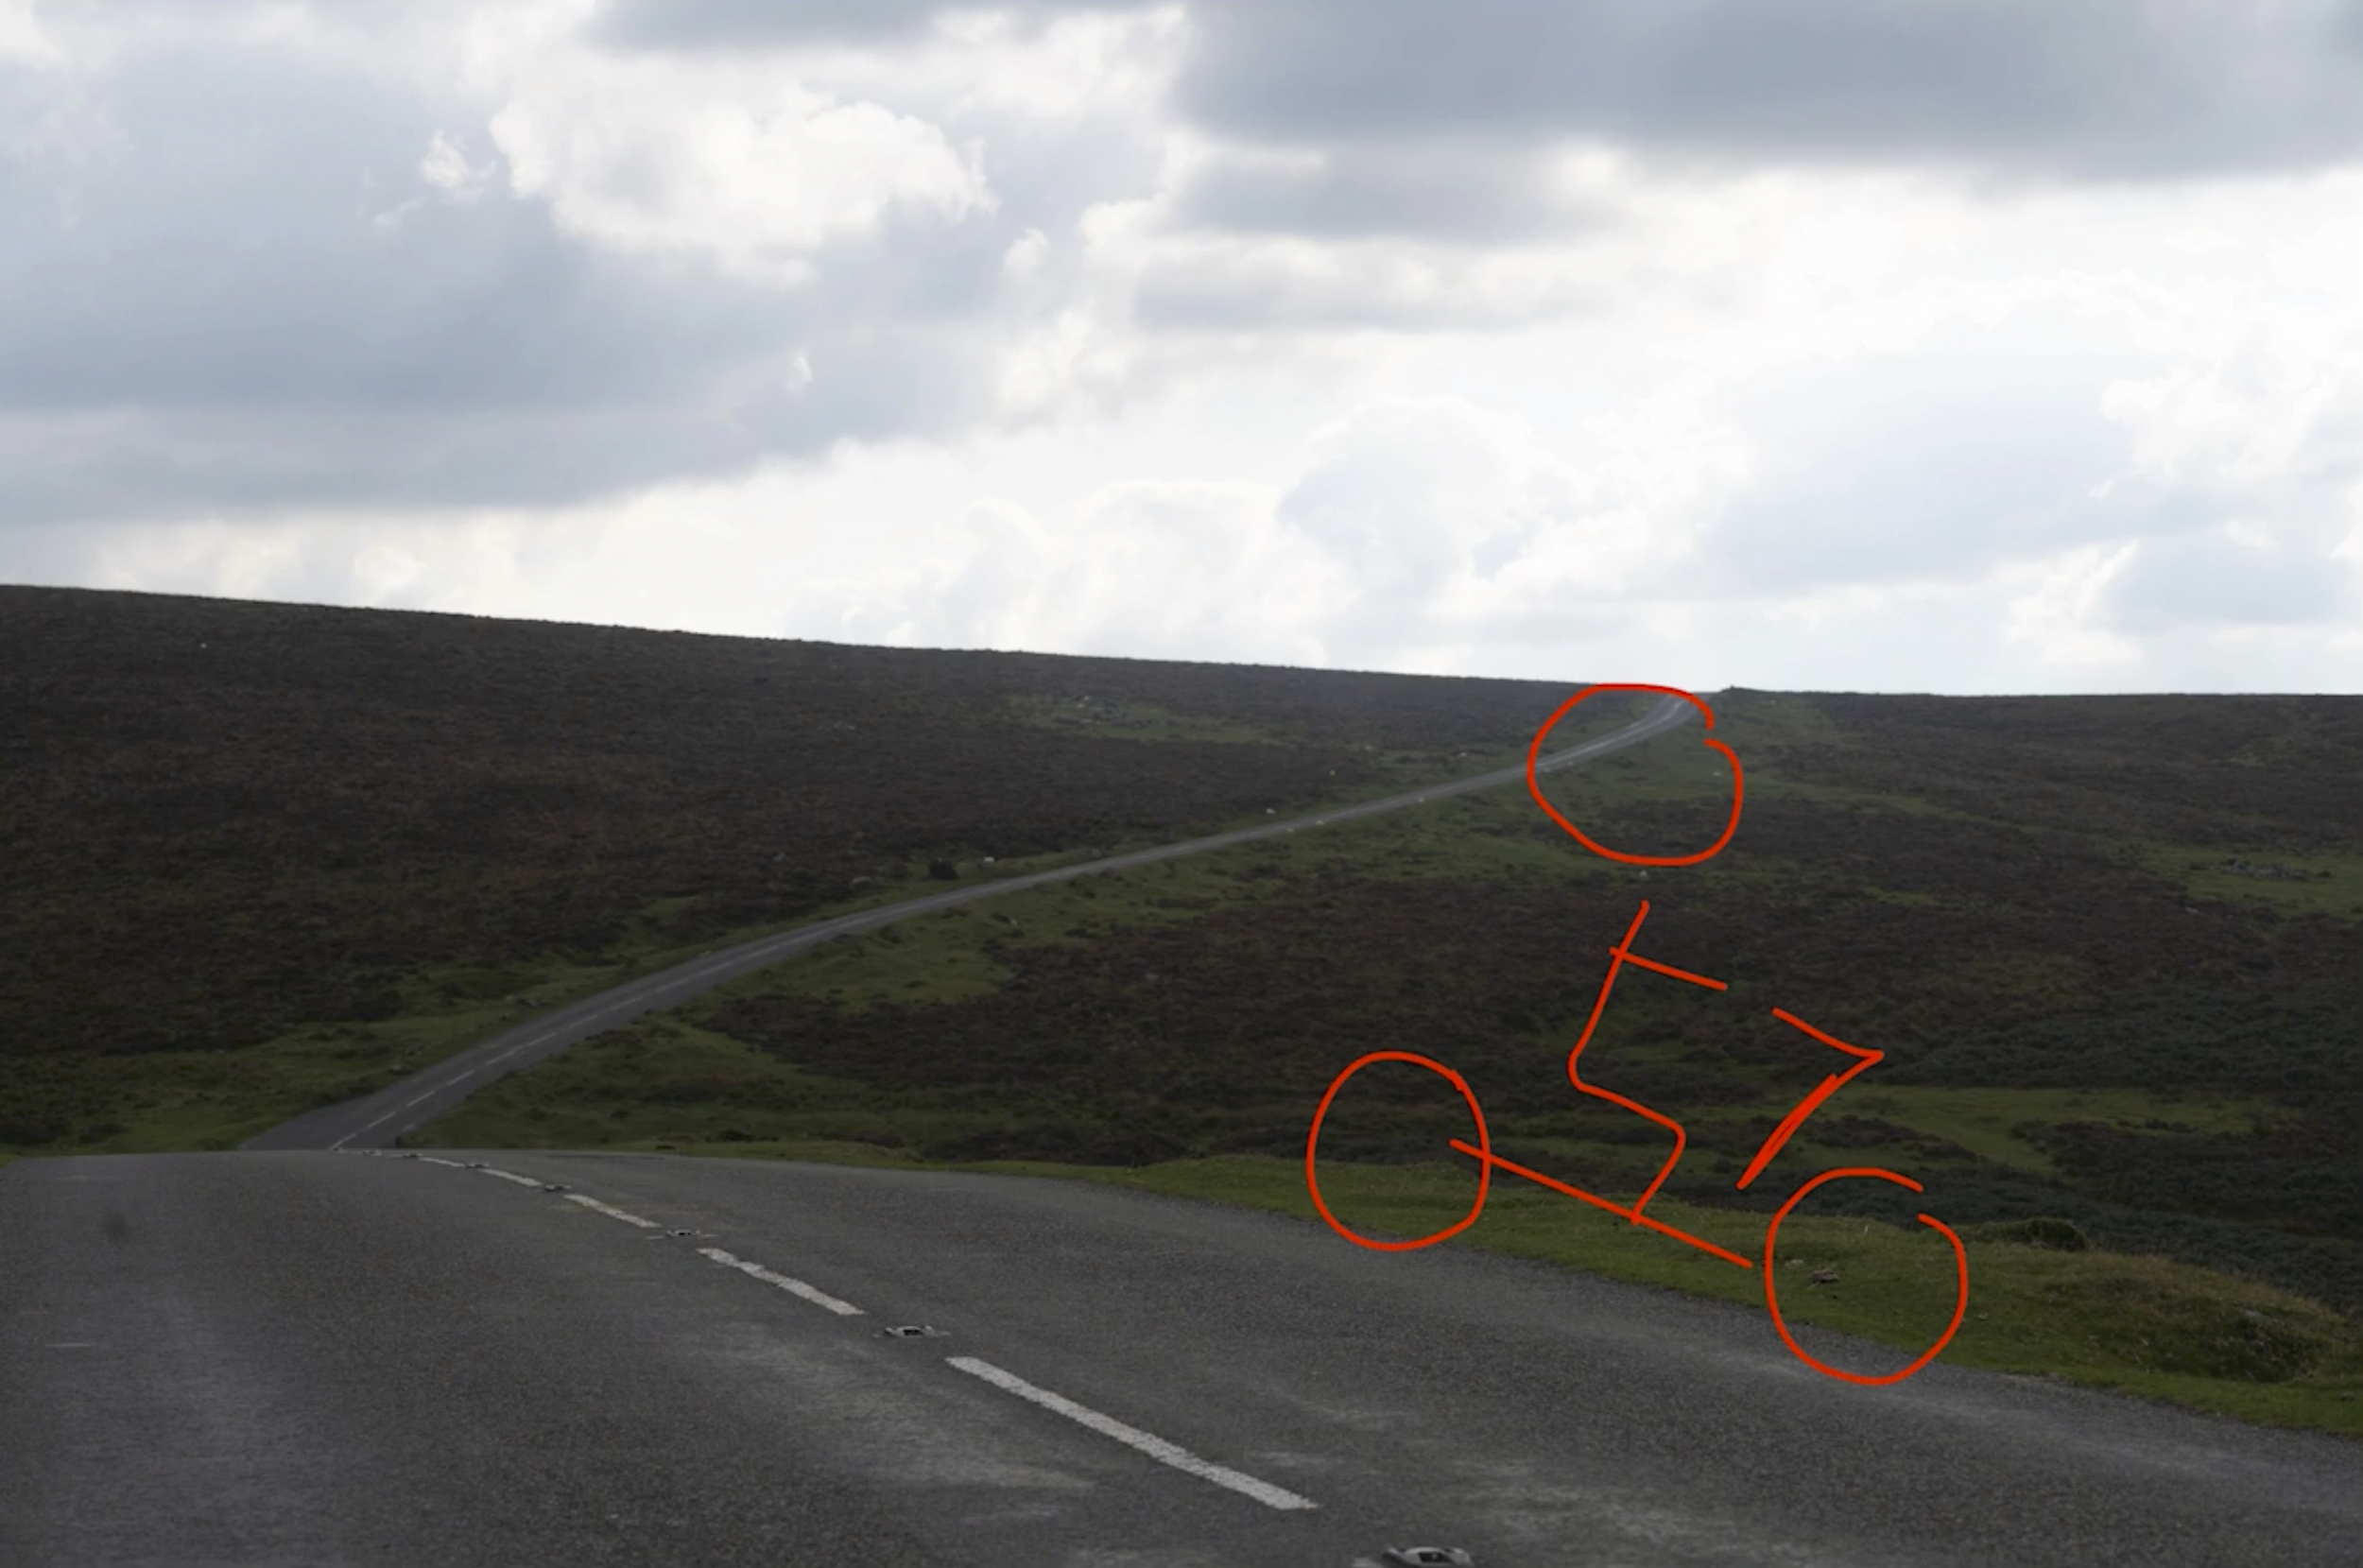
Now this here (below) would have been great, and maybe I'll try next time, but placing the subject (Matt and his Triumph) to the right of the frame would have meant that his head would be blocking part of the road in the distance.

So that didn't work for me.

We tried moving along a little bit and tried some different compositions, some with the camera angle, much lower down so that Matt was above the horizon line to give a bit more of a dramatic feel …

But, the one I was most happy with was the one below, which to me gives a nice balance between the scenery, the road and the biker, and although you don't see the way the road twists off to the left down and then up, you do still know it's the same road that the bike is on, that then goes off into the distance …

LENS CHOICE

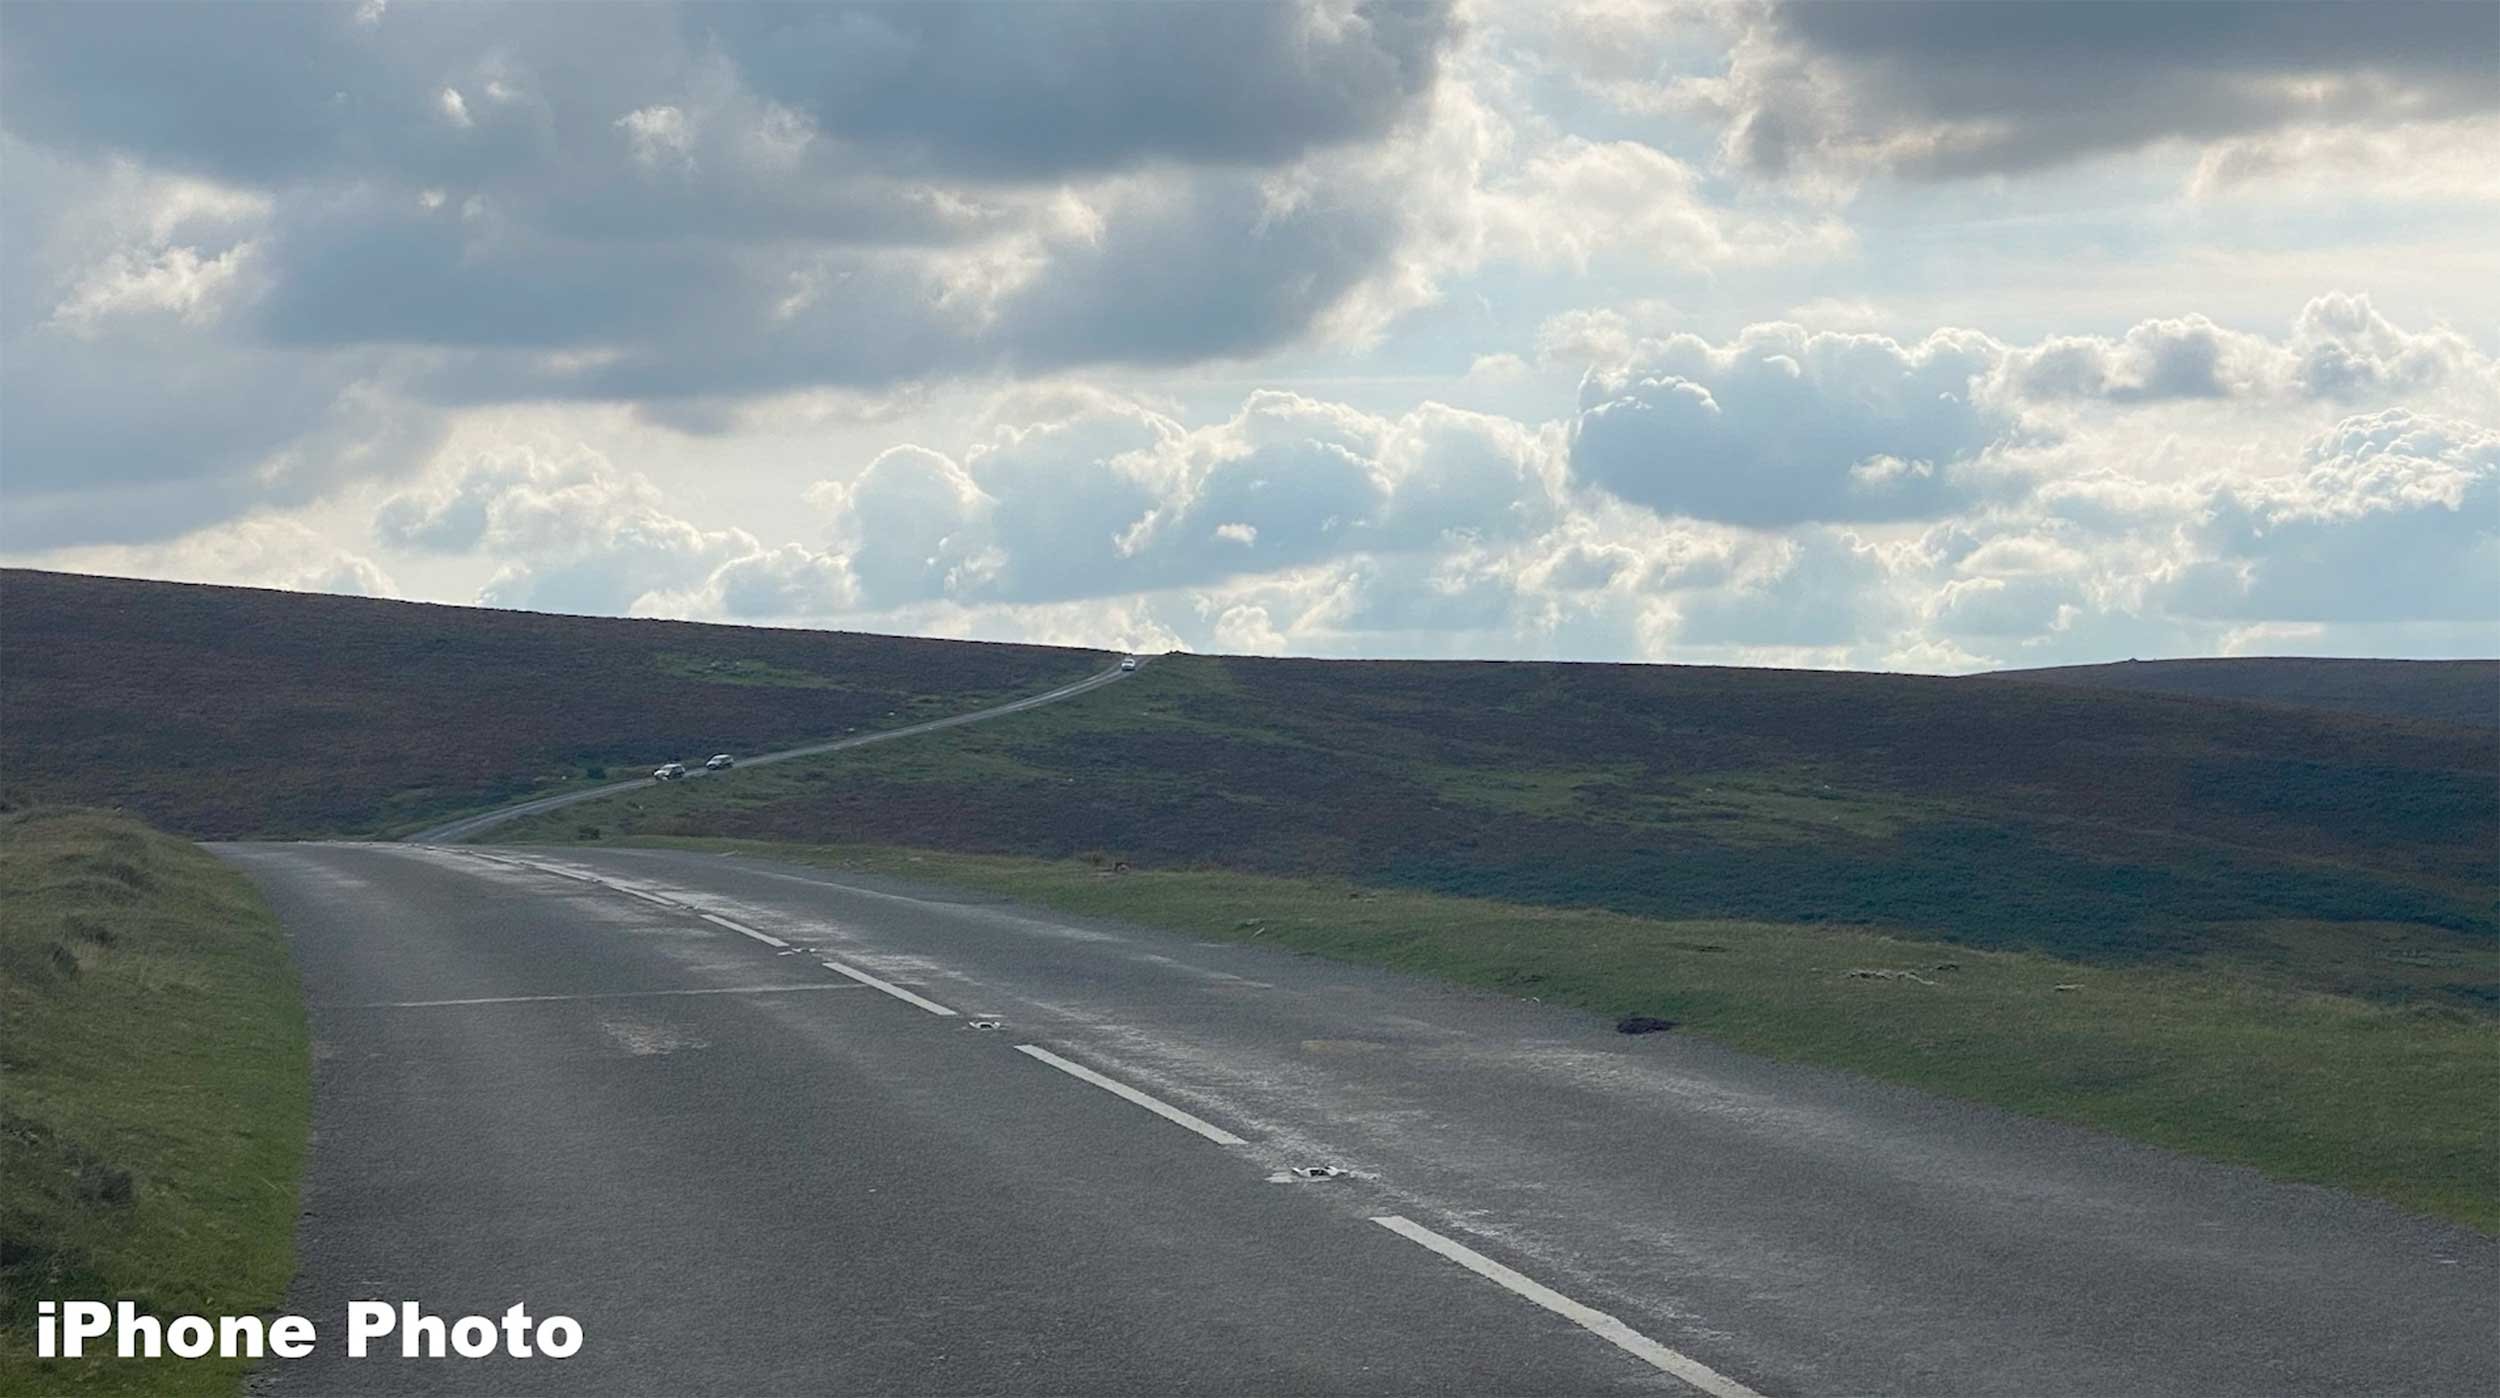
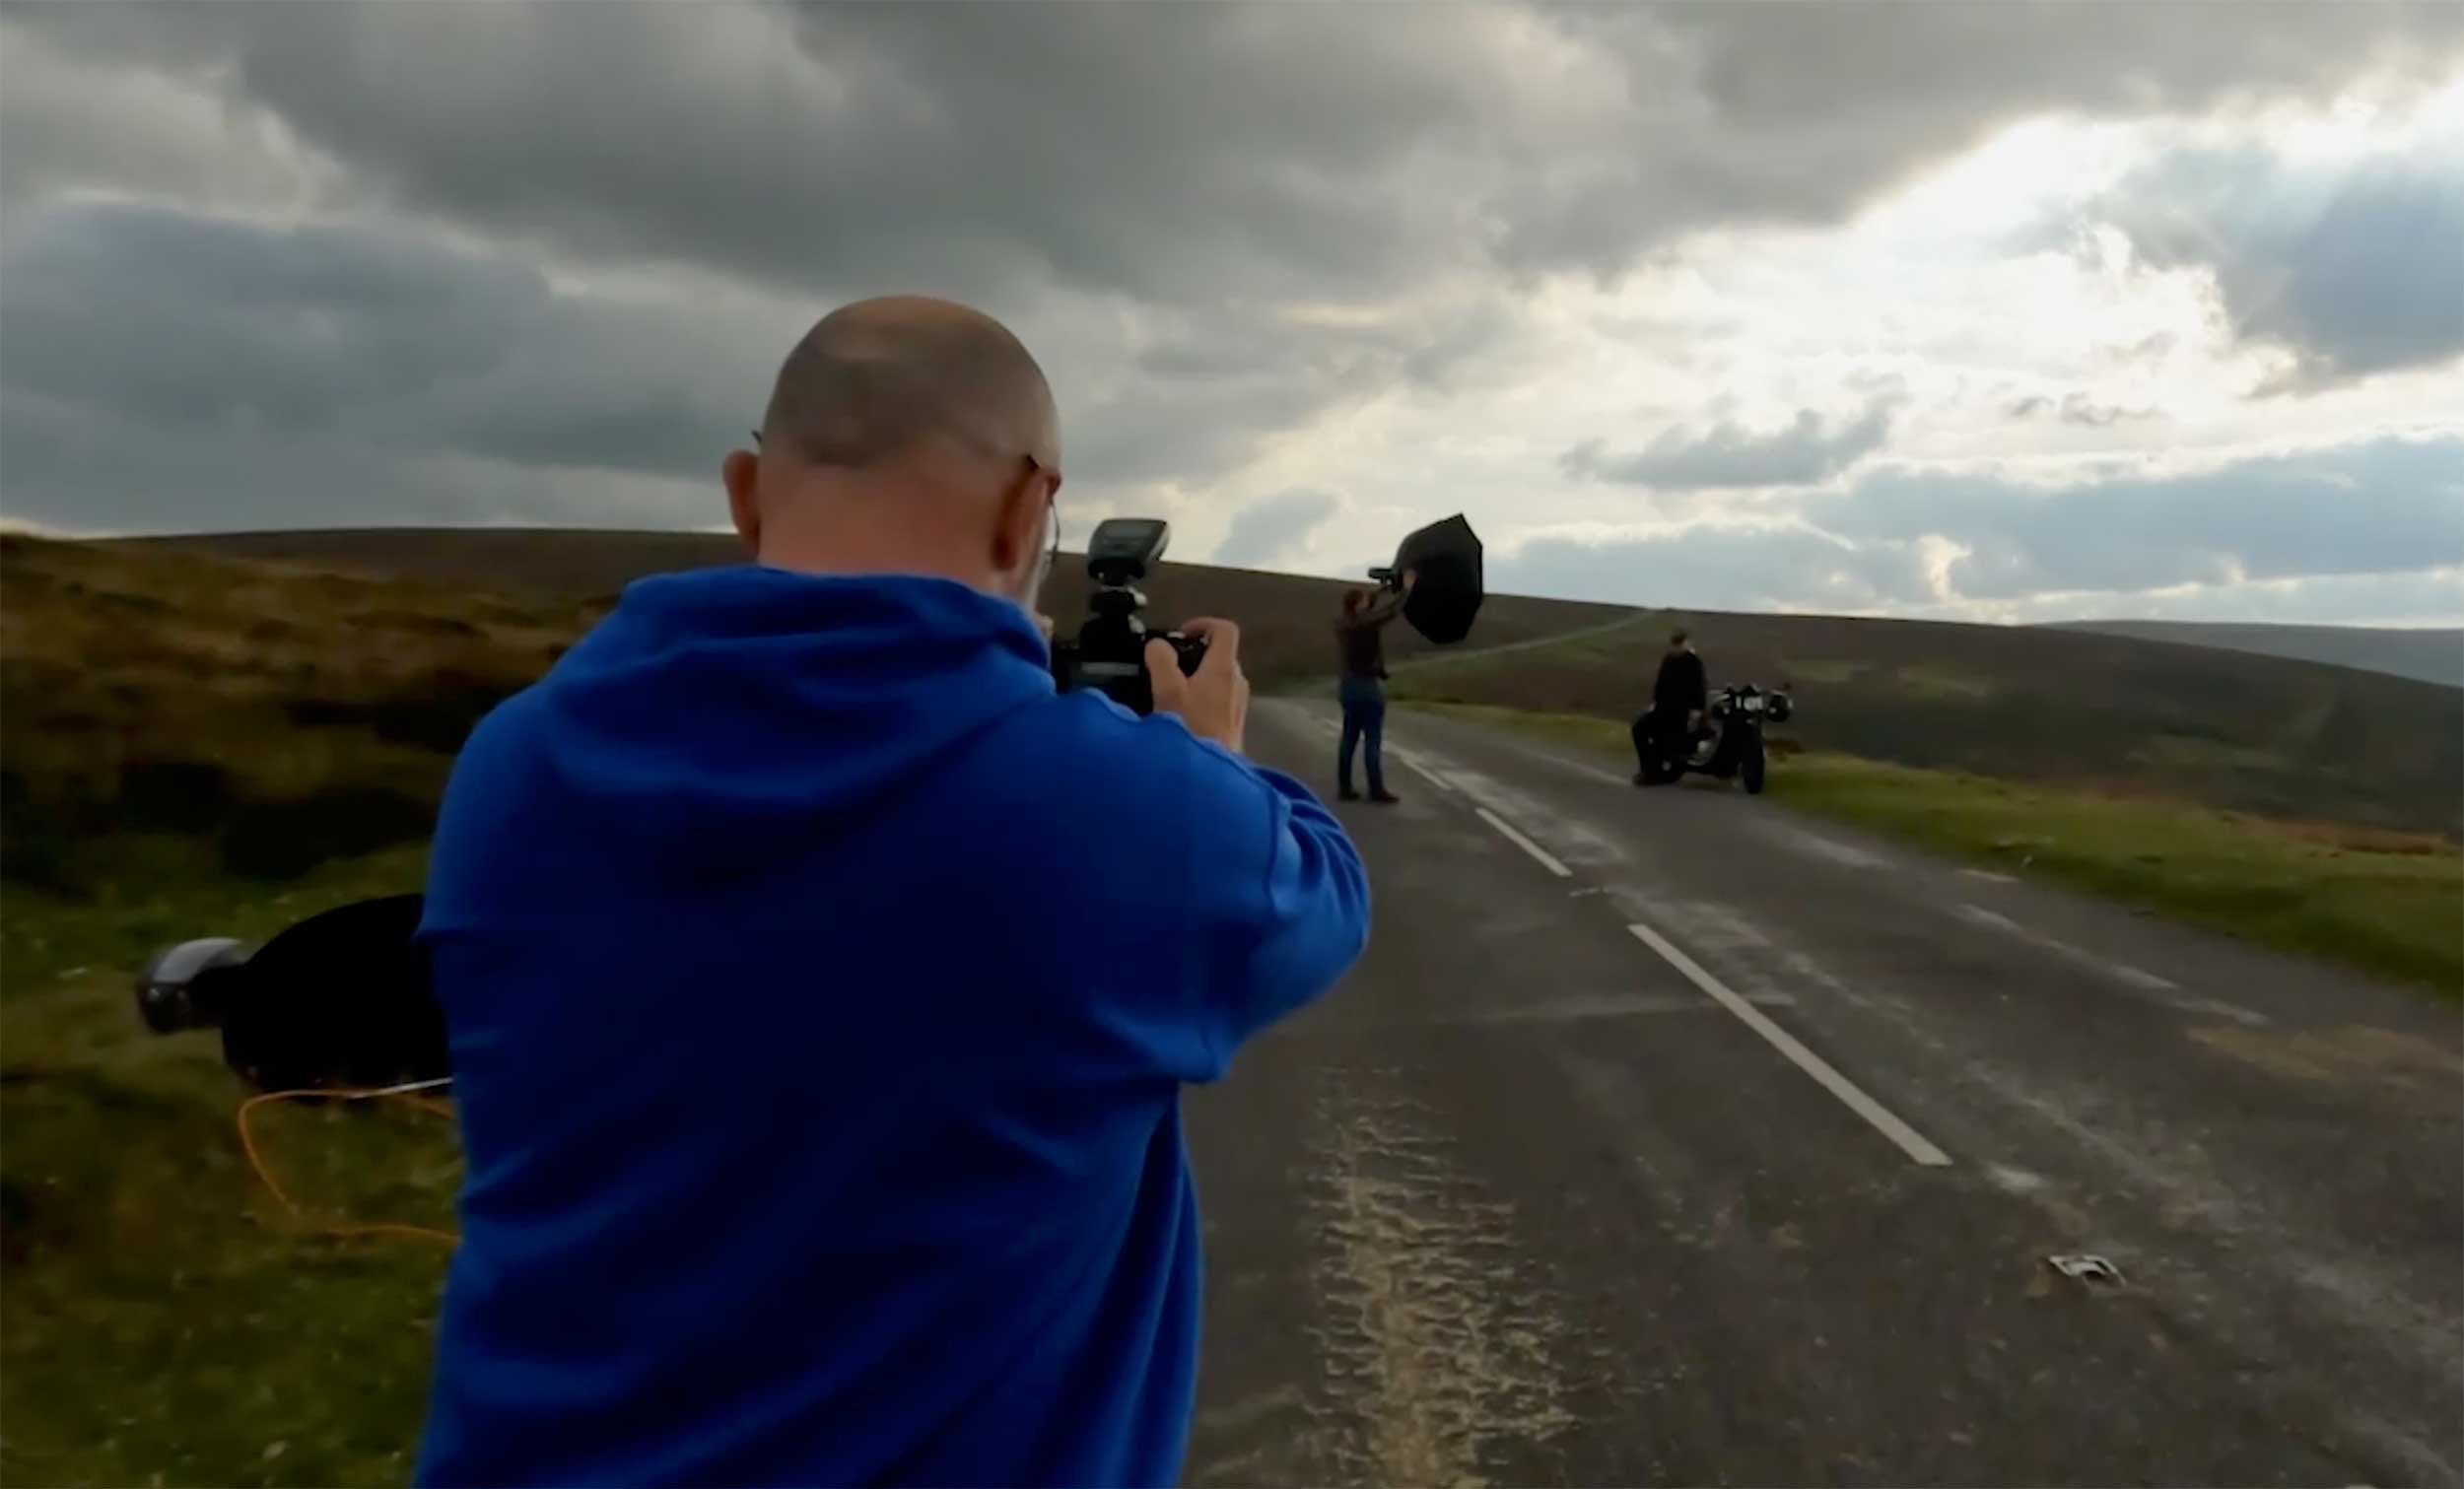
Now you'll notice in this behind the scenes pictures that I'm using a telephoto lens, this was a 70 to 200mm f/4 lens, and I used that to compress the background because a telephoto lens will bring those distant areas much closer to form part of the final picture.

You can see what I mean here with this photograph taken with my iPhone from when I was looking for a composition, how the distant road just seems so well, distant …

But compare that one to the final retouched image and hopefully you can see how the road in the distance has been brought closer by the using that telephoto lens …

LIGHTING

For the lighting side of things, this was actually quite a challenge because even though the location felt like it was in the middle of nowhere, the road we were on did end up being quite busy.

We had to go back in and out of the road with the lighting (thanks Jacob) , but also the clouds in the sky … one minute they were there, the next minute they were gone. They were moving incredibly fast.

This meant one moment we had nice soft diffuse lighting and the next minute we had quite harsh lighting.

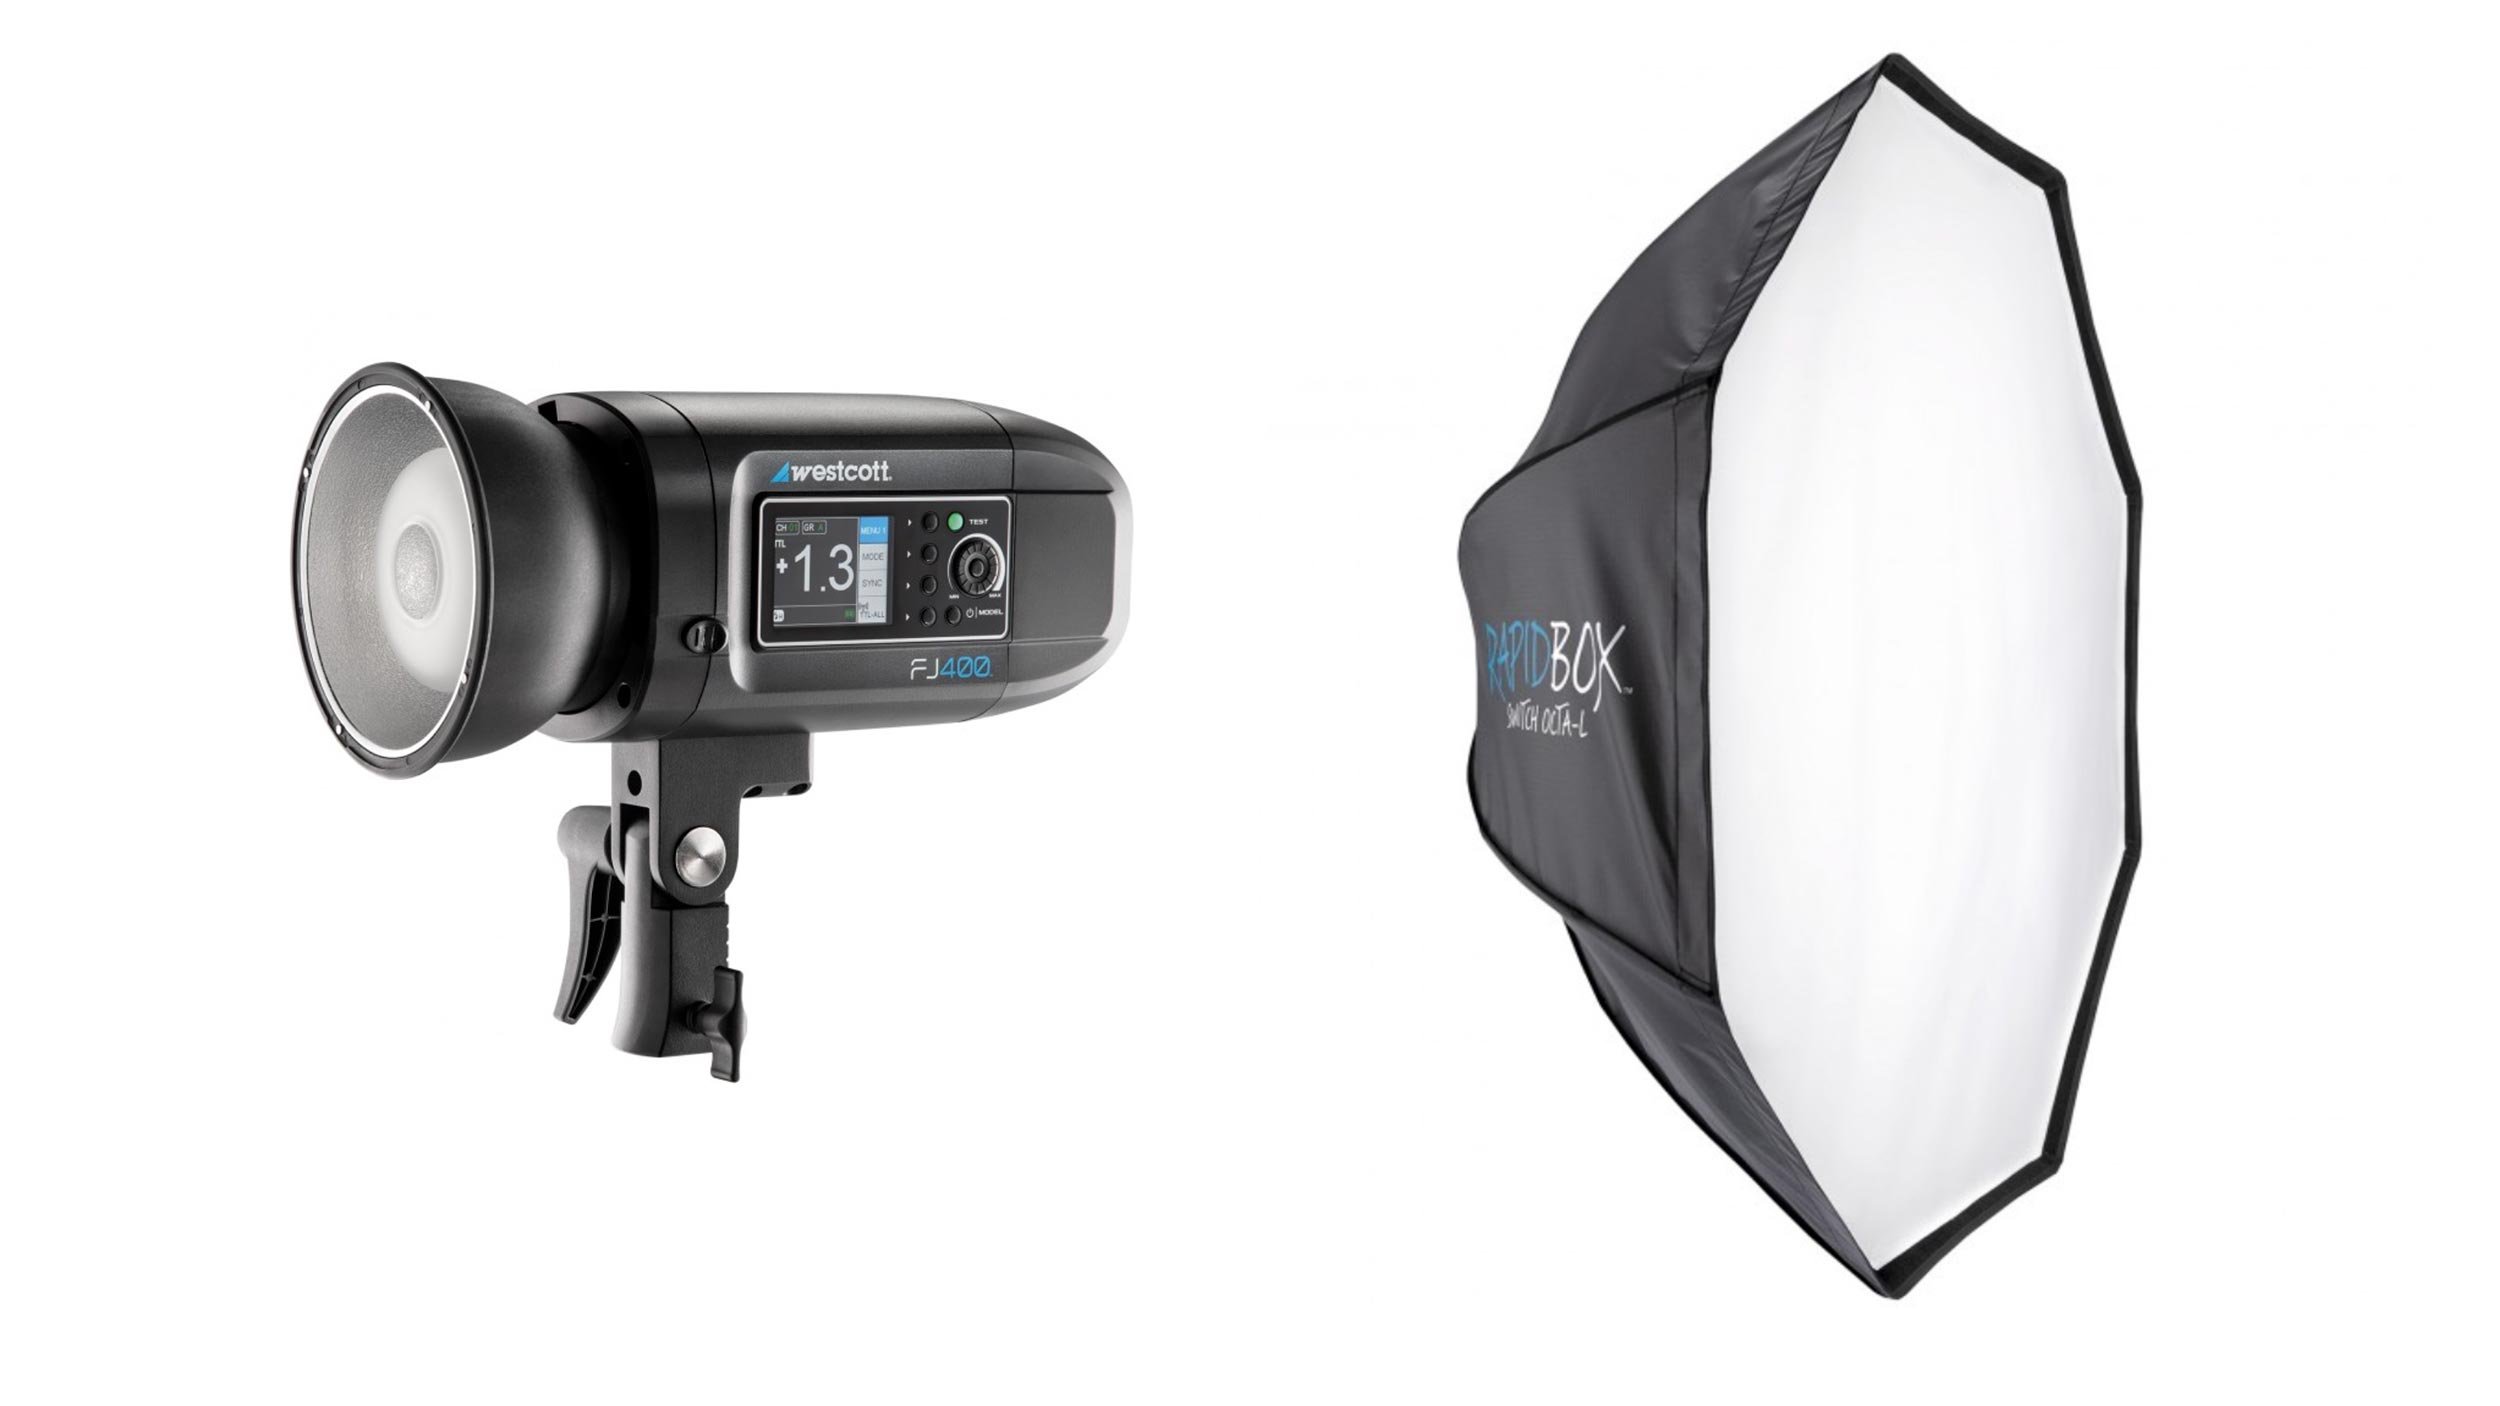
The light I used was a Wescott FJ 400; a 400ws light that has its own battery, and I used that with the Large Octa (Rapid Box Switch) which measures 48 inches; the combination of these made them very portable and easy to move around (thanks again Jacob)

Now because it was a bright day I needed as much power out of the light as possible, but I also needed a soft-ish kind of light to match the lighting in the scene. So to do that, I removed the outer diffusion material of the soft box, meaning there was only one layer of diffusion.

This gave just the right amount of balance between softness and hardness, but also didn't kill too much of the power out of the light (roughly one stop)

Because I was tethering to my laptop I was able to see, on a larger screen, what the images were looking like and check things such as sharpness, composition and so on.

This also really helped with checking out the detail in the sky and although in the out of camera shots there looks to be no detail, there was actually plenty of information there to bring back during post production. No sky replacement needed here 😃

This ultimately meant that I didn’t need to use High Speed Sync (HSS) which although great, because of how it works reduces the output of the flash / strobe so it needs to be in closer. Not using HSS meant I could have the light positioned further away out of the frame.

So there you go, a quick run through of what went on Behind the Scenes.

With the location and the conditions presenting a few challenges, keeping things simple definitely help but also the tethering came in very handy being able to not just see the images that were coming through and REALLY see what was there.

As always, if you have any questions just add them in the section below and I’ll make sure to respond.

Cheers,
Glyn

Back Home from The Photography & Video Show 2022

Back home after a wonderful few days in Birmingham at The Photography & Video Show…

So good to catch up with folks (including my cousin Richie) along with book signing with Rocky Nook, on stage for an episode of the He Shoots, He Draws Podcast with Dave and our friend Kaylee AND some GREAT meetings with companies / brands 😃

So good spending time with my best mate Dave Clayton too and just being ‘us’ 😃

👍 This BLUR FILTER looks FANTASTIC on PORTRAITS !!!

The Depth Blur Filter in Photoshop works great on landscape pictures BUT trying using it on a Portrait and WOW!

Totally brings it to life and gives the feel of the portrait coming forward of the screen / print! I've been experimenting with this lately and am loving the results! In this video I show you my 3 Step Process...

DRONE Photography: EVERYTHING I take with me for a SAFE + SUCCESSFUL Flight

I love my drones!

I used to use them purely for filming footage to go in my videos over on my YouTube Channel, but over the last few months I’ve been using them more and more for photography too.

The compositions that can be achieved are completely unique and without the ability to get in the air, would quite literally be out of reach.

With the Drone Laws that now exist, I’ve studied and taken exams to give me qualifications I need to fly what I have, where I want to fly it.

I know the law surrounding use of Drones. I have Insurance. I fly VERY responsibly.

But to do so, i’m addition to the checks I carry out before flying, what do I actually take with me for each flight to ensure (as best I can) that it’s both safe AND successful?

Well, here’s a short (one minute) video I put together to show what I take along…

And here’s a breakdown of everything …

  • VERY Bright LED Lights ( LINK )

  • Spare Prop Blades ( I always get the ‘Fly More’ Combo )

  • Lens Cloth

  • LiPo Safety Bags for Spare Batteries ( LINK )

  • DJI RC Pro Controller ( LINK )

  • Anemometer ( For Checking Windspeed ) ( LINK )

  • DJI ND Filters

  • Fire Blanket ( LINK )

  • Fire Extinguisher ( For LiPo Battery Fires )

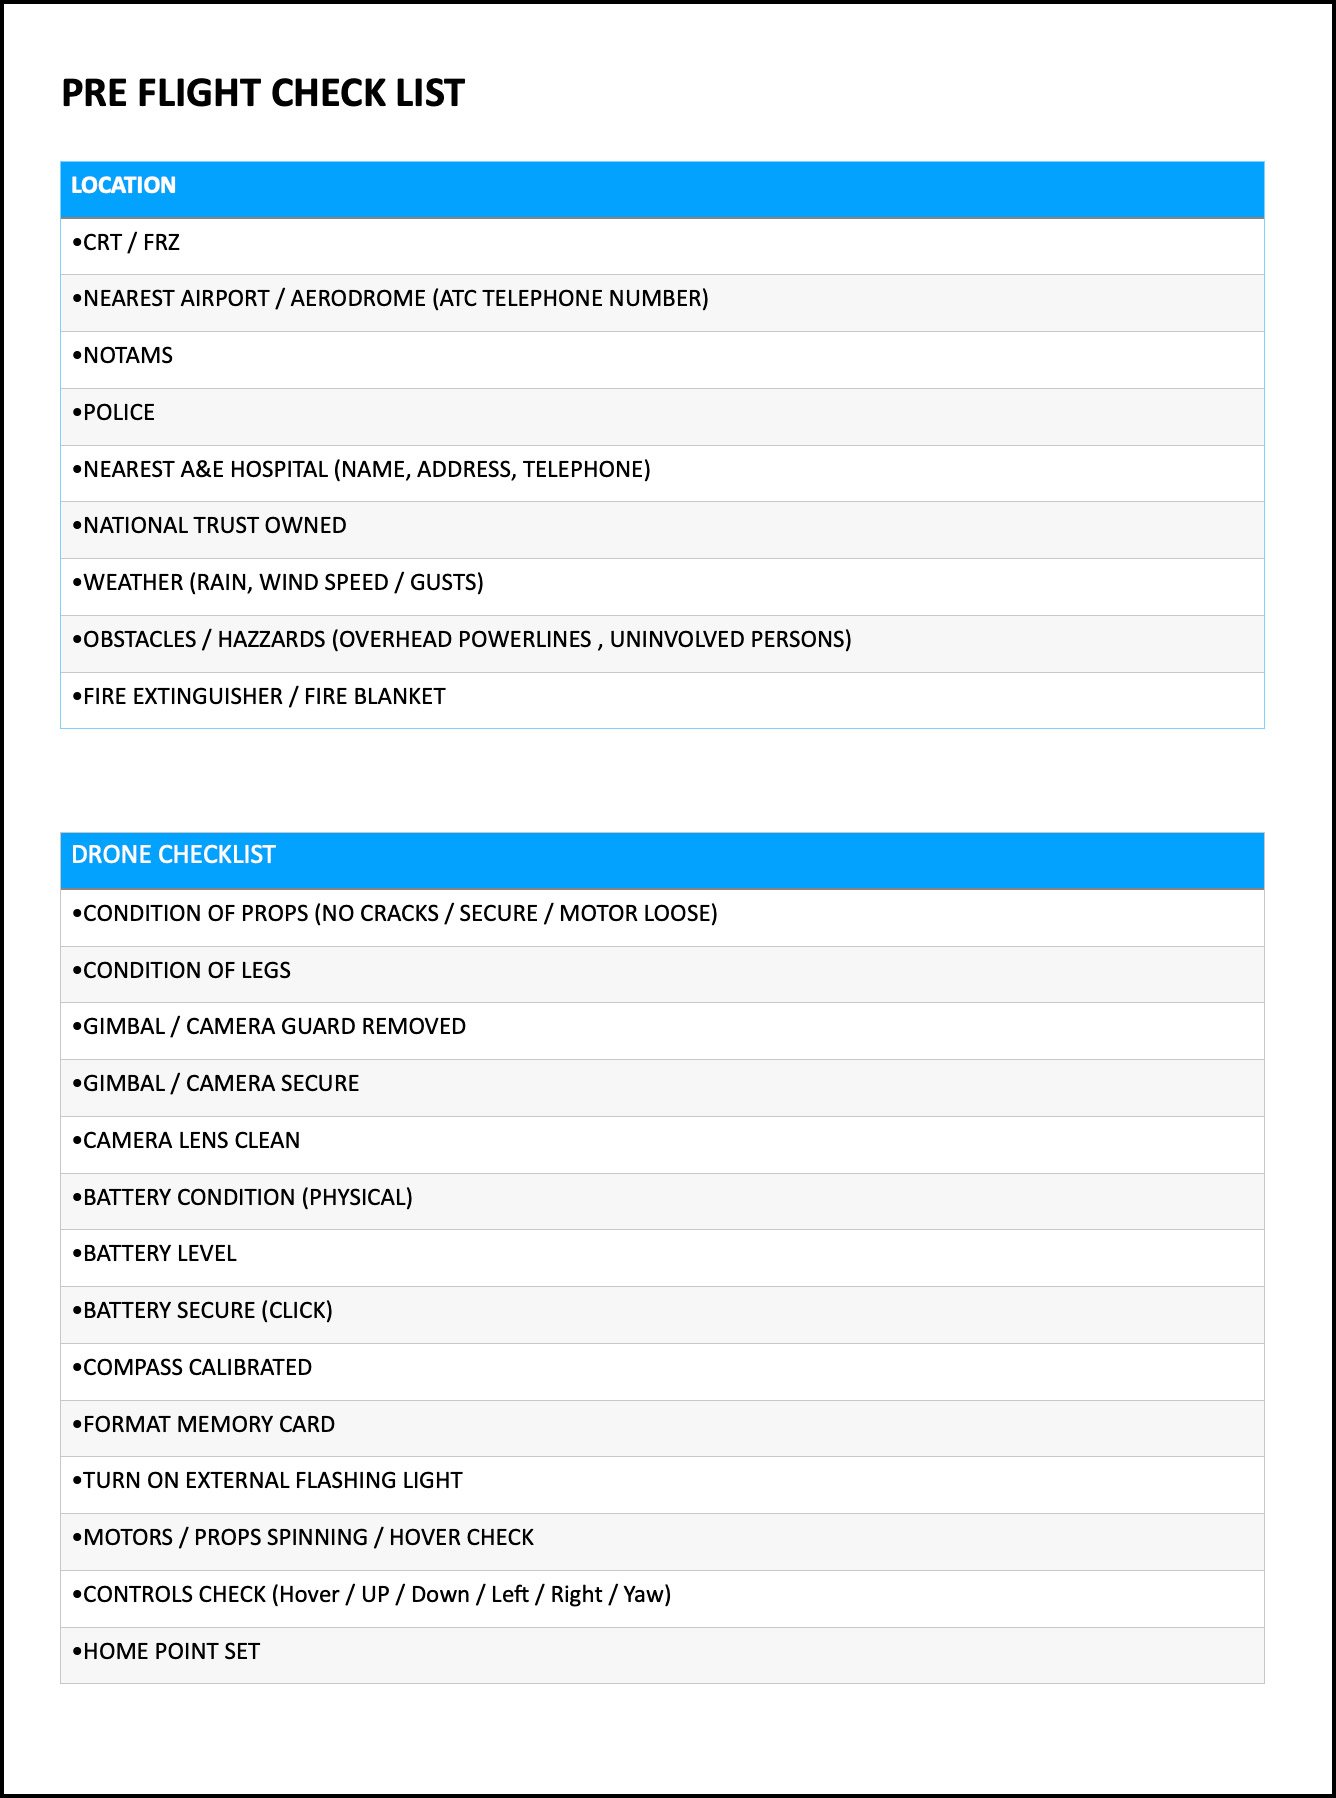
  • Pre Flight Checklist / Insurance and Drone Law ( I compiled this , Printed and Laminated it )

  • Take Off / Landing Pad ( LINK )

Here too, is the Pre Flight Checklist that I put together; the contents of which are not exhausitve, but the most obvious to check and be aware of …

If you have any questions, would like to see what I have on my pre-flight checklist, then let me know and I’ll share that here or even make it downloadable.

Safe flying,
Glyn

🎤 INCREDIBLE A.I. for EVERYONE that FIXES BAD Voice Recordings! Just Drag + Drop (Project Shasta)

Could this really mean the end of poor quality voice recordings?

Artificial Intelligence that enhances voice recordings with poor sound, background noise, echo and more by just dragging a dropping the audio file!

No technical expertise or input needed and no extra kit; this is the claim from Adobe Labs with Project Shasta.

But how good is it?

In this video you'll hear the before and after of my own real world recordings and it's impressive...VERY impressive!

Restoring a World War 1 Military Portrait using Photoshop

So yesterday I took some time out from recording a new video to work on restoring this Military Portrait for my Uncle Jeff.

Not something I usually do, in fact I think I've done one in the past, but it feels great to be able to be help like this as this is a portrait of a family member that my uncle is researching for his next book…

I guess this took about 3 hours to do, initially jumping in using the Photo Restoration Neural Filter in the current Photoshop Beta.

This certainly didn’t get the job done, but it did give me a good starting point…

As the original photograph was oval in shape, for my Uncle’s research / book I opted to make it a traditional portrait crop which meant adding in a completely new background which was reminiscent of the time it would have originally been taken. This also had to be done due to the small amount of background being visible and clean of damage.

I shared the result across social media yesterday evening and the response has been great, so I’ll look to add a video onto my YouTube Channel going over some of the key retouching points / techniques in the very near future.

GOODBYE PHOTOSHOP? This HIDDEN BUTTON in Lightroom CHANGES EVERYTHING!

The new Masking Section added into Lightroom was a BIG DEAL! But...did you know there's a Hidden Button that makes it EVEN BETTER by giving way more control? In this video I show ow we can use this hidden function to realistically add drama to skies, add Special Effects, light a Macro Shot AND add Highlights to a Portrait!